|
The first thing we are going to do is open up the Server Manager, it is located at the Taskbar. From here we can click on "Add roles and features". 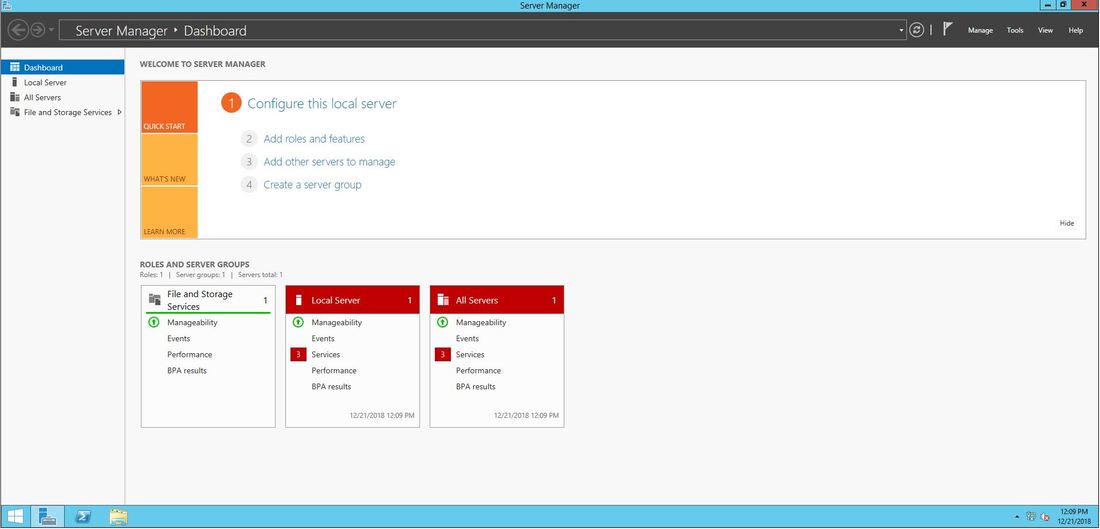 Next, the Installation Wizard will appear on the screen. We want to select "Role-based or feature-based installation" 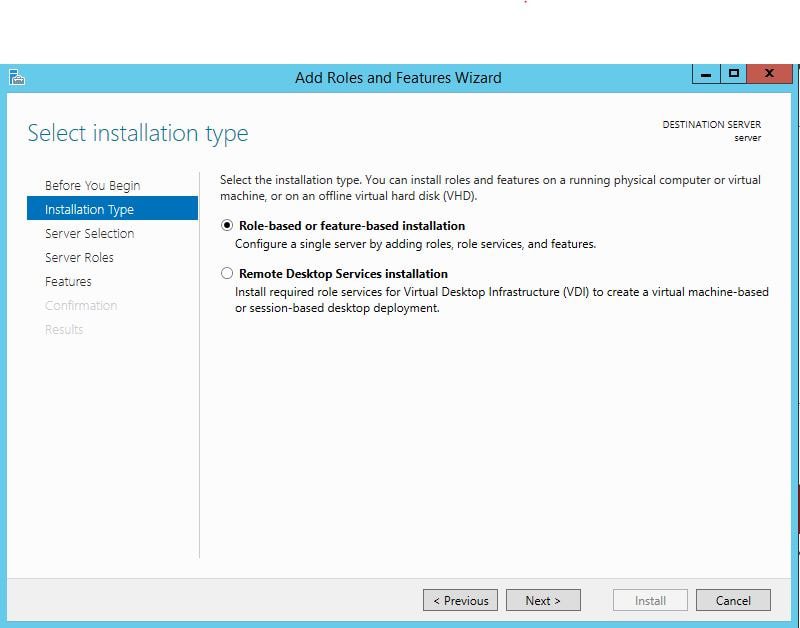 After selecting next, we will select a server to install the roles on, since this is the only server, this is the only one we can select. 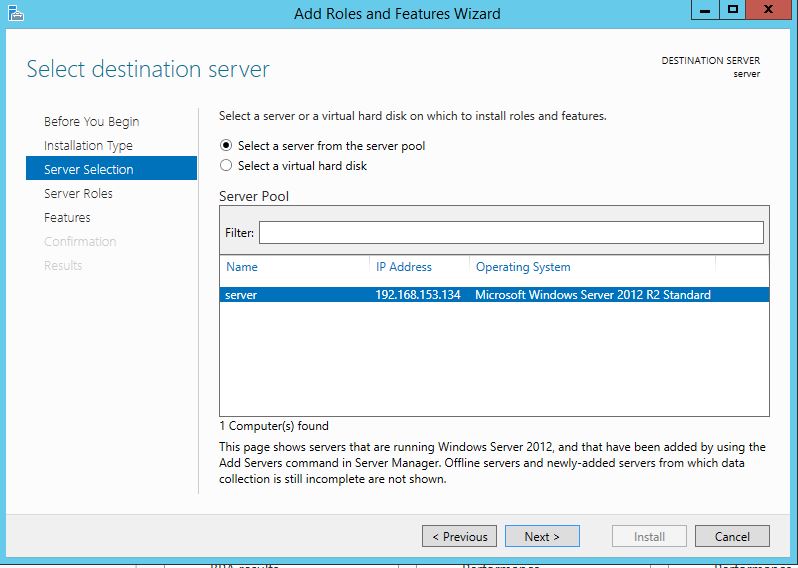 After pressing next, we arrive at the Server Roles, here please select "Active Directory Domain Services." It will then display a popup window with a list of services that also must be installed as well, then click "Add Features". 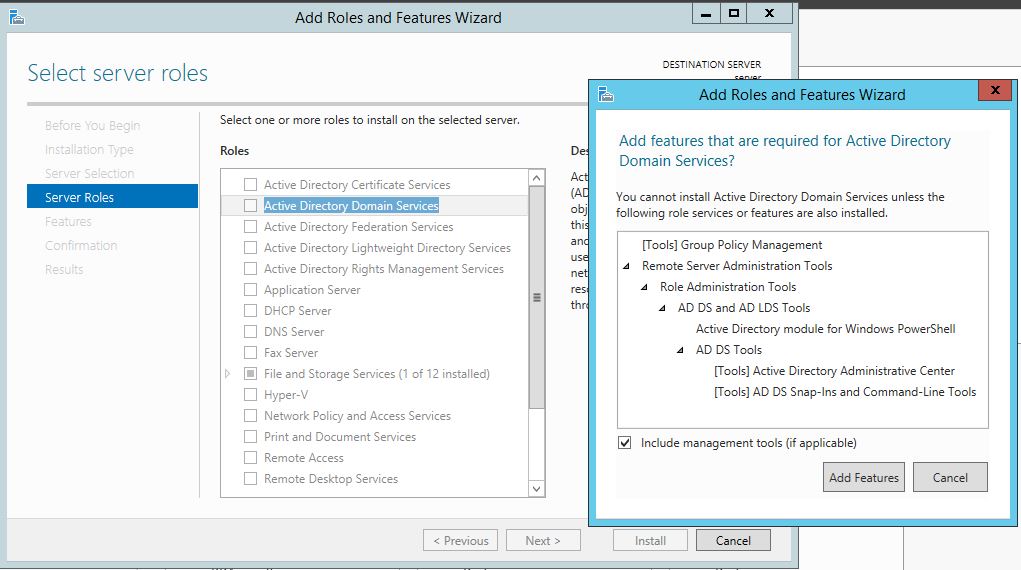 After pressing next we can then select the features we want, it is advised that you add the SNMP Service or any other service needed. 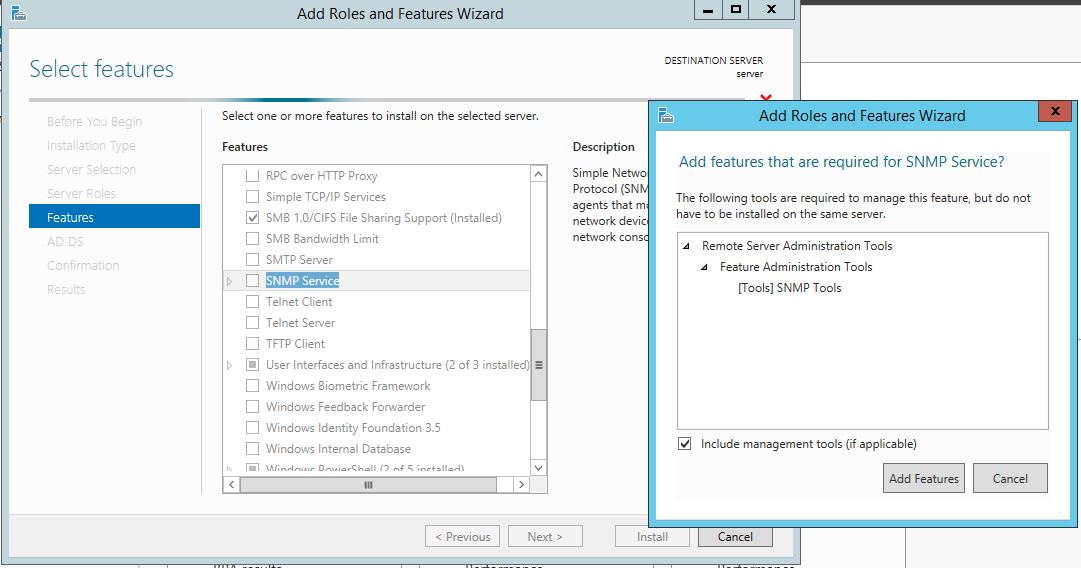 From here, it is going to ask for a confirmation of what is to be installed. 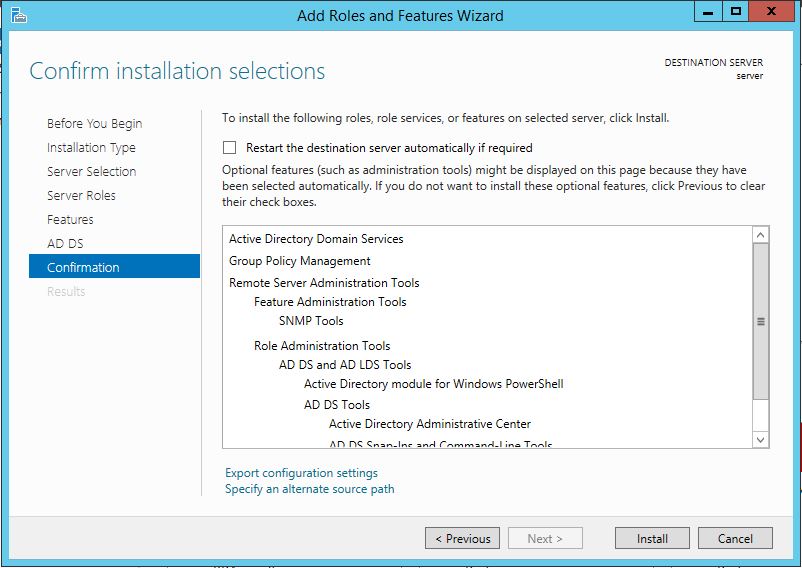 After we press Install, we then have to start the remote registry service. Click on the Start, navigate to the Control Panel, then Administrative Tools, Services, then right-click on Remote Registry, click on Properties, and select Automatic on the Startup. After, select Start on the Service Status. 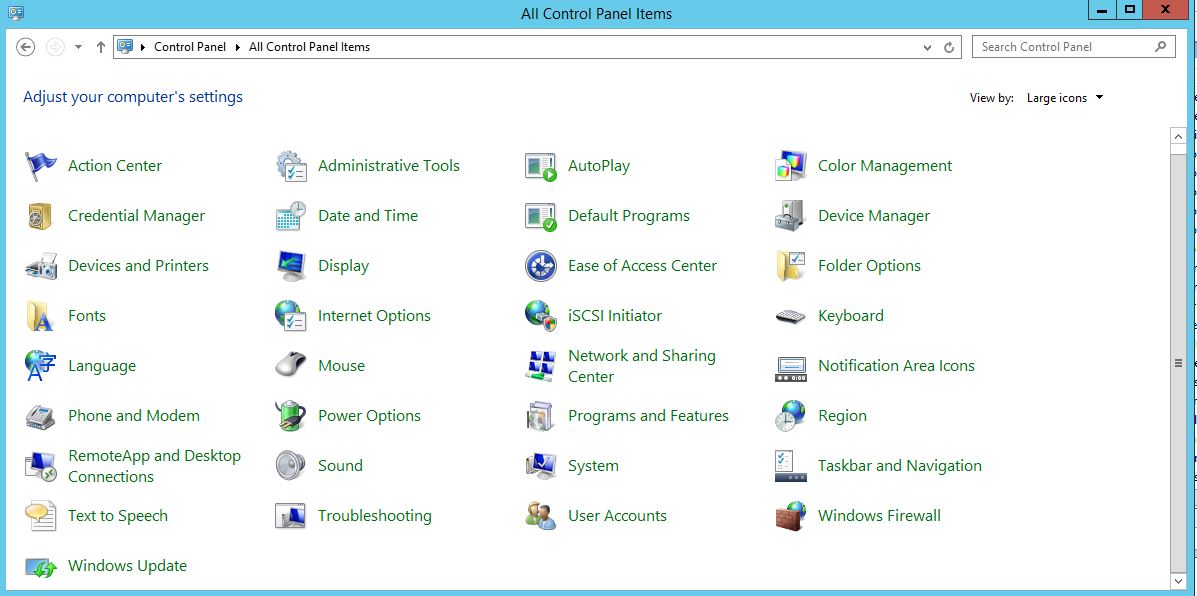 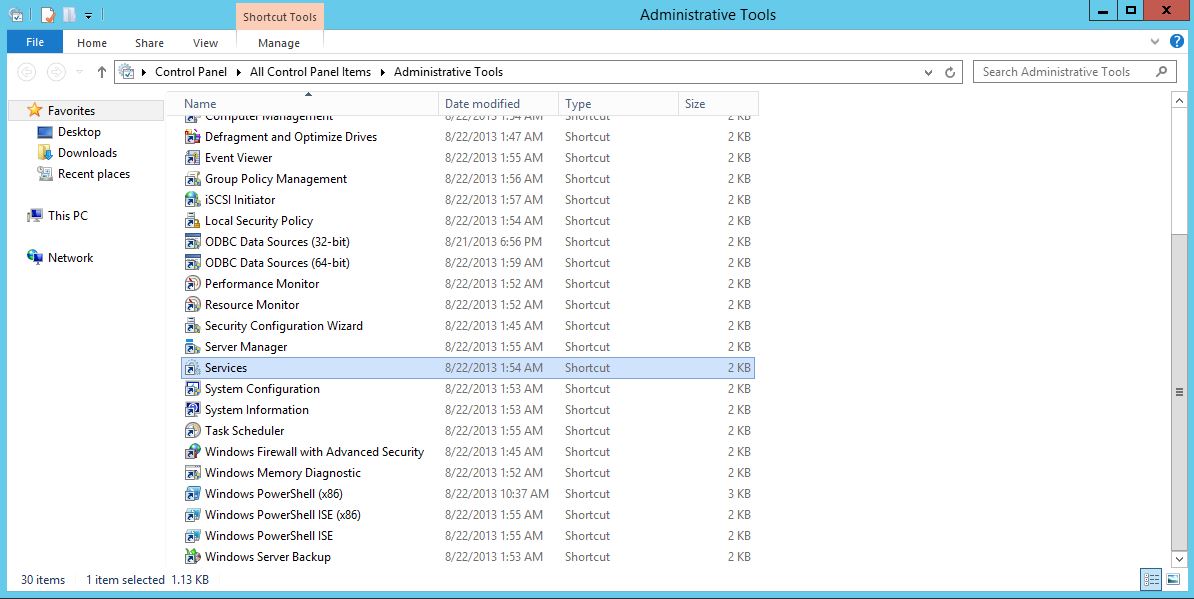 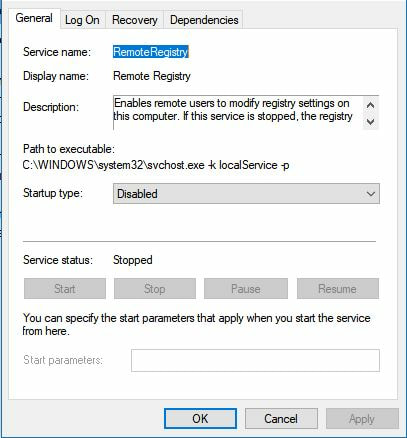 After that, we can navigate back to the Server Manager tab, click on the flag with the yellow caution sign and click on "Promote this server to a domain controller." 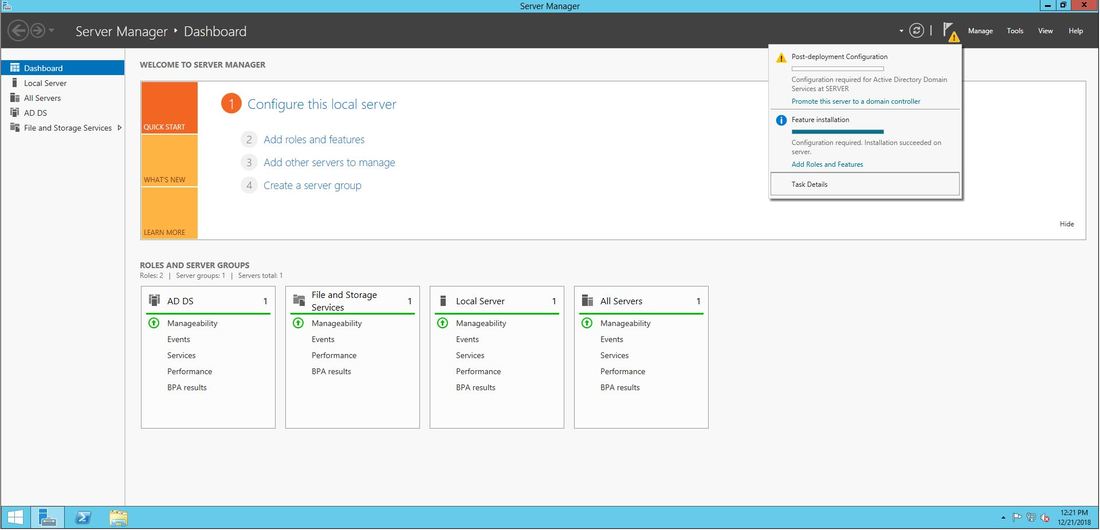 Next, a Deployment Configuration Wizard will appear and you can select the deployment operation "Add a new forest" and specify the Root domain name. After please press next. 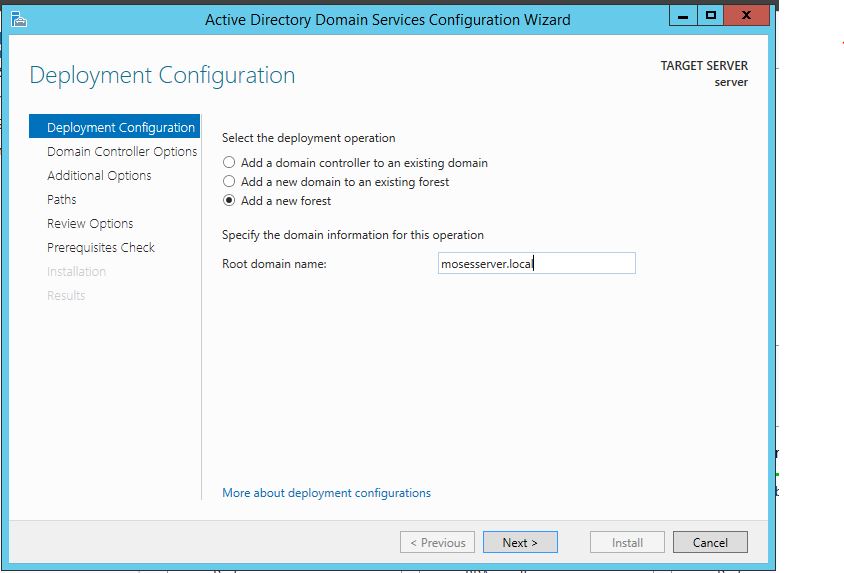 Next we can specify the NetBIOS domain name. 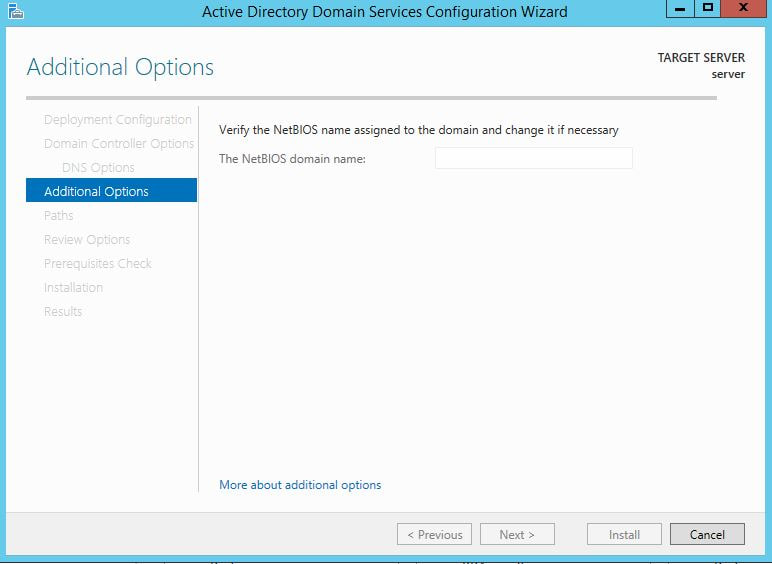 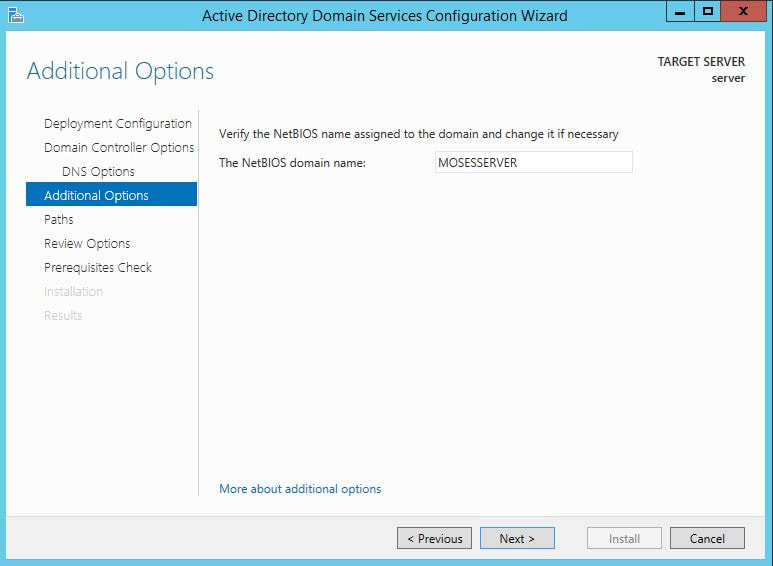 Next we can change the default location of the Database, Log files, and SYSVOL folders if needed. 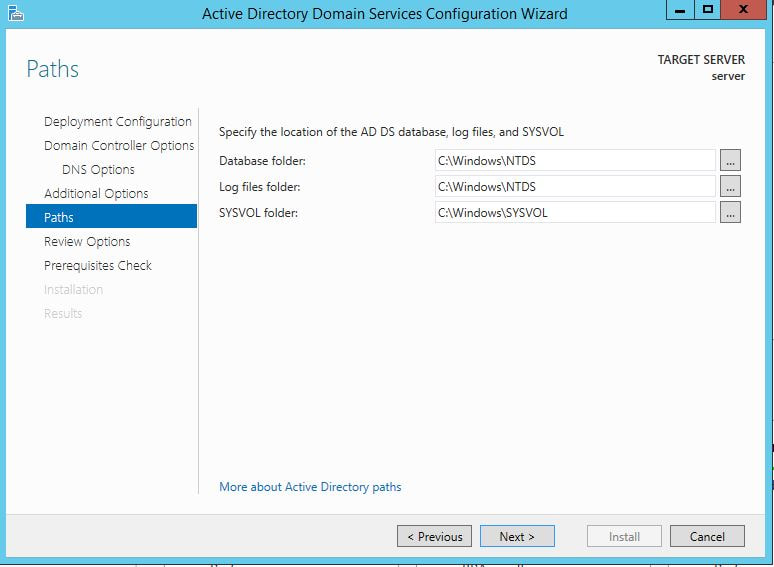 Finally review all of the prerequisites checks and verify that all are functioning properly. 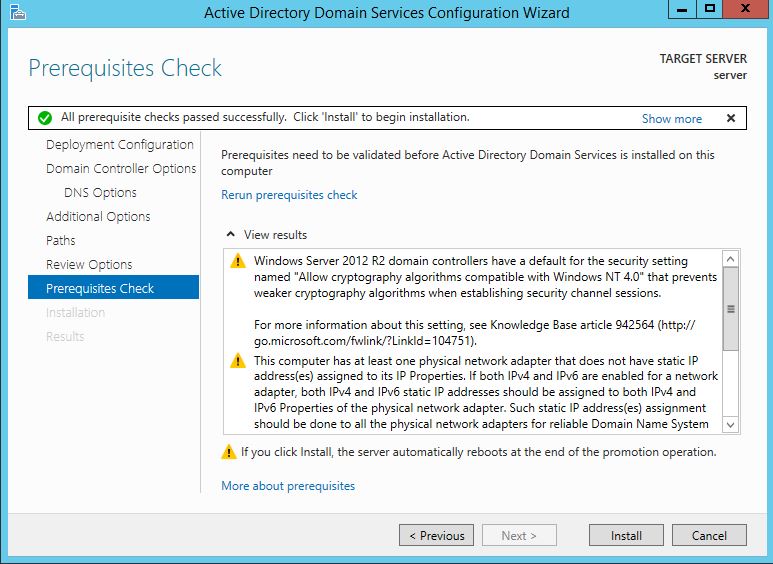 Please keep in mind that a DNS service must be present on the network, if it isn't than the server will need to establish its own DNS server. After clicking install and no other errors are received, then you have successfully installed Active Directory on Windows Server!
6 Comments
Now, this is of course only works if you have physical access to the computer and a re-installation or repair disc of preferably Windows 10. First you must create a bootable USB of the Windows ISO, which can be done here: Rufus Download After the repair bootable has been created, boot from the USB and arrive at the Windows set up screen. From here, you will press the shift+F10 to open up the command prompt. This prompt has administrative privileges and will allow you to access the files in the already installed Windows OS.
Note: Please make sure that UEFI secure boot is disabled, if needed please change the boot sequence. Now from here, you have to find the drive letter of the installed OS, normally it remains the C: drive, but every once in a while this changes. You can use the dir command to search through each letter and see if the directory displays. However, you can also use the diskpart utility with the command list volume to get a sense of the volumes and the letters attached. X:\Sources> dir a: or X:\Sources>diskpart DISKPART> list volume After you find the operating system, you then want to copy over the sticky keys file as a backup, then replace the sticky keys file in System32 with the command prompt, this will allow you to access the command prompt from the login screen. This can be done with the two following commands: X:\Sources > copy c:\windows\system32\sethc.exe c:\ X:\Sources > copy /y c:\windows\system32\cmd.exe c:\windows\system32\sethc.exe From here, you can exit out of the command prompt and Windows Setup to cancel the installation. Now, in Windows 10 version 1803, a patch was released that removed accessing sticky keys from the login screen, however if you press "Forgot Password" and press the shift key five times, the sticky keys prompt will display, but because we replaced sticky keys with the command prompt, we should now be greeted with an Administrator privileged command prompt. From here you can add an account as an administrator or change the password of an existing one. Below are the commands to both change the password and create an administrator. To create an administrator account: C:\Windows\System32 > net user [ new username] [new password] C:\Windows\System32 > net localgroup administrators /add [new username] To change the password of an existing account: C:\Windows\System32 > net user [old username] [new password] Hopefully the process was successful. After logging in, we now have to undo what we just did. The best way to revert the changes is through the re-installation USB. After you have booted the USB and gotten the command prompt again, all of the changes can be undone through the following two commands: X:\Sources > copy /y c:\sethc.exe c:\windows\system32\sethc.exe X:\Sources > del c:\sethc.exe Success! Hopefully everything has worked properly, now I must add that sometimes this method does not work because sticky keys has been disabled on the installed operating system, if that is the case then this process will fail. |
Hope you have enjoyed your stay! Come back again!
This site is under constant (slow) construction. Thank you for your patience.
Created by Moses J. Arocha ©
This site is under constant (slow) construction. Thank you for your patience.
Created by Moses J. Arocha ©